
Keeping your RV water hose from freezing is essential for safe winter camping and avoiding costly damage. With the right insulation, heating tools, and smart habits, you can protect your water supply even in subzero temperatures.
In This Article
- 1 Key Takeaways
- 2 📑 Table of Contents
- 3 Why Keeping Your RV Water Hose From Freezing Matters
- 4 Understanding the Risks of a Frozen RV Water Hose
- 5 Top Methods to Prevent Your RV Water Hose from Freezing
- 6 Winter RV Water System Maintenance Tips
- 7 Smart Habits for Cold-Weather RVing
- 8 What to Do If Your Hose Freezes
- 9 Conclusion
- 10 Frequently Asked Questions
- 10.1 Can I use a regular garden hose in cold weather?
- 10.2 How cold does it have to be for an RV water hose to freeze?
- 10.3 Can I leave my RV water hose connected overnight in winter?
- 10.4 Do heated water hoses use a lot of electricity?
- 10.5 Can I use heat tape on my RV water hose?
- 10.6 What should I do if my RV’s internal pipes freeze?
Key Takeaways
- Insulate your hose properly: Use foam pipe insulation or heated hose covers to trap heat and prevent freezing.
- Use a heated water hose: Invest in a self-regulating heated RV water hose designed for cold climates.
- Drain the hose when not in use: Always empty your water hose before storing or leaving your RV unattended in cold weather.
- Keep the hose elevated and off the ground: Cold ground temperatures can freeze water faster—use a hose ramp or support.
- Maintain a trickle flow: A slow drip from your faucet can prevent water from sitting still and freezing.
- Choose sheltered hookup locations: Park near buildings or use windbreaks to shield your water connection from harsh winds.
- Monitor weather and act early: Check forecasts and take preventive steps before temperatures drop below freezing.
📑 Table of Contents
Why Keeping Your RV Water Hose From Freezing Matters
Winter camping in an RV can be a magical experience—snow-covered landscapes, cozy campfires, and the quiet beauty of nature in hibernation. But with that beauty comes a serious challenge: freezing temperatures. One of the most common and frustrating problems RVers face in cold weather is a frozen water hose. When water inside your RV’s fresh water hose freezes, it can expand, crack the hose, damage your RV’s plumbing, or even burst your water lines. That’s not just inconvenient—it can lead to expensive repairs and leave you without clean water when you need it most.
Imagine waking up on a crisp winter morning, eager to brew your first cup of coffee, only to find your water hose is a solid block of ice. No water pressure, no flow, and possibly a leak waiting to happen. This scenario is more common than you might think, especially for full-time RVers or those who enjoy off-season adventures. But the good news? With a few smart strategies, you can keep your RV water hose from freezing and enjoy uninterrupted water access all winter long.
The key is understanding how freezing occurs and taking proactive steps to prevent it. Water freezes at 32°F (0°C), but wind chill, ground temperature, and exposure can make it happen even faster. Your hose is especially vulnerable because it’s exposed to the elements, often lying on cold ground or stretched across icy driveways. But don’t worry—this guide will walk you through practical, proven methods to protect your water hose and keep your RV adventure running smoothly, no matter how low the thermometer drops.
Understanding the Risks of a Frozen RV Water Hose
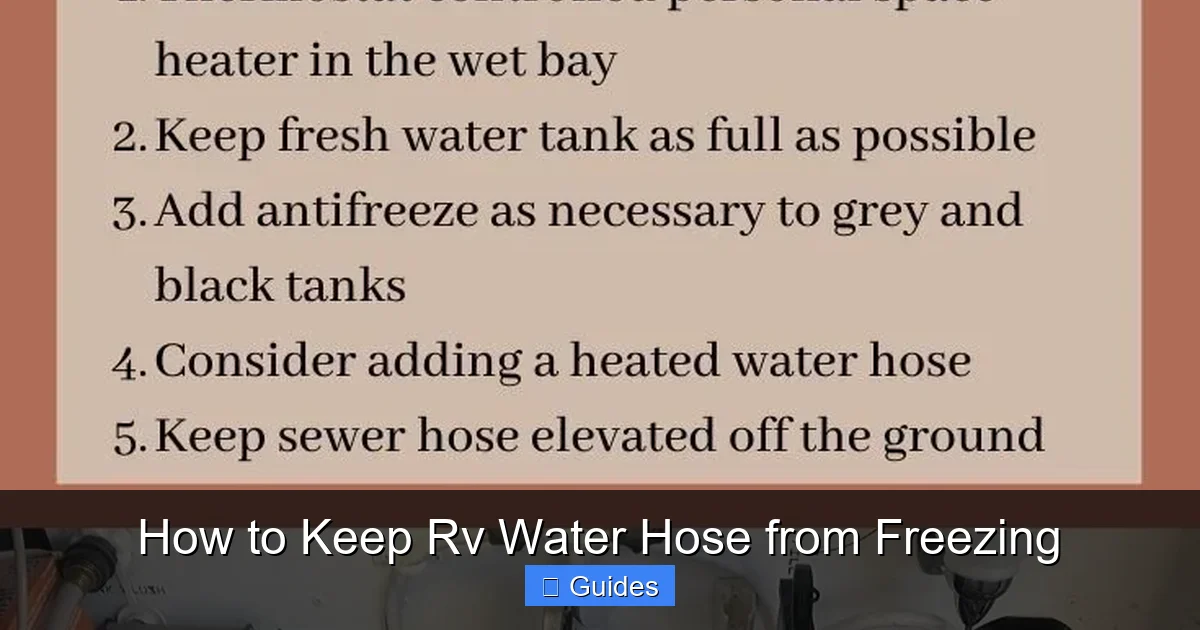
Visual guide about How to Keep Rv Water Hose from Freezing
Image source: images.squarespace-cdn.com
Before diving into solutions, it’s important to understand exactly why a frozen water hose is such a big deal. When water freezes, it expands by about 9%. This expansion creates immense pressure inside the hose and your RV’s plumbing system. Even a small section of ice can cause cracks, leaks, or complete ruptures in your water lines. Once that happens, you’re not just dealing with a frozen hose—you could be facing water damage, mold, or costly repairs.
But the risks don’t stop there. A frozen hose can also damage your RV’s water pump. If the pump tries to push water through a blocked line, it can overheat or burn out. And if you’re connected to a campground’s water supply, a burst hose could flood the area or damage the pedestal. In extreme cases, frozen water can even affect your RV’s water heater or cause issues with your plumbing valves.
Another often-overlooked risk is the inconvenience. Without water, you can’t shower, cook, flush the toilet, or wash dishes. For full-time RVers, this can disrupt daily life. For weekend campers, it can ruin a trip. And if you’re in a remote location, getting help or replacement parts might not be easy.
The good news is that most of these problems are preventable. By understanding the science behind freezing and taking a few simple precautions, you can avoid the headache of a frozen hose altogether. The key is to act before the temperature drops—don’t wait until you see ice forming. Prevention is always easier (and cheaper) than repair.
Top Methods to Prevent Your RV Water Hose from Freezing
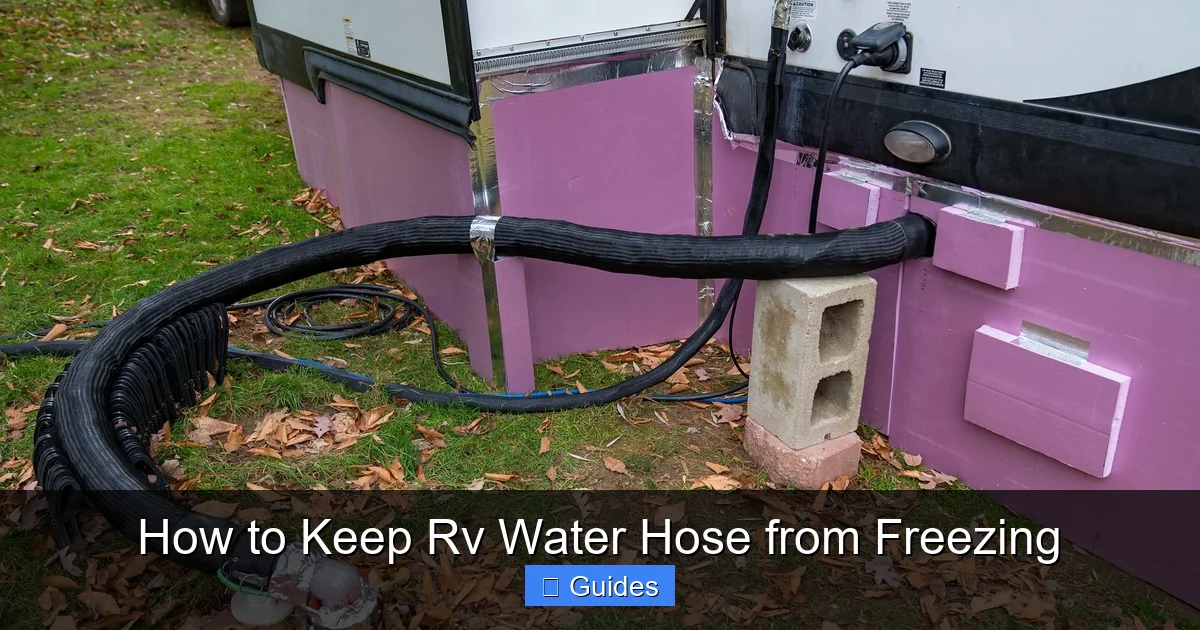
Visual guide about How to Keep Rv Water Hose from Freezing
Image source: adventurousway.com
Now that you know why it’s so important to protect your water hose, let’s talk about how to do it. There are several effective methods, and the best approach often involves combining a few of them. Here are the top strategies used by experienced RVers to keep their hoses ice-free all winter.
Use a Heated RV Water Hose
One of the most reliable ways to prevent freezing is to use a heated water hose. These hoses are specifically designed for cold-weather RVing and come with built-in heating elements that keep the water inside from freezing. Unlike regular hoses, heated hoses are made with durable, freeze-resistant materials and often feature self-regulating technology that adjusts the heat output based on the outside temperature.
For example, brands like Camco and Valterra offer heated hoses that plug into a standard 120V outlet. They’re available in various lengths (25, 50, and even 75 feet) and are compatible with most RV water systems. Some models even have LED indicators to show when the heating element is active. While they cost more than a standard hose—typically between $80 and $150—they’re a worthwhile investment if you plan to camp in freezing conditions regularly.
One tip: Always check the hose’s temperature rating before buying. Some are only rated down to 20°F (-6°C), while others can handle -20°F (-29°C) or lower. Choose one that matches your typical winter camping climate.
Insulate Your Existing Hose
If you don’t want to buy a heated hose, insulating your current one is a great alternative. Foam pipe insulation is inexpensive, easy to install, and highly effective. You can find it at most hardware stores in 6-foot lengths with a slit down the side, so you can wrap it around your hose without disconnecting it.
To install, simply slide the foam insulation over the hose, making sure it covers the entire length. Use duct tape or zip ties to secure the seams and prevent cold air from getting in. For extra protection, wrap the insulated hose in a reflective emergency blanket or a layer of bubble wrap. This adds an extra barrier against wind and radiant heat loss.
Another option is to use a heated hose cover, which is a sleeve with built-in heating wires. These covers fit over your existing hose and plug into an outlet, providing consistent warmth without replacing the entire hose. They’re a good middle ground between a standard hose and a full heated model.
Elevate the Hose Off the Ground
Cold ground is one of the biggest culprits when it comes to frozen hoses. Even if the air temperature is above freezing, the ground can be much colder—especially on concrete, asphalt, or frozen soil. When your hose lies directly on the ground, it loses heat rapidly and becomes vulnerable to freezing.
To prevent this, always elevate your hose using a hose ramp, wooden board, or even a piece of plywood. A hose ramp is a plastic or rubber channel that lifts the hose off the ground and protects it from abrasion. It also helps prevent kinks and makes it easier to disconnect.
If you don’t have a ramp, you can create a simple support using PVC pipes or foam blocks. Just make sure the hose isn’t sagging or touching the cold surface. The goal is to keep it as insulated from the ground as possible.
Use a Hose Buddy or Heated Hose Adapter
A Hose Buddy is a clever device that attaches to your RV’s water inlet and keeps the connection point warm. It uses a small heating element to prevent ice from forming where the hose connects to your RV. This is especially useful because the connection is often exposed and prone to freezing.
Similarly, heated hose adapters are inline devices that plug into your water line and provide targeted heat to the most vulnerable sections. They’re compact, energy-efficient, and can be used with any standard hose. Some models even have thermostats that turn on automatically when temperatures drop.
These tools are great for RVers who want extra protection without replacing their entire hose setup. They’re also useful for short-term winter trips when you don’t want to invest in a full heated hose.
Maintain a Trickle Flow
One of the simplest and most effective tricks is to keep a small trickle of water flowing through your hose. Moving water is much less likely to freeze than stagnant water. By leaving your faucet open just enough to produce a steady drip, you can prevent ice from forming inside the hose.
This method works best when you’re actively using your RV and can monitor the flow. It’s not ideal for long-term storage or when you’re away from the vehicle, but it’s a great option for overnight stays in cold weather.
Just be mindful of water waste and local regulations. Some campgrounds restrict continuous water flow, so check the rules before using this method. Also, make sure your gray water tank can handle the extra flow.
Winter RV Water System Maintenance Tips
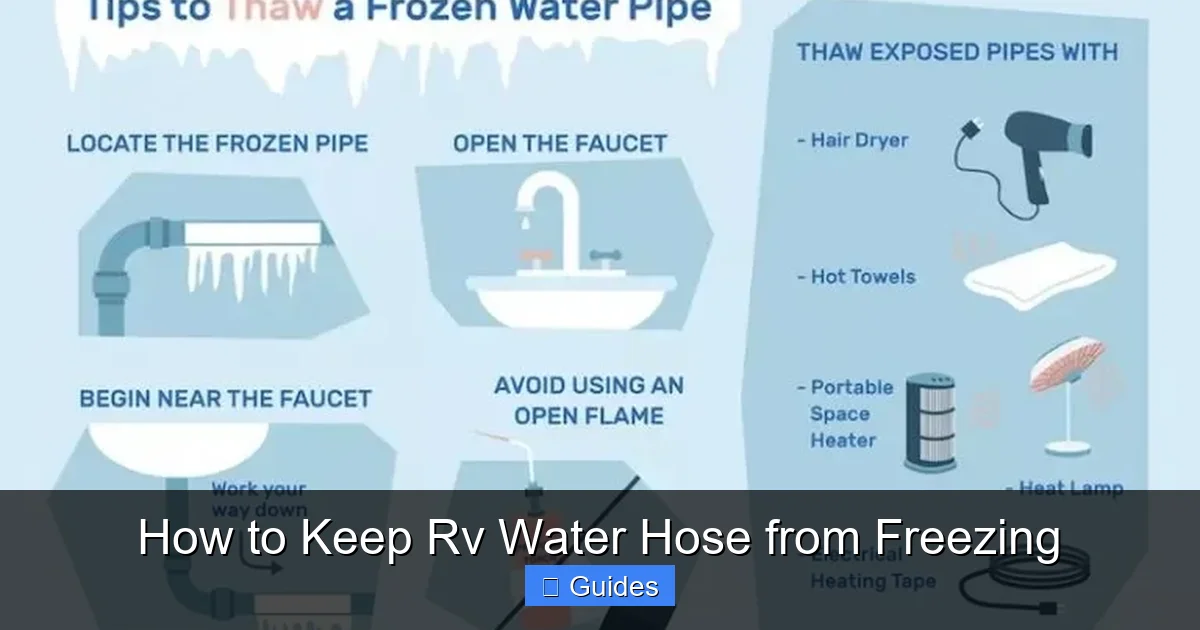
Visual guide about How to Keep Rv Water Hose from Freezing
Image source: i2.wp.com
Preventing a frozen hose is just one part of winter RV water safety. To keep your entire system running smoothly, you’ll need to maintain your RV’s plumbing, water heater, and tanks. Here are some essential maintenance tips for cold-weather camping.
Drain and Blow Out the Water Lines
If you’re storing your RV for the winter or traveling through extremely cold areas, it’s crucial to drain all water from your system. This includes the fresh water tank, water heater, and all plumbing lines. Most RVs have a built-in winterization kit or drain valves for this purpose.
To do it manually, start by turning off the water pump and opening all faucets (hot and cold). Then, open the low-point drain valves—usually located under the RV—to let water flow out. For a more thorough job, use an air compressor to blow out any remaining water. Attach the compressor to the city water inlet and pressurize the system until water stops coming out of the faucets.
This process removes standing water that could freeze and expand, causing damage. It’s a must-do before any long trip in freezing weather.
Use RV Antifreeze
After draining your system, you can add non-toxic RV antifreeze to the drain traps and toilet bowl. This pink liquid prevents any residual water from freezing and protects your P-traps and seals. It’s safe for RV plumbing and won’t harm your tanks.
To use it, pour about 1/4 cup into each drain and flush the toilet a few times to coat the bowl. You don’t need to fill the entire system—just the low points where water might collect.
Insulate Your Water Tank and Pipes
Your fresh water tank and internal plumbing are also at risk in cold weather. If you have an exposed tank under your RV, consider wrapping it with insulation foam or a heated tank pad. These pads plug into an outlet and keep the tank warm.
For internal pipes, use foam insulation sleeves or heat tape. Heat tape is a flexible wire that wraps around pipes and provides consistent warmth. It’s especially useful for pipes in unheated compartments like under sinks or near exterior walls.
Keep Your RV Interior Warm
Even if your hose is protected, your internal plumbing can still freeze if the inside of your RV gets too cold. Use space heaters (safely and with proper ventilation) to maintain a temperature above 40°F (4°C). Open cabinet doors to allow warm air to circulate around pipes.
If you’re using propane heat, make sure your furnace is working properly and your vents are clear. A warm interior goes a long way in protecting your entire water system.
Smart Habits for Cold-Weather RVing
Beyond equipment and insulation, your daily habits can make a big difference in preventing frozen hoses. Here are some smart practices to adopt during winter camping.
Check the Weather Daily
Always monitor the forecast before and during your trip. If temperatures are expected to drop below freezing, take preventive action early. Don’t wait until it’s too late.
Disconnect and Drain When Not in Use
If you’re leaving your RV unattended for more than a few hours, disconnect the water hose and drain it completely. Store it indoors or in a heated compartment. This eliminates the risk of freezing while you’re away.
Use a Heated Water Filter Housing
If you use a water filter, the housing can trap water and freeze. Some RVers install a small heating pad or heat tape around the filter canister to keep it warm.
Park Strategically
Choose your campsite wisely. Park with your water connection sheltered from wind, ideally near a building or natural windbreak. Avoid low-lying areas where cold air settles.
Carry Backup Supplies
Always have a backup plan. Carry bottled water for drinking and a portable water container for emergencies. If your hose does freeze, you’ll still have access to clean water.
What to Do If Your Hose Freezes
Despite your best efforts, there’s always a chance your hose could freeze. If it happens, don’t panic. Here’s how to safely thaw it.
Bring the Hose Indoors
The safest way to thaw a frozen hose is to bring it inside a warm area. Coil it up and place it in a heated room or your RV. Let it thaw naturally—don’t use open flames or high heat, which can damage the hose.
Use a Hair Dryer or Heat Gun
If you can’t bring the hose inside, use a hair dryer or heat gun on a low setting. Move it slowly along the length of the hose, focusing on frozen sections. Never use a propane torch or open flame.
Check for Damage
Once thawed, inspect the hose for cracks, leaks, or bulges. If you find any damage, replace the hose immediately. A compromised hose can fail under pressure.
Prevent Refreezing
After thawing, take extra precautions to prevent it from freezing again. Use insulation, elevate the hose, and consider switching to a heated model.
Conclusion
Keeping your RV water hose from freezing doesn’t have to be complicated or expensive. With the right tools, insulation, and habits, you can enjoy safe, comfortable winter camping without worrying about icy water lines. Whether you invest in a heated hose, wrap your current one in foam, or simply keep a trickle flowing, the key is to act proactively.
Remember, prevention is always better than repair. A little preparation now can save you time, money, and stress later. So before your next winter adventure, take a few minutes to protect your water hose. Your future self—and your RV—will thank you.
Frequently Asked Questions
Can I use a regular garden hose in cold weather?
No, regular garden hoses are not designed for freezing temperatures and can crack or burst when water inside freezes. Always use an RV-specific water hose, preferably one rated for cold weather or heated.
How cold does it have to be for an RV water hose to freeze?
Water freezes at 32°F (0°C), but wind chill, ground temperature, and exposure can cause freezing even when air temperatures are slightly above freezing. It’s best to take precautions whenever temperatures drop below 40°F (4°C).
Can I leave my RV water hose connected overnight in winter?
It’s not recommended unless you’ve taken protective measures like using a heated hose, insulation, or maintaining a trickle flow. Always drain the hose if you’re leaving your RV unattended in freezing conditions.
Do heated water hoses use a lot of electricity?
Heated hoses are designed to be energy-efficient. Most use between 50 and 100 watts and have self-regulating elements that only activate when needed, minimizing power consumption.
Can I use heat tape on my RV water hose?
Yes, heat tape can be used on RV water hoses, but make sure it’s rated for outdoor and water line use. Follow the manufacturer’s instructions and avoid overlapping the tape to prevent overheating.
What should I do if my RV’s internal pipes freeze?
Turn off the water pump, open all faucets, and use a space heater or hair dryer to gently warm the affected area. Never use open flames. If pipes are damaged, consult a professional for repairs.

At CarLegit, we believe information should be clear, factual, and genuinely helpful. That’s why every guide, review, and update on our website is created with care, research, and a strong focus on user experience.