
Adding Freon to your RV air conditioner can restore cooling power and improve comfort on the road. This guide walks you through the process safely, from diagnosing low refrigerant to recharging the system correctly.
This is a comprehensive guide about How To Put Freon In Rv Air Conditioner.
In This Article
- 1 Key Takeaways
- 2 How to Put Freon in RV Air Conditioner
- 3 Understanding RV Air Conditioners and Refrigerant
- 4 Signs Your RV Air Conditioner Needs Freon
- 5 Tools and Materials You’ll Need
- 6 Step-by-Step Guide to Adding Freon to Your RV AC
- 7 Safety Tips and Common Mistakes to Avoid
- 8 When to Call a Professional
- 9 Maintaining Your RV Air Conditioner
- 10 Conclusion
- 11 Frequently Asked Questions
- 11.1 Can I add Freon to my RV air conditioner myself?
- 11.2 How often does an RV air conditioner need Freon?
- 11.3 What happens if I put too much Freon in my RV AC?
- 11.4 Can I use automotive refrigerant in my RV air conditioner?
- 11.5 How do I know if my RV AC has a refrigerant leak?
- 11.6 Is it legal to add refrigerant to an RV air conditioner?
Key Takeaways
- Diagnose low Freon first: Weak cooling, hissing sounds, or ice buildup often signal a refrigerant leak or low levels.
- Use the right tools: A manifold gauge set, refrigerant can, and safety gear are essential for a safe recharge.
- Check for leaks before recharging: Adding Freon without fixing leaks leads to repeated loss and wasted money.
- Know your AC’s refrigerant type: Most RVs use R-22 or R-410A—using the wrong type can damage the system.
- Recharge slowly and safely: Overfilling can cause compressor damage; follow pressure guidelines carefully.
- Consider professional help: If you’re unsure or find a major leak, call an HVAC technician to avoid costly mistakes.
[FEATURED_IMAGE_PLACEHOLDER]
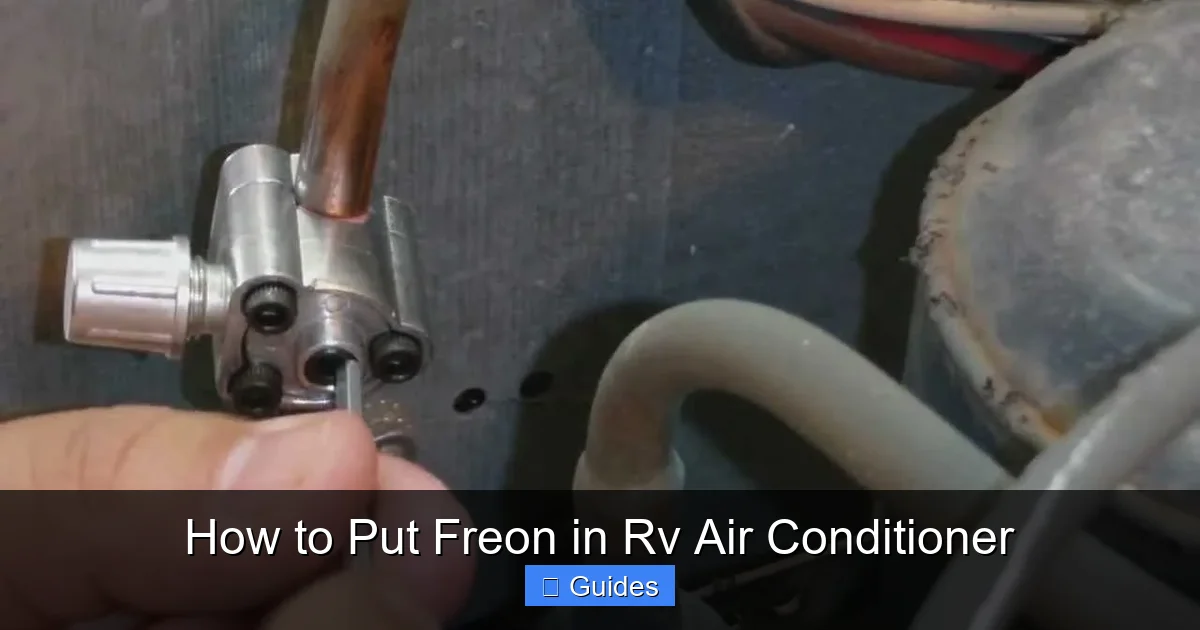
How to Put Freon in RV Air Conditioner
If you’ve ever been stuck in a hot RV with an air conditioner that’s blowing warm air, you know how frustrating it can be. One of the most common reasons for poor cooling is low refrigerant—commonly referred to as Freon. While it might sound complicated, learning how to put Freon in an RV air conditioner is a task many RV owners can handle with the right tools, knowledge, and safety precautions.
RV air conditioners work just like home units: they use refrigerant to absorb heat from inside your rig and release it outside. Over time, refrigerant levels can drop due to small leaks or normal wear. When that happens, your AC runs longer, works harder, and still doesn’t cool effectively. The good news? Recharging the system with the correct type of refrigerant can restore full cooling power and keep you comfortable on your adventures.
But before you grab a can of Freon and start spraying, it’s important to understand the process. This isn’t a “top-off” job like adding windshield washer fluid. Refrigerant systems are sealed and require precision. Adding too much or the wrong kind can damage your AC unit or even pose safety risks. That’s why this guide will walk you through every step—from diagnosing the problem to safely recharging your RV’s air conditioner.
Understanding RV Air Conditioners and Refrigerant
RV air conditioners are compact, high-efficiency units designed to cool small spaces under tough conditions. Most run on 110-volt power and are mounted on the roof, making them exposed to weather and vibration. Because of this, they’re more prone to wear and refrigerant leaks than home units.
The refrigerant—often called Freon, though that’s a brand name—is the lifeblood of your AC system. It cycles through coils, changing from liquid to gas and back again, absorbing heat from inside your RV and releasing it outside. Without enough refrigerant, the system can’t transfer heat effectively, leading to weak airflow and warm air blowing from the vents.
There are two main types of refrigerant used in RV air conditioners: R-22 and R-410A. Older RVs (typically pre-2010) often use R-22, which is being phased out due to environmental concerns. Newer models usually use R-410A, a more eco-friendly option. It’s crucial to know which type your unit uses before adding refrigerant. Using the wrong kind can ruin the compressor and void warranties.
You can usually find the refrigerant type on a label inside the AC unit’s access panel or in the owner’s manual. If you’re unsure, check with the manufacturer or a certified technician. Never mix refrigerants—this can cause chemical reactions and system failure.
Another key point: refrigerant doesn’t “wear out.” It should last the life of the unit unless there’s a leak. So if your AC is low on Freon, it’s a sign something is wrong. Simply adding more without fixing the leak is a temporary fix at best.
Signs Your RV Air Conditioner Needs Freon
Before you start recharging, it’s important to confirm that low refrigerant is actually the problem. Many RV owners assume warm air means low Freon, but other issues—like dirty filters, blocked vents, or electrical problems—can cause similar symptoms.
One of the most obvious signs is reduced cooling power. If your AC runs constantly but the air coming out isn’t cold, or if it takes much longer than usual to cool the RV, low refrigerant could be the culprit. You might also notice that the air is cool at first but gradually warms up as the unit runs.
Another red flag is ice buildup on the evaporator coils or refrigerant lines. This happens when the refrigerant level is too low, causing the coils to get extremely cold and freeze moisture from the air. Ice can block airflow and eventually damage the compressor if left unchecked.
Listen for unusual sounds. A hissing or bubbling noise near the AC unit could indicate a refrigerant leak. You might also see oily residue around fittings or connections—refrigerant often leaks along with lubricating oil, leaving a greasy stain.
Check the temperature difference between the return air (the air going into the AC) and the supply air (the air coming out). A healthy system should have a 15–20°F difference. If it’s less than 10°F, the system isn’t cooling efficiently, and low refrigerant is a likely cause.
Finally, if your AC trips the breaker frequently or the compressor struggles to start, it could be working too hard due to low refrigerant pressure. This puts extra strain on the motor and can lead to premature failure.
Keep in mind: these symptoms can also point to other issues, like a clogged filter, dirty coils, or a failing compressor. Always rule out simpler fixes first. Replace the air filter, clean the coils, and ensure vents aren’t blocked. If the problem persists, then it’s time to check the refrigerant level.
Tools and Materials You’ll Need
Recharging your RV air conditioner isn’t a job you can do with just a can of Freon and a hose. You’ll need specialized tools to measure pressure, control the flow, and ensure safety. Here’s a list of what you’ll need:
First and foremost, you’ll need a manifold gauge set. This tool connects to the AC system and shows the pressure on both the low and high sides. It’s essential for monitoring refrigerant levels and ensuring you don’t overfill the system. Look for a set with hoses, gauges, and a center hose for refrigerant.
Next, you’ll need the correct type of refrigerant. As mentioned earlier, most RVs use either R-22 or R-410A. Make sure you buy the right kind—check the label on your unit or consult the manual. Refrigerant comes in disposable cans or rechargeable cylinders. For most RV owners, a 30-pound disposable can with a built-in gauge is sufficient.
You’ll also need a refrigerant can tap valve. This attaches to the can and allows you to control the flow of refrigerant into the system. Some recharge kits come with a hose and tap valve built in, which can simplify the process.
Safety gear is non-negotiable. Wear safety goggles to protect your eyes from refrigerant spray, and use gloves to prevent skin contact. Refrigerant can cause frostbite on contact and is harmful if inhaled.
A digital thermometer or infrared thermometer can help you measure air temperatures at the supply and return vents. This lets you check if the cooling performance improves after recharging.
Finally, have a flashlight, screwdriver, and wrench handy to access the AC unit and service ports. Most RV ACs have a service panel on the roof or inside the unit that needs to be opened.
Optional but helpful: a leak detection kit. These use UV dye or electronic sensors to find small leaks. If you suspect a leak but can’t locate it, a detection kit can save you time and money.
Step-by-Step Guide to Adding Freon to Your RV AC
Now that you’ve diagnosed the issue and gathered your tools, it’s time to recharge your RV air conditioner. Follow these steps carefully to do it safely and effectively.
Step 1: Turn Off Power and Access the Unit
Safety first. Turn off the power to your RV air conditioner at the breaker panel. This prevents accidental startup while you’re working. Then, locate the service access panel on your AC unit. Most are on the roof, but some are inside the RV near the ceiling. Use a screwdriver to remove the panel and expose the compressor and refrigerant lines.
Step 2: Locate the Service Ports
You’ll see two refrigerant lines: a larger suction line (low-pressure) and a smaller liquid line (high-pressure). The low-pressure side has a service port—usually a Schrader valve covered by a blue or gray cap. This is where you’ll add refrigerant. Never open the high-pressure side unless you’re a certified technician.
Remove the cap and attach the low-side hose from your manifold gauge set. Make sure it’s securely connected to avoid leaks.
Step 3: Connect the Manifold Gauge and Refrigerant Can
Attach the center hose of the manifold gauge to the refrigerant can using the tap valve. Open the valve on the can slowly to purge air from the hose, then close it. Connect the low-side hose to the service port on the AC unit.
Leave the high-side valve closed—you’re only working on the low side. Open the low-side valve on the manifold gauge to allow refrigerant to flow.
Step 4: Start the AC and Begin Recharging
Turn the power back on and set your AC to the coldest setting with the fan on high. Let it run for a few minutes to stabilize. Watch the low-pressure gauge—it should read between 60–80 psi for R-410A or 65–75 psi for R-22, depending on outdoor temperature.
Slowly open the valve on the refrigerant can to allow gas to enter the system. Keep the can upright—adding liquid refrigerant can damage the compressor. Add refrigerant in short bursts, pausing to check the gauge and temperature difference.
Step 5: Monitor Pressure and Performance
As you add refrigerant, watch the low-pressure gauge and the air temperature at the vents. The goal is to reach the recommended pressure range and achieve a 15–20°F temperature drop. Don’t overfill—too much refrigerant can cause high pressure, reduced efficiency, and compressor damage.
If the pressure rises too quickly or the compressor makes unusual noises, stop immediately. Close the valve and disconnect the hose.
Step 6: Disconnect and Test
Once the system is properly charged, close the valve on the refrigerant can and the manifold gauge. Disconnect the hose from the service port and replace the cap. Turn off the AC, then turn the power back on and test the system.
Let it run for 15–20 minutes and check that it’s cooling effectively. Use your thermometer to confirm the temperature difference between supply and return air.
Safety Tips and Common Mistakes to Avoid
Working with refrigerant requires caution. Here are some key safety tips and common pitfalls to avoid.
Never work on a hot roof. Let the AC cool down before accessing it. Hot surfaces can cause burns, and refrigerant behaves differently at high temperatures.
Avoid overcharging. Adding too much refrigerant is one of the most common mistakes. It can cause high pressure, reduce cooling efficiency, and damage the compressor. Always follow the manufacturer’s pressure guidelines.
Don’t ignore leaks. If your AC loses refrigerant quickly after recharging, there’s likely a leak. Common leak points include Schrader valves, flare fittings, and the evaporator coil. Use a leak detection kit or soapy water to find bubbles indicating a leak.
Never mix refrigerants. R-22 and R-410A are not interchangeable. Mixing them can cause chemical reactions, system failure, and safety hazards.
Wear protective gear. Refrigerant can cause frostbite and is harmful if inhaled. Always wear goggles and gloves, and work in a well-ventilated area.
Don’t assume low Freon is the only issue. If your AC still doesn’t cool after recharging, check the air filter, coils, and electrical connections. A dirty filter can restrict airflow and mimic low refrigerant symptoms.
Finally, know your limits. If you’re uncomfortable with any part of the process—especially if you find a major leak or electrical issue—call a professional. HVAC technicians have the tools and training to handle complex repairs safely.
When to Call a Professional
While recharging your RV air conditioner is doable for many owners, there are times when it’s best to call in an expert.
If you find a large refrigerant leak—especially one you can’t locate or repair—professional help is essential. Leaks often require soldering, replacement parts, or system evacuation, which require specialized equipment.
If your AC still doesn’t cool after recharging, the problem may be more serious. A failing compressor, blocked condenser, or electrical fault could be to blame. These issues are beyond the scope of a simple recharge.
Older RVs with R-22 systems may require a retrofit to use newer refrigerants. This is a complex process that should only be done by a certified technician.
If you’re not confident in your ability to safely handle refrigerant or use manifold gauges, don’t risk it. One mistake can lead to costly repairs or safety hazards.
Finally, if your RV is still under warranty, DIY repairs could void it. Check your warranty terms before proceeding.
A licensed HVAC technician can diagnose the issue, repair leaks, and recharge the system correctly. While it may cost more upfront, it can save you money and headaches in the long run.
Maintaining Your RV Air Conditioner
Preventing refrigerant loss starts with regular maintenance. Here’s how to keep your AC running efficiently.
Clean or replace the air filter every 1–2 months, especially during heavy use. A dirty filter restricts airflow and forces the system to work harder.
Inspect the coils and fins for dirt, debris, or damage. Use a soft brush or coil cleaner to remove buildup. Bent fins can be straightened with a fin comb.
Check the condensate drain for clogs. A blocked drain can cause water damage and reduce efficiency.
Inspect refrigerant lines and connections for signs of leaks, such as oily residue or corrosion. Address any issues promptly.
Run your AC regularly, even in cooler weather. This keeps seals lubricated and prevents refrigerant from settling.
Consider a professional inspection once a year. A technician can check refrigerant levels, test for leaks, and ensure all components are in good working order.
By staying proactive, you can extend the life of your RV air conditioner and avoid unexpected breakdowns on the road.
Conclusion
Learning how to put Freon in an RV air conditioner is a valuable skill for any RV owner. It can save you money, extend the life of your AC unit, and keep you cool during hot summer trips. But it’s not a job to take lightly. Proper diagnosis, the right tools, and careful execution are essential.
Start by confirming that low refrigerant is the real issue. Check for ice, listen for leaks, and measure temperature differences. Gather your tools—manifold gauge, refrigerant can, safety gear—and follow the step-by-step process to recharge safely.
Always prioritize safety. Wear protective equipment, avoid overcharging, and never ignore leaks. And when in doubt, call a professional. Some problems require expert attention, and it’s better to pay for a repair than risk damaging your entire system.
With regular maintenance and smart troubleshooting, your RV air conditioner can deliver reliable cooling for years to come. Stay cool, stay safe, and enjoy the open road.
Frequently Asked Questions
Can I add Freon to my RV air conditioner myself?
Yes, many RV owners can safely add Freon with the right tools and knowledge. However, you must diagnose the issue correctly, use the correct refrigerant type, and follow safety procedures to avoid damage or injury.
How often does an RV air conditioner need Freon?
A properly sealed system should never need Freon added. If your AC is low on refrigerant, it indicates a leak that needs repair. Recharging without fixing the leak will only provide a temporary solution.
What happens if I put too much Freon in my RV AC?
Overcharging can cause high pressure, reduce cooling efficiency, and damage the compressor. It may also trigger safety shutoffs or lead to costly repairs. Always monitor pressure gauges and follow manufacturer guidelines.
Can I use automotive refrigerant in my RV air conditioner?
No. Automotive AC systems use different refrigerants and operate under different conditions. Using the wrong type can damage your RV’s air conditioner and void the warranty.
How do I know if my RV AC has a refrigerant leak?
Signs include hissing sounds, oily residue near fittings, ice buildup on coils, or rapid loss of cooling after recharging. Use a leak detection kit or soapy water to locate the source.
Is it legal to add refrigerant to an RV air conditioner?
In the U.S., only EPA-certified technicians can purchase and handle certain refrigerants like R-22. However, R-410A is more accessible, and many DIY kits are available. Always check local regulations and handle refrigerant responsibly.

At CarLegit, we believe information should be clear, factual, and genuinely helpful. That’s why every guide, review, and update on our website is created with care, research, and a strong focus on user experience.