
Removing an RV valance may seem daunting, but with the right tools and techniques, it’s a manageable DIY task. Whether you’re updating your interior, repairing damage, or installing new window treatments, this guide walks you through every step to ensure a smooth, stress-free process.
In This Article
- 1 Key Takeaways
- 2 📑 Table of Contents
- 3 Introduction: Why You Might Need to Remove an RV Valance
- 4 Understanding RV Valances: Types and Functions
- 5 Tools and Supplies You’ll Need
- 6 Step-by-Step Guide to Removing an RV Valance
- 7 Common Challenges and How to Solve Them
- 8 What to Do After Removing the Valance
- 9 Tips for Reinstalling or Replacing the Valance
- 10 Conclusion: A Clean Removal Sets the Stage for Success
- 11 Frequently Asked Questions
Key Takeaways
- Identify the valance type: RV valances come in various styles—snap-in, screw-mounted, or adhesive—so knowing yours is the first step.
- Gather the right tools: A screwdriver, trim removal tool, pliers, and a flashlight make the job easier and safer.
- Work from the center outward: Start removing fasteners in the middle to prevent warping or cracking the valance board.
- Label and store hardware: Keep screws, clips, and brackets organized so reassembly is simple.
- Inspect for hidden damage: Once removed, check the wall and window frame for moisture, rot, or mold.
- Protect surrounding surfaces: Use painter’s tape and soft cloths to avoid scratches on walls, trim, or cabinets.
- Plan your next steps: Decide whether you’ll replace, repaint, or install new window treatments before removing the valance.
📑 Table of Contents
- Introduction: Why You Might Need to Remove an RV Valance
- Understanding RV Valances: Types and Functions
- Tools and Supplies You’ll Need
- Step-by-Step Guide to Removing an RV Valance
- Common Challenges and How to Solve Them
- What to Do After Removing the Valance
- Tips for Reinstalling or Replacing the Valance
- Conclusion: A Clean Removal Sets the Stage for Success
Introduction: Why You Might Need to Remove an RV Valance
If you’ve spent any time in an RV, you’ve probably noticed the decorative board that runs along the top of your windows—this is the valance. It’s more than just a pretty face; it serves practical purposes like hiding curtain rods, covering electrical wiring, or concealing damaged drywall. But over time, that same valance might start to look outdated, get damaged, or simply get in the way of a renovation.
Whether you’re upgrading your interior design, fixing water damage, or installing new blinds or shades, removing the RV valance is often the first step. And while it might seem like a small task, doing it wrong can lead to cracked boards, stripped screws, or even damage to your RV’s interior walls. That’s why it’s important to approach the job with care, the right tools, and a clear plan.
The good news? Removing an RV valance is totally doable for most DIYers—even if you’re not a seasoned handyman or woman. With a little patience and the right guidance, you can take it down cleanly and safely, setting the stage for whatever project comes next. In this guide, we’ll walk you through everything you need to know, from identifying your valance type to storing hardware and inspecting for hidden issues.
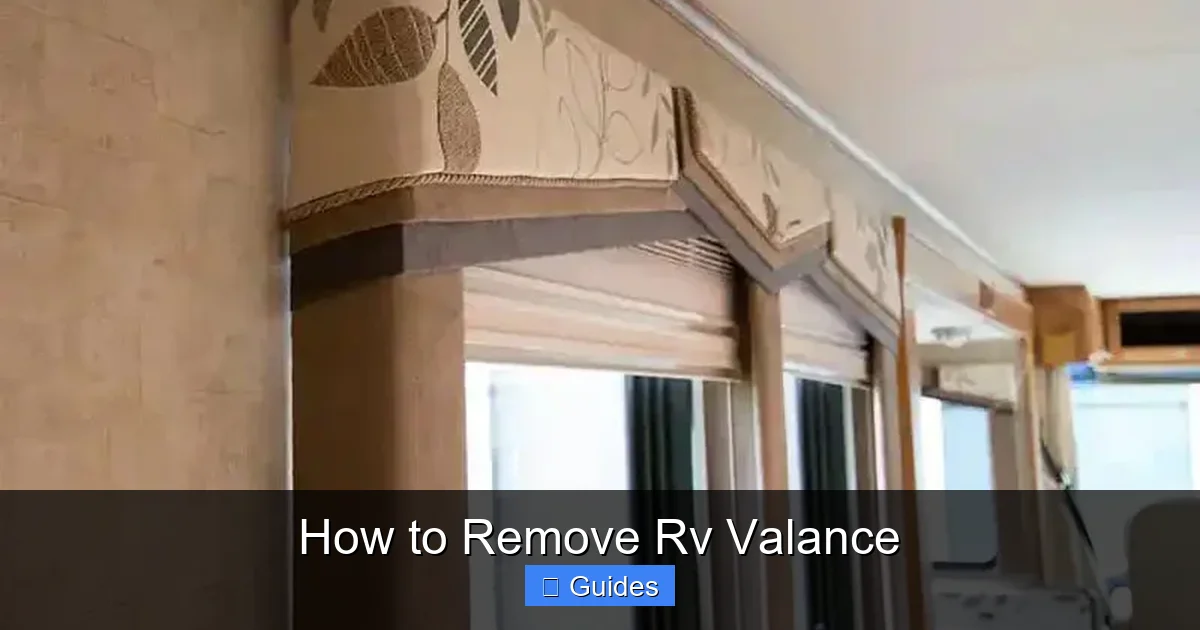
Understanding RV Valances: Types and Functions
Visual guide about How to Remove Rv Valance
Image source: musthavemom.com
Before you even think about pulling out a screwdriver, it’s important to understand what you’re working with. RV valances aren’t one-size-fits-all. They come in different styles, materials, and mounting methods, and each requires a slightly different approach for removal.
Common Types of RV Valances
Most RV valances fall into one of three categories: snap-in, screw-mounted, or adhesive-backed. Let’s break them down.
Snap-in valances are the most common in newer RVs. These are typically made of lightweight wood or MDF and attach to the wall using plastic clips or snap fasteners. They’re designed for easy removal during maintenance or upgrades. You’ll often find these in travel trailers and fifth wheels where manufacturers want to make interior access simple.
Screw-mounted valances are more traditional and common in older models or larger motorhomes. These are secured directly to the wall or cabinet frame with screws, sometimes hidden under plastic caps or decorative trim. They’re sturdier but require more effort to remove.
Adhesive-backed valances are less common but do exist, especially in budget or lightweight RVs. These use strong double-sided tape or construction adhesive to stick to the wall. While easy to install, they can be tricky to remove without damaging the wall surface.
What’s Hiding Behind the Valance?
One of the biggest reasons people remove valances is to access what’s behind them. And there’s often more than you’d expect.
In many RVs, the valance covers curtain rods or tracks. This keeps them out of sight and gives a cleaner look. But if you’re switching to blinds or shades, you’ll need to remove the valance to install new hardware.
Electrical wiring is another common hidden feature. Some RVs run lighting circuits—like overhead LEDs or reading lights—through the valance area. If you’re not careful, you could accidentally disconnect or damage these wires.
And then there’s the possibility of damage. Water leaks from windows, roof seams, or plumbing can seep into the wall and go unnoticed for months. The valance hides the evidence, but once removed, you might discover mold, rot, or soft drywall. That’s why it’s crucial to inspect thoroughly once the valance is off.
Materials and Construction
RV valances are usually made from lightweight materials to reduce overall weight. Common materials include:
– MDF (Medium-Density Fiberboard): Affordable and easy to paint, but prone to swelling if exposed to moisture.
– Plywood: Stronger and more durable, often used in higher-end RVs.
– Plastic or composite: Used in modern RVs for moisture resistance and easy cleaning.
– Laminate or veneer: Applied over wood or MDF for a finished look.
Understanding the material helps you know how much force you can safely apply during removal. For example, MDF can crack easily, so you’ll want to avoid prying too hard.
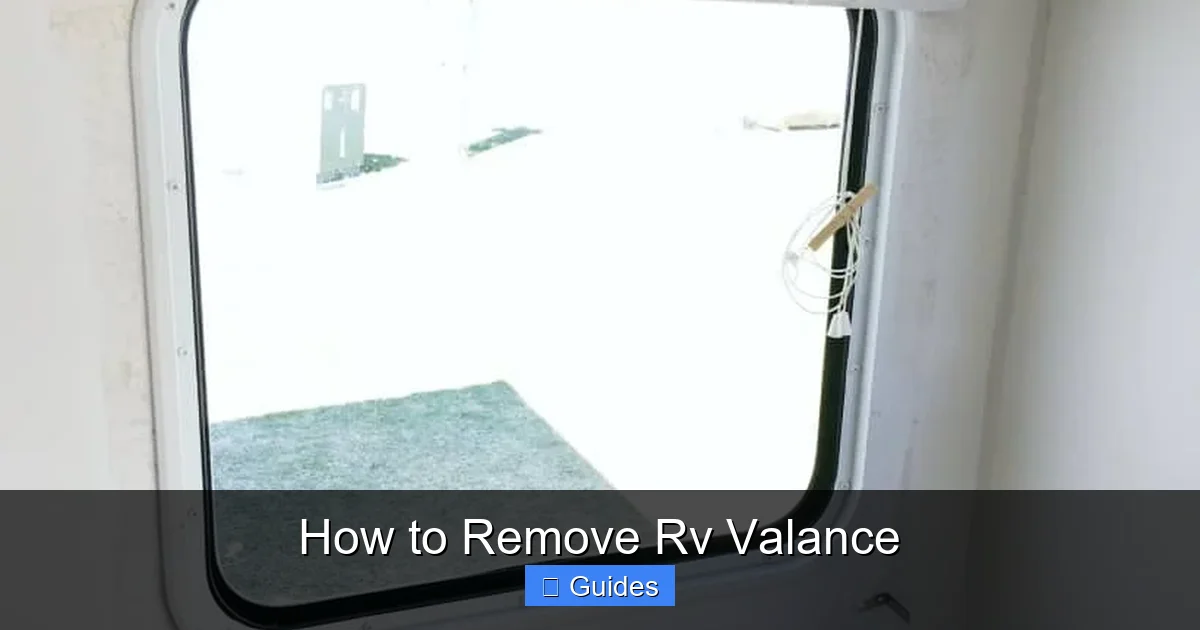
Tools and Supplies You’ll Need
Visual guide about How to Remove Rv Valance
Image source: musthavemom.com
Having the right tools makes all the difference. You don’t need a full workshop, but a few key items will save you time, frustration, and potential damage.
Essential Tools
Screwdriver set: Both Phillips and flathead screwdrivers are useful, especially for older valances with visible screws. A power drill with a screwdriver bit can speed things up, but use it on low torque to avoid stripping screws.
Trim removal tool or plastic pry bar: These are designed to gently separate trim and molding without scratching surfaces. A $10 tool from an auto or hardware store can prevent costly damage.
Needle-nose pliers: Great for gripping and removing small clips or stubborn fasteners.
Flashlight or headlamp: Valance areas are often dimly lit. A good light source helps you see screws, clips, and wiring.
Utility knife: Useful for cutting through caulk or adhesive, especially around the edges.
Putty knife: A wide-blade putty knife can help gently pry adhesive-backed valances off the wall.
Optional but Helpful Tools
Stud finder: If you’re unsure where the valance is anchored, a stud finder can help locate screws or brackets behind the board.
Magnetic tray or small container: Keeps screws and clips from getting lost. A muffin tin or egg carton works in a pinch.
Painter’s tape: Use this to mark sections of the valance or protect nearby surfaces.
Soft cloth or microfiber towel: Place under the valance as you remove it to catch debris and prevent scratches.
Safety Gear
Don’t forget safety. Wear dust masks if you suspect mold or drywall dust. Safety glasses protect your eyes from falling debris. And if you’re working in a tight space, knee pads can make the job more comfortable.
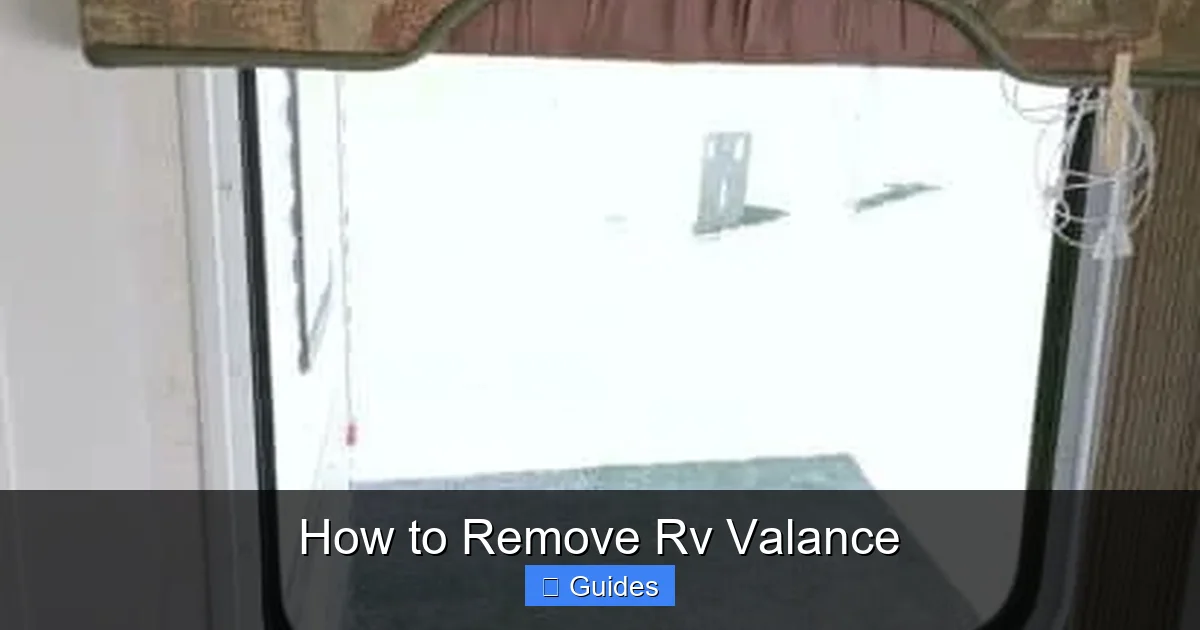
Step-by-Step Guide to Removing an RV Valance
Visual guide about How to Remove Rv Valance
Image source: musthavemom.com
Now that you’re prepared, let’s get into the actual removal process. Follow these steps carefully to avoid damage and make reassembly (if needed) much easier.
Step 1: Clear the Area
Start by removing any curtains, blinds, or decorative items from the window. Open the blinds or shades fully so they’re out of the way. If there are nearby cabinets or furniture, slide them slightly away to give yourself room to work.
Step 2: Inspect the Valance
Take a close look at the valance. Run your fingers along the edges to feel for screws, clips, or seams. Look for small plastic caps that might be hiding screw heads. Check the corners—many valances are secured there.
If you’re unsure how it’s attached, gently press on the center of the board. If it moves slightly, it’s likely snap-in. If it’s rigid, it’s probably screwed in.
Step 3: Remove Visible Fasteners
Start with any visible screws. Use the appropriate screwdriver and turn counterclockwise. If a screw is stuck, try spraying a little WD-40 or penetrating oil and wait a few minutes before trying again.
For plastic caps, use a flathead screwdriver or your fingernail to gently pry them off. Be careful—these can break easily.
Step 4: Locate and Release Hidden Clips
If your valance is snap-in, you’ll need to release the clips. These are usually spaced every 12 to 18 inches along the top edge.
Start in the center of the valance. Insert your trim removal tool between the valance and the wall, about 1–2 inches from the top. Gently pry outward until you hear a “pop”—that’s the clip releasing.
Work your way outward toward both ends, releasing one clip at a time. Don’t force it. If a clip doesn’t release easily, check for a hidden screw or adhesive.
Step 5: Deal with Adhesive or Caulk
Some valances are sealed with caulk or adhesive along the top and sides. Use a utility knife to carefully cut through the caulk line. Slide the blade between the valance and the wall, moving slowly to avoid gouging the drywall.
For adhesive-backed valances, use a putty knife to gently work under the board. Apply steady pressure and wiggle the knife to break the bond. If the adhesive is strong, you can use a hairdryer on low heat to soften it.
Step 6: Lift the Valance Away
Once all fasteners are released, carefully lift the valance away from the wall. Have a helper if it’s long or heavy. Tilt it slightly and pull it down and away.
Place it on a soft surface—like a towel or blanket—to prevent scratching.
Step 7: Label and Store Hardware
As you remove screws, clips, or brackets, place them in a labeled container. You can use small bags or tape them to a piece of paper with notes like “left corner” or “center clip.”
This makes reassembly much easier, especially if you plan to reinstall the same valance later.
Common Challenges and How to Solve Them
Even with the best preparation, things don’t always go smoothly. Here are some common issues and how to handle them.
Stripped or Rusted Screws
If a screw won’t turn, don’t force it. Apply penetrating oil and wait 10–15 minutes. If it’s still stuck, use a screw extractor tool or drill out the screw head carefully.
Broken Clips
Plastic clips can break during removal. If this happens, don’t panic. You can usually reinstall the valance using new clips or small screws. Most hardware stores carry replacement RV trim clips.
Damaged Drywall or Wall Panels
If the wall behind the valance is soft, cracked, or moldy, you’ve got a bigger issue. Stop and assess the damage. Small holes can be patched with spackle or drywall compound. For mold or rot, you may need to cut out the damaged section and replace it with new paneling.
Wires Get Disconnected
If you accidentally pull on a wire and it comes loose, don’t reconnect it blindly. Take a photo before disconnecting, or label the wires. If you’re not comfortable with electrical work, consult a professional.
Valance Won’t Budge
If the valance seems stuck, double-check for hidden screws or adhesive. Sometimes manufacturers use extra fasteners in the center or corners. Use a flashlight to inspect thoroughly.
What to Do After Removing the Valance
Removing the valance is just the beginning. Now’s the time to decide what comes next.
Inspect for Damage
Look closely at the wall, window frame, and any exposed wiring. Check for:
– Water stains or soft spots
– Mold or mildew (especially in corners)
– Rodent droppings or nesting material
– Loose or frayed wires
Address any issues before moving forward.
Clean the Area
Use a vacuum to remove dust and debris. Wipe down the wall with a damp cloth. If there’s mold, use a mixture of water and vinegar or a commercial mold cleaner.
Plan Your Next Step
Now that the valance is off, you have options:
– Install new window treatments: Blinds, shades, or curtains can be mounted directly to the wall or window frame.
– Paint or wallpaper: This is a great time to refresh the wall color or add a decorative touch.
– Replace the valance: You can build a new one from wood or MDF, or buy a pre-made replacement.
– Leave it open: Some RVers prefer the minimalist look of exposed window tops.
Whatever you choose, make sure it fits your style and functional needs.
Tips for Reinstalling or Replacing the Valance
If you plan to put the valance back—or install a new one—here are some tips to make it look professional.
Reinforce Weak Areas
If the original mounting points are damaged, add small wooden blocks behind the wall (if accessible) to create new anchor points.
Use New Fasteners
Old clips and screws can wear out. Replace them with new ones for a secure fit.
Seal the Edges
Apply a thin bead of paintable caulk along the top and sides before reinstalling. This prevents dust from getting behind and gives a clean finish.
Paint or Stain Before Installing
It’s much easier to paint the valance while it’s off the wall. Use a primer and two coats of paint for a durable finish.
Consider Upgrades
This is your chance to improve. Add LED strip lighting underneath for ambient light. Or install a valance with built-in storage for remotes or sunglasses.
Conclusion: A Clean Removal Sets the Stage for Success
Removing an RV valance might not be the most exciting part of your RV renovation, but it’s a crucial one. Done right, it opens the door to better window treatments, improved aesthetics, and even important repairs. Done wrong, it can lead to damaged walls, broken boards, and frustration.
By taking your time, using the right tools, and following a systematic approach, you can remove your valance safely and efficiently. Remember to inspect for hidden damage, label your hardware, and plan your next steps before you start.
Whether you’re updating your interior, fixing a leak, or just curious what’s behind that board, this guide gives you the confidence to tackle the job like a pro. And when you’re done, you’ll have a clean, open space ready for whatever comes next—brighter windows, better lighting, or a whole new look for your RV.
So grab your tools, take a deep breath, and get started. Your RV—and your peace of mind—will thank you.
Frequently Asked Questions
Can I remove an RV valance by myself?
Yes, most RV valances can be removed by one person, especially if you use the right tools and work carefully. For longer valances, having a helper can make it easier to lift and support the board.
Will removing the valance damage my RV walls?
If done carefully, removal shouldn’t cause major damage. Use plastic pry tools, avoid excessive force, and cut through caulk with a utility knife to minimize scratches or dents.
How do I know if my valance is screwed in or snap-in?
Gently press on the center of the valance. If it moves slightly, it’s likely snap-in. If it’s rigid, look for hidden screws under caps or along the edges.
What should I do if I find mold behind the valance?
Stop immediately. Clean the area with a mold-killing solution, ensure it’s dry, and fix the source of moisture. For extensive mold, consult a professional.
Can I reuse the same valance after removal?
Yes, as long as it’s not damaged. Clean it, repair any cracks, and reinstall using new fasteners for a secure fit.
Do I need to replace the valance if I install new blinds?
Not necessarily. Some blinds mount directly to the wall or window frame, allowing you to remove the valance entirely. Others may require a valance for a finished look.

At CarLegit, we believe information should be clear, factual, and genuinely helpful. That’s why every guide, review, and update on our website is created with care, research, and a strong focus on user experience.