
Knowing how to light an RV oven is essential for safe and convenient cooking on the road. Whether you have a manual pilot light or an electronic ignition system, this guide walks you through the process clearly and simply—so you can enjoy home-cooked meals wherever your adventures take you.
In This Article
- 1 Key Takeaways
- 2 📑 Table of Contents
- 3 Why Knowing How to Light an RV Oven Matters
- 4 Understanding Your RV Oven Type
- 5 Safety First: Pre-Lighting Checklist
- 6 Step-by-Step Guide: How to Light an RV Oven with a Pilot Light
- 6.1 Step 1: Turn On the Propane
- 6.2 Step 2: Locate the Pilot Light Assembly
- 6.3 Step 3: Turn the Oven Knob to “Pilot”
- 6.4 Step 4: Press and Hold the Knob
- 6.5 Step 5: Light the Pilot
- 6.6 Step 6: Hold the Knob for 30–60 Seconds
- 6.7 Step 7: Release the Knob and Turn to “On”
- 6.8 Step 8: Set Your Desired Temperature
- 6.9 Troubleshooting Pilot Light Issues
- 7 Step-by-Step Guide: How to Light an RV Oven with Electronic Ignition
- 8 Maintaining Your RV Oven for Reliable Performance
- 9 Common Problems and How to Fix Them
- 10 Final Thoughts: Confidence in the Kitchen
- 11 Frequently Asked Questions
- 11.1 How do I know if my RV oven has a pilot light or electronic ignition?
- 11.2 Can I light my RV oven without propane?
- 11.3 Why won’t my RV oven stay lit after lighting the pilot?
- 11.4 Is it safe to use my RV oven while driving?
- 11.5 How often should I clean my RV oven?
- 11.6 What should I do if I smell gas while lighting the oven?
Key Takeaways
- Understand your RV oven type: Most RV ovens use either a pilot light or electronic ignition—knowing which one you have is the first step.
- Safety comes first: Always check for gas leaks, ensure proper ventilation, and never leave the oven unattended while lighting.
- Follow the correct lighting sequence: For pilot light models, hold the gas knob down while lighting; for electronic models, press and turn the knob to ignite.
- Keep your oven clean and maintained: Food debris and grease can block gas flow or cause ignition issues—regular cleaning prevents problems.
- Know when to call a professional: If you smell gas, hear unusual sounds, or can’t light the oven after multiple attempts, stop and seek expert help.
- Use a long-reach lighter or match: This reduces the risk of burns and gives you better control when lighting the pilot.
- Test the oven after lighting: Always verify that the flame is steady and blue—yellow or flickering flames may indicate a problem.
📑 Table of Contents
- Why Knowing How to Light an RV Oven Matters
- Understanding Your RV Oven Type
- Safety First: Pre-Lighting Checklist
- Step-by-Step Guide: How to Light an RV Oven with a Pilot Light
- Step-by-Step Guide: How to Light an RV Oven with Electronic Ignition
- Maintaining Your RV Oven for Reliable Performance
- Common Problems and How to Fix Them
- Final Thoughts: Confidence in the Kitchen
Why Knowing How to Light an RV Oven Matters
Cooking in your RV isn’t just about convenience—it’s about comfort, savings, and enjoying home-cooked meals even when you’re miles from the nearest restaurant. Whether you’re parked at a scenic campground, boondocking in the desert, or road-tripping across the country, your RV oven is a vital tool for preparing everything from morning pancakes to holiday roasts. But unlike your kitchen oven at home, an RV oven often runs on propane and may require a different lighting method. That’s why understanding how to light an RV oven safely and correctly is so important.
Many new RV owners are surprised to learn that their oven doesn’t work like a standard electric or gas stove. Some models still use a traditional pilot light that must be manually lit, while others feature modern electronic ignition systems. Confusion between these types—or simply not knowing the proper steps—can lead to frustration, wasted propane, or even safety hazards. The good news? Once you learn the basics, lighting your RV oven becomes second nature. This guide will walk you through every step, whether you’re dealing with an older model or a newer, high-efficiency unit.
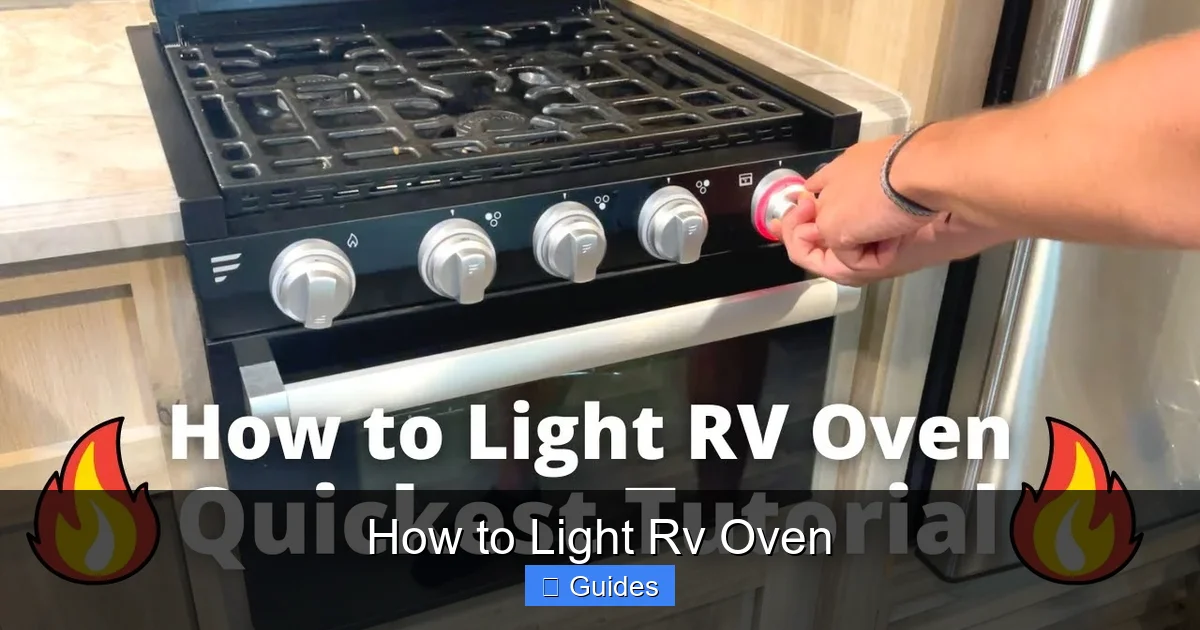
Understanding Your RV Oven Type
Visual guide about How to Light Rv Oven
Image source: rvprofy.com
Before you even think about lighting your oven, it’s crucial to identify which type of ignition system your RV uses. The two most common types are pilot light ovens and electronic ignition ovens. Knowing the difference will save you time, prevent mistakes, and keep you safe.
Pilot Light Ovens
Pilot light ovens are the older, more traditional style found in many older RVs or budget-friendly models. These ovens have a small, continuously burning flame called a pilot light that ignites the main burner when you turn on the oven. The pilot light stays lit even when the oven isn’t in use, which means it uses a small amount of propane 24/7. While this might seem inefficient, it ensures the oven is always ready to go.
To check if your oven has a pilot light, look inside the oven cavity near the burner. You might see a small tube or opening where the flame should be. Some models have a viewing window or access panel specifically for the pilot. If you can see a tiny flame (even when the oven is off), you likely have a pilot light system.
Electronic Ignition Ovens
Electronic ignition ovens are more modern and energy-efficient. Instead of a constantly burning pilot light, these ovens use an electric spark to ignite the gas when you turn the knob. This means no wasted propane when the oven isn’t in use, and they’re generally safer since there’s no open flame sitting idle.
Most newer RVs come equipped with electronic ignition systems. You’ll know you have one if your oven doesn’t have a visible pilot flame and instead produces a clicking sound when you turn the knob—this is the spark igniter at work. These systems rely on your RV’s 12-volt electrical system, so if your battery is dead or the wiring is faulty, the oven may not light.
How to Confirm Your Oven Type
Still unsure? Here’s a quick way to tell: Turn off the propane at the tank and wait 10 minutes. Then, open the oven door and look inside. If you see a small flame near the burner, it’s a pilot light. If there’s no flame and you hear a clicking noise when you turn the knob (with the propane back on), it’s electronic ignition.
You can also check your RV owner’s manual or look up your oven model online. Manufacturers like Suburban, Atwood, and Dometic often list ignition types in their product specs.
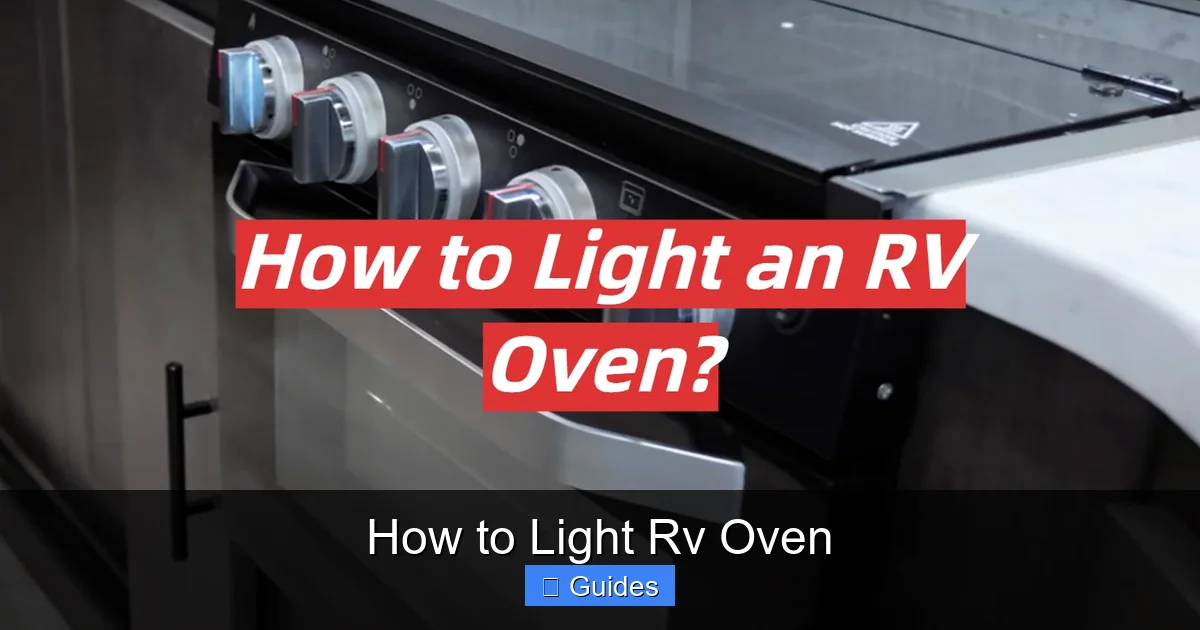
Safety First: Pre-Lighting Checklist
Visual guide about How to Light Rv Oven
Image source: rvprofy.com
Lighting an RV oven involves working with propane—a flammable gas—so safety should always be your top priority. A few simple precautions can prevent accidents, fires, or gas leaks. Before you attempt to light your oven, go through this pre-lighting checklist.
Check for Gas Leaks
Gas leaks are dangerous and can lead to fire or explosion. Always inspect your propane system before lighting the oven. Start by checking the propane tank valve—make sure it’s fully open. Then, examine the gas line running from the tank to the oven. Look for cracks, kinks, or loose connections.
To test for leaks, mix a small amount of dish soap with water and apply it to the gas connections and hose. If you see bubbles forming, there’s a leak. Turn off the propane immediately and tighten the connection or replace the damaged part. Never use an open flame to check for leaks—this is extremely dangerous.
Ensure Proper Ventilation
Propane combustion produces carbon monoxide (CO), a colorless, odorless gas that can be deadly in enclosed spaces. Always make sure your RV is well-ventilated before and during oven use. Open a window or roof vent, and never use the oven in a sealed, unventilated area.
Install a carbon monoxide detector in your RV if you don’t already have one. Test it regularly and replace the batteries as needed. If the alarm sounds, turn off all gas appliances, open windows, and leave the RV immediately.
Clear the Oven and Surrounding Area
Remove any food wrappers, paper towels, or flammable items from the oven and nearby surfaces. Even a small piece of foil or a crumb can ignite if exposed to high heat. Also, make sure the oven door opens freely and isn’t blocked by cabinets or other objects.
Use the Right Tools
For pilot light ovens, you’ll need a long-reach lighter or a fireplace match. Avoid using short matches or lighters that bring your hand too close to the flame. A long-reach lighter gives you better control and keeps your fingers safe.
For electronic ignition ovens, no tools are needed—just your hands. But make sure your hands are dry to avoid electric shock from the spark mechanism.
Never Leave the Oven Unattended
Once you begin the lighting process, stay nearby until the flame is stable. If the flame goes out or sputters, turn off the gas immediately and wait a few minutes before trying again. Never leave the oven unattended while it’s lighting or in use.
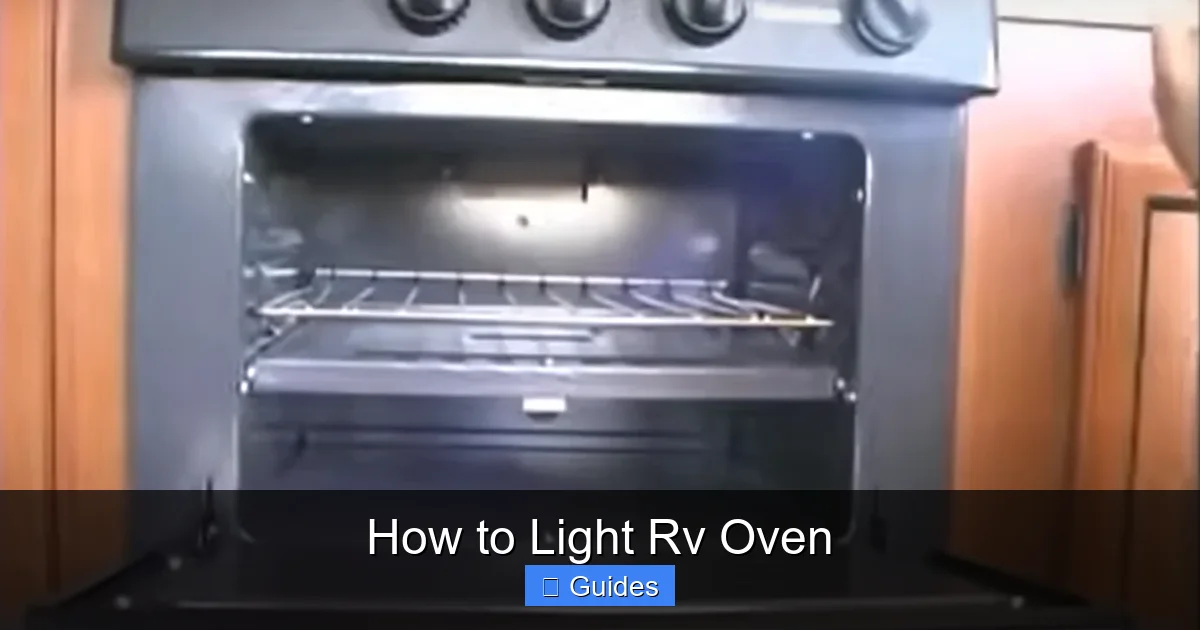
Step-by-Step Guide: How to Light an RV Oven with a Pilot Light
Visual guide about How to Light Rv Oven
Image source: i.ytimg.com
If your RV oven uses a pilot light, follow these detailed steps to light it safely and effectively. This method works for most older models and some budget-friendly RVs.
Step 1: Turn On the Propane
Locate your propane tank (usually outside the RV) and make sure the valve is fully open. You should hear a slight hiss as gas flows through the line. If you don’t hear anything, check that the tank isn’t empty and that the regulator isn’t faulty.
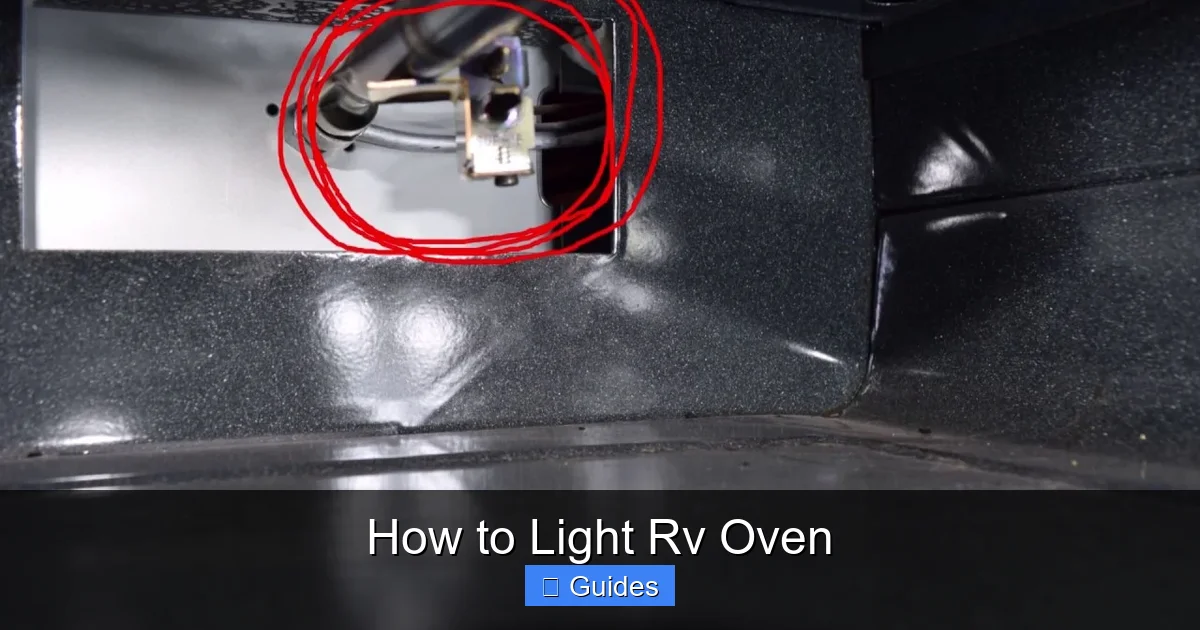
Step 2: Locate the Pilot Light Assembly
Open the oven door and look for the pilot light assembly. It’s usually a small metal tube near the burner, often labeled “Pilot” or “Igniter.” Some models have an access panel on the front or side of the oven that you need to remove.
Step 3: Turn the Oven Knob to “Pilot”
Find the oven control knob (usually on the front of the range). Turn it to the “Pilot” position. This allows gas to flow to the pilot light but not the main burner.
Step 4: Press and Hold the Knob
While the knob is in the “Pilot” position, press it down firmly. This opens the gas valve for the pilot. Hold it down for about 30 seconds to allow gas to reach the pilot assembly.
Step 5: Light the Pilot
With the knob still pressed, use your long-reach lighter or match to ignite the pilot. Insert the flame into the pilot opening. You should see a small, steady blue flame appear.
Step 6: Hold the Knob for 30–60 Seconds
Keep holding the knob down for at least 30 seconds after the pilot lights. This allows the thermocouple (a safety device) to heat up and keep the gas valve open. If you release the knob too soon, the pilot may go out.
Step 7: Release the Knob and Turn to “On”
After holding the knob for a full minute, slowly release it. The pilot flame should remain lit. Now, turn the knob to the “On” position. The main burner should ignite automatically, and you’ll hear a whooshing sound as the oven heats up.
Step 8: Set Your Desired Temperature
Once the oven is lit, turn the temperature knob to your desired setting. Wait a few minutes for the oven to preheat. Most RV ovens take 10–15 minutes to reach full temperature.
Troubleshooting Pilot Light Issues
If the pilot won’t stay lit, it could be due to a dirty thermocouple, a clogged pilot orifice, or a weak gas flow. Try cleaning the pilot assembly with compressed air or a soft brush. If the problem persists, consider replacing the thermocouple or calling a technician.
Step-by-Step Guide: How to Light an RV Oven with Electronic Ignition
Electronic ignition ovens are easier and safer to light, but they require a functioning electrical system. Follow these steps to light your oven quickly and efficiently.
Step 1: Ensure Power is On
Electronic igniters run on your RV’s 12-volt system. Make sure your RV is plugged into shore power or that your battery is charged. If the lights or other appliances aren’t working, the igniter may not spark.
Step 2: Turn On the Propane
As with pilot light ovens, confirm that the propane tank valve is open and gas is flowing.
Step 3: Open the Oven Door
Open the oven door fully to allow proper airflow and prevent gas buildup.
Step 4: Turn the Knob to “Ignite” or “Light”
Turn the oven control knob to the “Ignite” or “Light” position. You should hear a rapid clicking sound—this is the spark igniter working.
Step 5: Wait for the Flame to Catch
Within a few seconds, the burner should ignite with a steady blue flame. If it doesn’t light after 10–15 seconds, turn the knob off, wait 30 seconds, and try again.
Step 6: Adjust the Temperature
Once the oven is lit, turn the knob to your desired temperature. The flame will adjust automatically to maintain the heat.
What If It Doesn’t Spark?
If you don’t hear clicking, check your battery or electrical connections. A dead battery or faulty igniter module may need replacement. Also, ensure the igniter electrode isn’t dirty or corroded—clean it gently with a soft cloth.
Maintaining Your RV Oven for Reliable Performance
A well-maintained oven lights more easily and lasts longer. Regular cleaning and inspections can prevent many common issues.
Clean the Burner and Igniter
Food spills and grease can clog the burner ports or cover the igniter, preventing proper ignition. Turn off the gas and let the oven cool completely. Remove the burner cover (if applicable) and clean it with warm, soapy water. Use a toothbrush to clear clogged ports. For electronic igniters, wipe the spark electrode with a dry cloth.
Check the Thermocouple (Pilot Light Models)
The thermocouple is a small metal rod near the pilot light. It detects heat and keeps the gas valve open. If it’s dirty or misaligned, the pilot may not stay lit. Clean it gently with fine steel wool and ensure it’s positioned correctly in the flame.
Inspect Gas Lines and Connections
Every few months, inspect the gas hose and connections for wear, cracks, or leaks. Replace any damaged parts immediately. Use a gas leak detector spray for thorough checks.
Test the Oven Regularly
Even if you don’t use your oven often, light it once a month to ensure it’s working properly. This helps prevent surprises when you need it most.
Common Problems and How to Fix Them
Even with proper maintenance, RV ovens can develop issues. Here are some common problems and practical solutions.
Oven Won’t Light at All
– For pilot light models: Check if the pilot is out. Relight it following the steps above.
– For electronic models: Ensure power is on and the igniter is sparking. Replace the igniter module if needed.
– Check the propane level—empty tanks are a common cause.
Flame Is Yellow or Flickering
A yellow or flickering flame indicates incomplete combustion, often due to a dirty burner or poor ventilation. Clean the burner ports and ensure the oven is well-ventilated. A steady blue flame is ideal.
Oven Heats Slowly or Not at All
This could be due to low propane pressure, a clogged burner, or a faulty regulator. Check the propane tank level and regulator. Clean the burner and ensure the oven door seals properly.
Gas Smell When Lighting
If you smell gas during lighting, turn off the propane immediately. Open windows and doors, and do not use any electrical switches or flames. Wait 15 minutes, then check for leaks. If the smell persists, call a professional.
Final Thoughts: Confidence in the Kitchen
Learning how to light an RV oven might seem daunting at first, but with the right knowledge and a few safety habits, it becomes a simple, routine task. Whether you’re using a classic pilot light or a modern electronic ignition, the key is understanding your system and following the correct steps.
Remember, safety is never optional. Always check for leaks, ensure ventilation, and use the right tools. Keep your oven clean and well-maintained, and don’t hesitate to call a professional if something feels off.
With these tips, you’ll be ready to bake, roast, and cook delicious meals no matter where your RV adventures take you. After all, home is wherever you park—and a warm, home-cooked meal makes it even better.
Frequently Asked Questions
How do I know if my RV oven has a pilot light or electronic ignition?
Look inside the oven near the burner. If you see a small, continuously burning flame when the oven is off, it has a pilot light. If you hear a clicking sound when turning the knob and no visible flame, it uses electronic ignition.
Can I light my RV oven without propane?
No, RV ovens require propane to operate. Electric ovens are rare in RVs due to high power demands. Always ensure your propane tank is full and the valve is open before attempting to light the oven.
Why won’t my RV oven stay lit after lighting the pilot?
This is often due to a dirty or faulty thermocouple. Clean it gently with steel wool or replace it if necessary. Also, ensure you’re holding the knob down long enough (30–60 seconds) for the thermocouple to heat up.
Is it safe to use my RV oven while driving?
No, it is not safe to use the oven while the RV is in motion. Most manufacturers and safety experts recommend turning off all gas appliances during travel to prevent fire or carbon monoxide risks.
How often should I clean my RV oven?
Clean the oven after every few uses to prevent grease buildup. Deep clean the burner, igniter, and interior every 3–6 months, or more often if you cook frequently.
What should I do if I smell gas while lighting the oven?
Turn off the propane immediately, open all windows and vents, and do not use any electrical devices or flames. Leave the RV and wait 15 minutes. Check for leaks with soapy water. If the smell remains, contact a professional.

At CarLegit, we believe information should be clear, factual, and genuinely helpful. That’s why every guide, review, and update on our website is created with care, research, and a strong focus on user experience.