
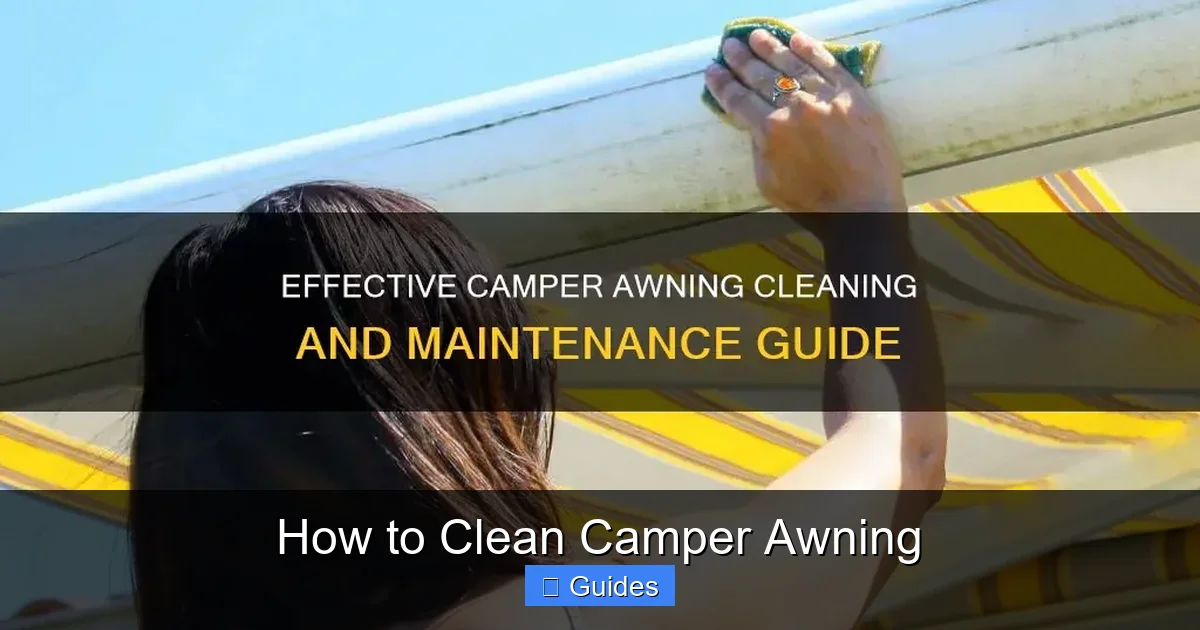
Keeping your camper awning clean isn’t just about looks—it’s essential for durability and performance. Dirt, mold, and UV exposure can break down fabric over time, but regular maintenance prevents damage and extends its life. With the right tools and techniques, cleaning your camper awning is easier than you think.
In This Article
- 1 Key Takeaways
- 2 📑 Table of Contents
- 3 Why Cleaning Your Camper Awning Matters
- 4 When and How Often Should You Clean Your Awning?
- 5 Tools and Supplies You’ll Need
- 6 Step-by-Step Guide to Cleaning Your Camper Awning
- 7 Special Considerations for Different Awning Materials
- 8 Common Mistakes to Avoid
- 9 Maintaining Your Awning Between Cleanings
- 10 When to Call a Professional
- 11 Conclusion
- 12 Frequently Asked Questions
Key Takeaways
- Clean your awning regularly: Aim for at least twice a year, or more often if you camp in humid or dusty areas.
- Use mild, non-abrasive cleaners: Harsh chemicals can damage fabric and coatings—stick to soap and water or awning-specific cleaners.
- Never pressure wash aggressively: High-pressure water can force moisture into seams and weaken the material.
- Check for mold and mildew: These thrive in damp environments and must be treated promptly to avoid permanent staining.
- Allow full drying before retracting: Storing a wet awning promotes mold growth and fabric rot.
- Inspect hardware and fabric: Look for tears, loose stitching, or rusted parts during cleaning.
- Apply a protective treatment: After cleaning, use a UV and water repellent spray to boost longevity.
📑 Table of Contents
- Why Cleaning Your Camper Awning Matters
- When and How Often Should You Clean Your Awning?
- Tools and Supplies You’ll Need
- Step-by-Step Guide to Cleaning Your Camper Awning
- Special Considerations for Different Awning Materials
- Common Mistakes to Avoid
- Maintaining Your Awning Between Cleanings
- When to Call a Professional
- Conclusion
Why Cleaning Your Camper Awning Matters
Your camper awning is one of the most exposed parts of your RV. It faces sun, rain, dirt, pollen, bird droppings, and even tree sap—especially if you love camping under shady trees. Over time, these elements build up and can seriously affect both the look and function of your awning. A dirty awning doesn’t just look unappealing; it can also trap moisture, encourage mold growth, and weaken the fabric.
Think of your awning like the roof of a house. If you never cleaned your roof, debris would pile up, gutters would clog, and eventually, leaks would start. The same logic applies here. Regular cleaning helps prevent long-term damage, saves you money on repairs, and keeps your outdoor space inviting. Plus, a clean awning reflects sunlight better, which can help keep your campsite cooler on hot days.
Many RV owners overlook awning maintenance, assuming it’s low priority. But skipping this simple task can lead to costly consequences. Mold and mildew can eat away at synthetic fibers, causing them to rot. Dirt and grime act like sandpaper under wind stress, accelerating wear. And if you store your awning while damp, you’re basically creating a petri dish for bacteria and fungi. By learning how to clean camper awning properly, you’re investing in your RV’s longevity and your own comfort.
When and How Often Should You Clean Your Awning?

Visual guide about How to Clean Camper Awning
Image source: i.ytimg.com
There’s no one-size-fits-all answer, but most experts recommend cleaning your camper awning at least twice a year—once in early spring before peak camping season and again in late fall after you’ve put your RV away for winter. However, your location and camping habits play a big role.
If you frequently camp in humid climates, near the ocean, or under trees, you may need to clean it every 2–3 months. Salt air, pine sap, and bird droppings are especially harsh and should be addressed quickly. On the other hand, if you mostly camp in dry, open areas with minimal tree cover, twice-yearly cleaning might be sufficient.
Another good rule of thumb: clean your awning after any extended trip, especially if it was exposed to rain, mud, or heavy pollen. Don’t wait until you see visible stains or smell mildew. Prevention is always easier than restoration.
Also, consider the season. Cleaning in mild, dry weather is ideal. Avoid washing your awning in direct sunlight, as this can cause soap to dry too quickly and leave streaks. Early morning or late afternoon on a cloudy day works best.
Signs It’s Time for a Deep Clean
You don’t always need to wait for your scheduled cleaning. Watch for these warning signs that your awning needs attention:
– Visible dirt, dust, or pollen buildup
– Dark spots or streaks (possible mold or mildew)
– A musty smell when you extend the awning
– Stiff or crunchy fabric (a sign of grime embedding into fibers)
– Water no longer beads up on the surface (indicating loss of water repellency)
If you notice any of these, it’s time to grab your cleaning supplies and get to work.
Tools and Supplies You’ll Need
Visual guide about How to Clean Camper Awning
Image source: everrv.com
Before you start, gather the right tools. Using the wrong equipment can do more harm than good. Here’s a simple checklist of what you’ll need for a safe and effective cleaning:
– Soft-bristle brush (a long-handled awning brush works great)
– Garden hose with a spray nozzle
– Bucket
– Mild detergent (like dish soap or a dedicated awning cleaner)
– White vinegar or specialized mildew remover (for mold spots)
– Microfiber cloths or soft sponges
– Ladder (if your awning is high)
– Protective gloves and eyewear
– Optional: awning protectant spray (for after cleaning)
Avoid stiff brushes, wire scrubbers, or abrasive pads—they can scratch or tear the fabric. Also, never use bleach unless absolutely necessary and only in diluted form, as it can degrade synthetic materials and fade colors.
For those with large awnings or hard-to-reach areas, consider investing in an extendable awning cleaning kit. These often include a telescoping pole with a brush head and hose attachment, making the job much easier.
Choosing the Right Cleaner
Not all cleaners are created equal. Harsh chemicals like chlorine bleach, ammonia, or strong degreasers can strip protective coatings, weaken fibers, and cause discoloration. Instead, opt for gentle, pH-neutral cleaners.
Dish soap (like Dawn) mixed with water is a safe, effective option for general cleaning. For tougher stains or mildew, mix one part white vinegar with three parts water. Vinegar is a natural disinfectant and mildew killer, and it’s safe for most awning fabrics.
There are also commercial awning cleaners on the market—brands like 303 Aerospace Protectant, Star brite Awning Cleaner, and Camco Awning Cleaner are popular choices. These are formulated specifically for vinyl and acrylic awnings and often include UV protectants. Always check the label to ensure compatibility with your awning material.
Step-by-Step Guide to Cleaning Your Camper Awning

Visual guide about How to Clean Camper Awning
Image source: gocarlife.com
Now that you’re prepared, let’s walk through the cleaning process step by step. Follow these instructions carefully to avoid damage and get the best results.
Step 1: Extend the Awning Fully
Start by fully extending your awning. Make sure it’s secure and won’t retract unexpectedly. If your awning is manual, use the crank handle. For electric models, activate the motor and lock it in place if possible. This gives you full access to the fabric and prevents wrinkles or folds that could trap moisture.
Step 2: Remove Loose Debris
Use a soft-bristle brush or a dry microfiber cloth to gently sweep away leaves, dirt, and dust. Work from the top down to avoid pushing debris into creases. If there’s a lot of buildup, you can also use a leaf blower on a low setting—just be careful not to blow water or soap into the roller tube.
Step 3: Pre-Rinse with Water
Attach a spray nozzle to your garden hose and rinse the entire awning with lukewarm water. Use a gentle spray setting—too much pressure can force water into seams or damage the fabric. Focus on areas with visible stains or dirt. This step helps loosen grime so the cleaner can work more effectively.
Step 4: Mix Your Cleaning Solution
In a bucket, mix 1 tablespoon of mild dish soap with 1 gallon of warm water. For mildew, add 1 cup of white vinegar to the mix. Stir gently to avoid creating too many suds.
Step 5: Scrub Gently
Dip your soft-bristle brush into the solution and scrub the awning in small sections. Use circular motions and light pressure—no need to scrub hard. Pay extra attention to stained areas, corners, and seams where dirt tends to accumulate. For stubborn mildew, let the vinegar solution sit for 5–10 minutes before scrubbing.
Avoid scrubbing too aggressively, especially on acrylic fabrics, which can pill or fray. If you’re using a commercial cleaner, follow the manufacturer’s instructions for application and dwell time.
Step 6: Rinse Thoroughly
Once you’ve scrubbed the entire awning, rinse it thoroughly with clean water. Start from the top and work your way down to prevent streaking. Make sure all soap residue is removed—leftover detergent can attract more dirt and cause discoloration over time.
Step 7: Dry Completely
This step is critical. Allow the awning to air dry completely before retracting. Depending on the weather, this can take several hours. Never roll up a damp awning—even slightly moist fabric can lead to mold and rot.
If possible, leave the awning extended for a few hours in a shaded, well-ventilated area. Avoid direct sunlight during drying, as UV rays can weaken wet fabric faster.
Step 8: Inspect and Treat
Once dry, inspect the awning for any remaining stains, tears, or loose stitching. Address small issues now to prevent bigger problems later.
Then, apply a UV and water repellent treatment. Sprays like 303 Fabric Guard or Star brite Water Repellent help restore the awning’s protective coating and improve water beading. Follow the product instructions—usually, you’ll spray it on evenly and let it dry for 24 hours before retracting.
Special Considerations for Different Awning Materials
Not all awnings are made the same. The cleaning method may vary slightly depending on whether your awning is made of vinyl, acrylic, or polyester. Here’s what you need to know:
Vinyl Awnings
Vinyl is durable, waterproof, and easy to clean, but it can become brittle over time if not maintained. Avoid petroleum-based cleaners, as they can degrade the material. Stick to mild soap and water or vinyl-safe cleaners. Never use abrasive tools—vinyl scratches easily.
Acrylic Awnings
Acrylic is breathable, fade-resistant, and popular for its soft feel. However, it’s more prone to mildew because it absorbs moisture. Clean it regularly and ensure it dries completely. Use only soft brushes and avoid high heat during drying.
Polyester Awnings
Often coated with PVC or acrylic, polyester awnings are strong and affordable. They respond well to standard cleaning methods but may require more frequent re-treatment with protectants. Check the manufacturer’s guidelines for specific care instructions.
Always refer to your awning’s user manual for material-specific recommendations. When in doubt, test your cleaning solution on a small, inconspicuous area first.
Common Mistakes to Avoid
Even with the best intentions, it’s easy to make mistakes when cleaning your awning. Here are some common pitfalls and how to avoid them:
– **Using a pressure washer:** High-pressure water can force moisture into seams, damage stitching, and tear fabric. If you must use one, keep it on the lowest setting and hold it at least 3 feet away.
– **Cleaning in direct sunlight:** Soap dries too quickly, leaving streaks and residue. Always clean in shade or overcast conditions.
– **Skipping the rinse:** Leftover soap attracts dirt and can cause yellowing. Rinse thoroughly.
– **Storing while damp:** This is the #1 cause of mold and rot. Always dry completely.
– **Using bleach regularly:** It weakens fibers and fades colors. Reserve it for severe mildew and always dilute it.
– **Ignoring hardware:** Don’t forget to wipe down arms, brackets, and rollers. Lubricate moving parts with silicone spray if needed.
Maintaining Your Awning Between Cleanings
Cleaning isn’t the only part of awning care. Regular maintenance helps keep it in top shape year-round.
After each use, give your awning a quick visual inspection. Remove any leaves or debris. If it got wet, extend it again when you get home to dry fully.
Consider using an awning cover or shelter when parked for long periods. This reduces exposure to UV rays and environmental contaminants.
Also, check the tension of your awning arms periodically. Loose arms can cause sagging, which leads to water pooling and fabric stress.
Finally, reapply protectant spray every 6–12 months, depending on usage and climate. This helps maintain water repellency and UV resistance.
When to Call a Professional
Most awning cleaning can be done at home, but sometimes it’s best to call in the experts. Consider professional cleaning if:
– The awning is heavily stained or has deep-set mildew
– You’re unsure of the fabric type or cleaning method
– The awning is large or difficult to access safely
– You notice structural damage, such as torn fabric or broken arms
Professional detailers have specialized equipment and knowledge to handle tough jobs without causing damage. It’s a worthwhile investment for valuable or hard-to-replace awnings.
Conclusion
Learning how to clean camper awning doesn’t have to be complicated. With the right tools, gentle cleaners, and a little time, you can keep your awning looking great and functioning properly for years. Regular cleaning prevents mold, extends fabric life, and ensures your outdoor space stays comfortable and inviting.
Remember: consistency is key. Don’t wait for visible damage to appear. A quick clean after each trip and a deep clean twice a year will go a long way. And always prioritize safety—use a stable ladder, wear gloves, and avoid harsh chemicals.
Your awning is more than just a shade provider—it’s part of your home away from home. Treat it well, and it’ll serve you reliably through countless adventures.
Frequently Asked Questions
Can I use bleach to clean my camper awning?
It’s not recommended for regular use. Bleach can weaken fabric fibers, fade colors, and damage protective coatings. Only use a diluted bleach solution (1 part bleach to 10 parts water) for severe mildew, and rinse thoroughly afterward.
How do I remove tree sap from my awning?
Apply a small amount of rubbing alcohol or a commercial sap remover to a cloth and gently dab the area. Avoid scrubbing. Rinse with soapy water and dry completely. Test on a hidden spot first.
Is it safe to pressure wash my awning?
Only if done carefully. Use the lowest pressure setting and hold the nozzle at least 3 feet away. High pressure can force water into seams and damage the fabric. A garden hose with a spray nozzle is safer.
How long should I let my awning dry before retracting?
Allow at least 4–6 hours of drying time in a shaded, well-ventilated area. On humid days, it may take longer. Never retract a damp awning—this promotes mold and rot.
Can I clean my awning while it’s retracted?
No. You need full access to both sides of the fabric. Always extend the awning completely before cleaning to ensure even coverage and proper rinsing.
What’s the best way to prevent mildew on my awning?
Keep it clean and dry. Rinse off dirt and pollen regularly, and always allow it to dry fully before storing. Use a mildew-resistant cleaner periodically and apply a protectant spray to inhibit growth.

At CarLegit, we believe information should be clear, factual, and genuinely helpful. That’s why every guide, review, and update on our website is created with care, research, and a strong focus on user experience.