
Removing the center console from your loveseat doesn’t have to be complicated. With the right tools and a little patience, you can access hidden storage, clean hard-to-reach areas, or replace damaged components. This guide walks you through every step to ensure a smooth, damage-free process.
In This Article
- 1 Key Takeaways
- 2 📑 Table of Contents
- 3 Why You Might Need to Remove the Center Console from Your Loveseat
- 4 Understanding Your Loveseat’s Console Design
- 5 Tools and Materials You’ll Need
- 6 Step-by-Step Guide to Removing the Center Console
- 7 Reinstalling the Center Console
- 8 Common Mistakes to Avoid
- 9 Tips for Maintaining Your Loveseat Console
- 10 When to Call a Professional
- 11 Conclusion
- 12 Frequently Asked Questions
- 12.1 Can I remove the center console without tools?
- 12.2 Will removing the console void my warranty?
- 12.3 What if I can’t find any screws or latches?
- 12.4 Is it safe to remove an electrical console myself?
- 12.5 How often should I remove the console for cleaning?
- 12.6 What if the console doesn’t fit back properly after removal?
Key Takeaways
- Identify your loveseat model: Different brands and designs have unique console mechanisms, so knowing your model helps determine the removal method.
- Gather the right tools: A screwdriver, Allen wrench, or socket set may be needed—check your owner’s manual or inspect the console for fasteners.
- Work slowly and carefully: Rushing can damage upholstery, wiring, or internal mechanisms—take your time to avoid costly mistakes.
- Disconnect power if applicable: If your console has cup warmers, USB ports, or lights, unplug the loveseat or disconnect power before starting.
- Label cables and parts: Use tape or sticky notes to mark wires and screws so reassembly is easier and error-free.
- Clean and inspect during removal: Use this opportunity to vacuum debris, check for wear, and lubricate moving parts if needed.
- Reassemble in reverse order: Follow your steps backward to reinstall the console securely and test all functions afterward.
📑 Table of Contents
- Why You Might Need to Remove the Center Console from Your Loveseat
- Understanding Your Loveseat’s Console Design
- Tools and Materials You’ll Need
- Step-by-Step Guide to Removing the Center Console
- Reinstalling the Center Console
- Common Mistakes to Avoid
- Tips for Maintaining Your Loveseat Console
- When to Call a Professional
- Conclusion
Why You Might Need to Remove the Center Console from Your Loveseat
You’re enjoying a quiet evening on your loveseat, sipping coffee from the built-in cup holder, when suddenly—spill! Or maybe you’ve noticed a strange noise coming from the center console, or perhaps you’re planning to reupholster your furniture and need full access to the frame. Whatever the reason, knowing how to remove the center console from your loveseat is a valuable skill that can save you time, money, and frustration.
The center console is a popular feature in modern loveseats, especially in reclining or sectional models. It often houses cup holders, storage compartments, USB charging ports, cup warmers, or even mini coolers. While these additions enhance comfort and convenience, they also introduce complexity when maintenance or repairs are needed. Removing the console allows you to clean hidden areas, replace faulty components, or modify the setup to better suit your needs.
Many people assume that removing such a feature requires professional help or specialized tools. But in most cases, it’s a straightforward DIY task—provided you approach it methodically. Whether you’re dealing with a high-end leather recliner or a budget-friendly fabric model, the principles remain similar. The key is understanding your specific loveseat’s design and following a careful, step-by-step process.
In this guide, we’ll walk you through everything you need to know about how to remove the center console from your loveseat. From identifying your model to safely disconnecting electronics and reassembling everything correctly, we’ve got you covered. By the end, you’ll feel confident tackling this project on your own—no handyman required.
Understanding Your Loveseat’s Console Design
Before you even think about picking up a screwdriver, it’s essential to understand how your loveseat’s center console is constructed. Not all consoles are created equal. Some are bolted directly to the frame, while others snap into place or slide into grooves. Some are purely mechanical, while others include electrical components like USB ports or LED lighting.
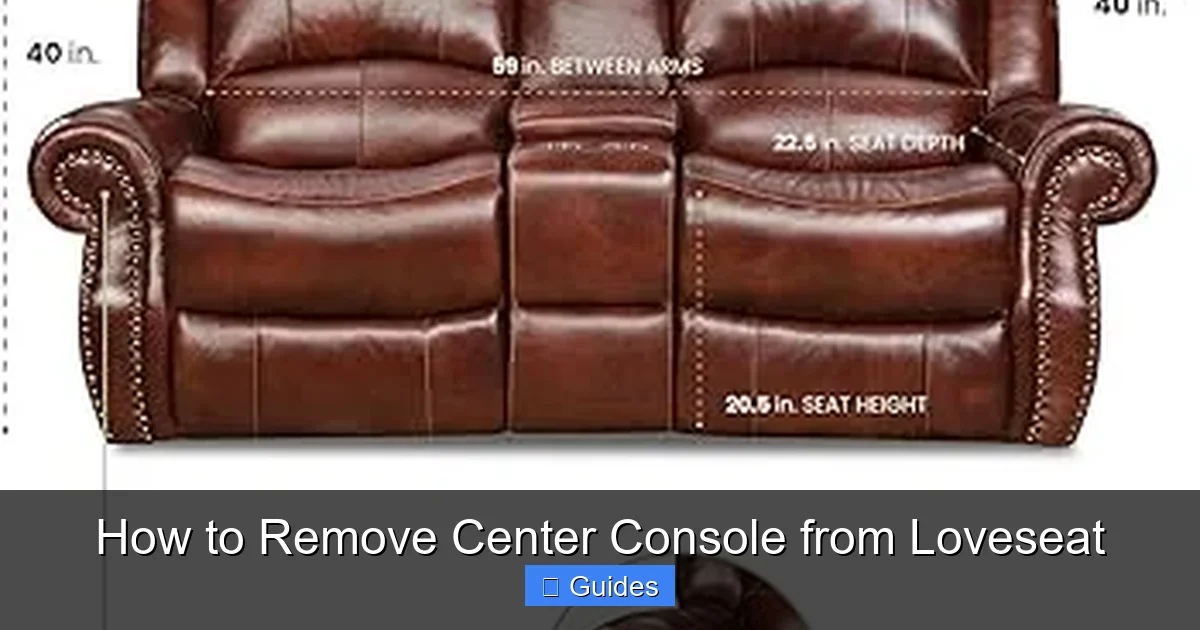
Visual guide about How to Remove Center Console from Loveseat
Image source: m.media-amazon.com
Types of Center Consoles
There are generally three types of center consoles found in loveseats:
- Fixed consoles: These are permanently attached to the seat frame and typically require unscrewing multiple bolts or screws to remove. They’re common in high-end reclining loveseats.
- Snap-in or slide-in consoles: These are designed for easy removal and reattachment. They often lock into place with latches or clips and can be lifted out after releasing the mechanism.
- Modular consoles: Found in sectional or modular furniture, these consoles are separate units that connect to the main seating pieces. They may connect via brackets, hooks, or interlocking frames.
Common Brands and Their Mechanisms
Different furniture brands use different attachment methods. For example:
- Ashley Furniture: Often uses hidden screws under the console or beneath removable panels. Some models have quick-release levers.
- La-Z-Boy: Known for reclining loveseats with consoles that may include power outlets. These usually require disconnecting wiring harnesses.
- Flexsteel: Uses durable frames with consoles secured by bolts accessible from underneath or behind.
- IKEA: Favors snap-together designs with minimal tools required—often just a flathead screwdriver or Allen key.
To identify your console type, start by examining the area around it. Look for visible screws, latches, or seams where the console meets the seat. Check underneath the loveseat—many fasteners are hidden there. If you have the owner’s manual, it’s a goldmine of information. If not, try searching online using your loveseat’s model number, usually found on a label underneath or on the back.
Electrical vs. Non-Electrical Consoles
This is a critical distinction. If your console has any powered features—like USB ports, cup warmers, ambient lighting, or cooling fans—it’s electrical. Removing such a console requires extra caution to avoid damaging wires or causing electrical shorts.
Non-electrical consoles are simpler to handle. They usually involve only mechanical fasteners and don’t require disconnecting any cables. However, even non-electrical consoles may have internal springs, hinges, or storage mechanisms that need careful handling.
Always assume there could be wiring until proven otherwise. If you’re unsure, err on the side of caution and treat it as an electrical component. We’ll cover safe disconnection procedures later in this guide.
Tools and Materials You’ll Need
Having the right tools on hand makes the entire process smoother and reduces the risk of damage. You don’t need a full workshop—just a few essentials. Here’s what to gather before you begin:
Visual guide about How to Remove Center Console from Loveseat
Image source: hevan.net
Basic Tools
- Screwdrivers: Both Phillips and flathead. Many consoles use Phillips-head screws, but some may require flatheads, especially on older models.
- Allen wrench set: Hex keys are common in modern furniture. Look for sizes like 4mm, 5mm, or 6mm.
- Socket wrench or ratchet set: Useful if your console is bolted with larger nuts or bolts, especially on heavy-duty recliners.
- Pliers: Needle-nose pliers can help grip small screws or clips that are hard to reach.
- Utility knife or seam ripper: Only if you need to carefully cut through fabric or tape covering hidden fasteners.
Optional but Helpful Tools
- Flashlight or headlamp: Many fasteners are hidden in dark areas underneath or behind the console.
- Magnetic tray or small container: Keeps screws and small parts from getting lost.
- Labeling tape and marker: Essential if you’re disconnecting multiple wires or removing several screws in different locations.
- Soft cloth or towel: Protects the floor and prevents scratching the loveseat during removal.
- Vacuum with crevice tool: Great for cleaning out dust and debris once the console is off.
Safety Gear
While this isn’t a high-risk task, a few safety precautions are wise:
- Gloves: Protect your hands from sharp edges, splinters, or pinched fingers.
- Safety glasses: Especially if you’re prying or removing components that might snap back.
- Knee pads: If you’ll be working on the floor for an extended period.
What Not to Use
Avoid using excessive force or tools that don’t fit properly. Hammers, crowbars, or power drills can easily damage upholstery, break plastic clips, or strip screws. If something isn’t coming loose, stop and reassess—there’s likely a hidden fastener or latch you’ve missed.
Also, never use water or liquid cleaners near electrical components unless the manufacturer explicitly states it’s safe. Even when disconnected, moisture can cause corrosion or short circuits.
Step-by-Step Guide to Removing the Center Console
Now that you’ve identified your console type and gathered your tools, it’s time to get to work. Follow these steps carefully to remove the center console from your loveseat without causing damage.
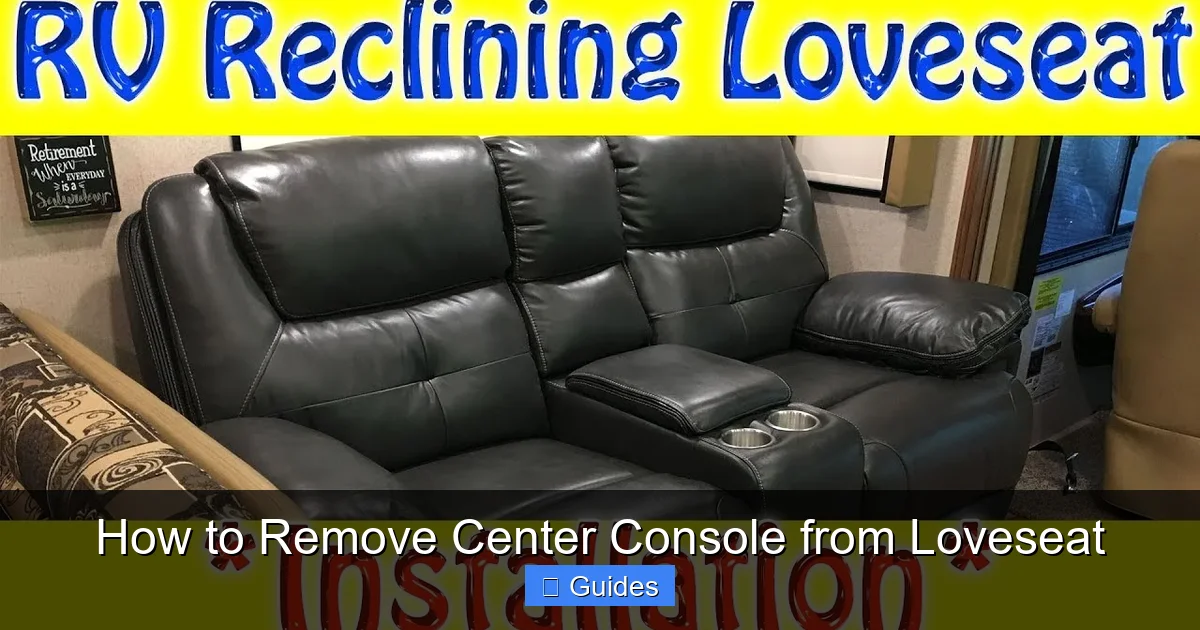
Visual guide about How to Remove Center Console from Loveseat
Image source: i.ytimg.com
Step 1: Prepare the Area
Clear the space around your loveseat. Move coffee tables, rugs, or other furniture that might get in the way. Lay down a soft towel or blanket on the floor to protect both the loveseat and your flooring in case parts fall.
If your loveseat is against a wall, consider tilting it slightly forward (if safe to do so) to access the underside. For reclining models, make sure the footrest is fully closed and locked to prevent accidental movement.
Step 2: Power Down (If Applicable)
If your console has electrical features, unplug the entire loveseat from the wall outlet. Do not rely solely on a power switch—physically disconnecting the cord ensures no current is flowing.
Some high-end models have internal batteries or capacitors that store energy. Wait at least 10–15 minutes after unplugging before proceeding to allow any residual charge to dissipate.
Step 3: Locate and Remove Visible Fasteners
Start by inspecting the console for obvious screws or bolts. Common locations include:
- Under the cup holders (lift or twist to reveal hidden screws)
- Inside the storage compartment (check the bottom or sides)
- Along the edges where the console meets the seat cushions
- Underneath the console, accessible from the front or sides
Use the appropriate tool to remove each fastener. Place screws in your magnetic tray or container as you go. If a screw feels stuck, don’t force it—apply a drop of penetrating oil (like WD-40) and wait a few minutes before trying again.
Step 4: Check for Hidden Latches or Clips
Many consoles use spring-loaded clips or latches that aren’t immediately visible. These are often found:
- Along the sides of the console, near the seat frame
- Underneath, where the console connects to the base
- Behind removable panels or trim pieces
To release these, you may need to gently pry the console away from the frame using a flathead screwdriver or plastic trim tool. Work slowly and evenly to avoid breaking clips. If resistance is high, stop and look for additional fasteners you might have missed.
Step 5: Disconnect Electrical Connections (If Any)
If your console has USB ports, lights, or other powered features, you’ll need to disconnect the wiring harness. Look for a plug or connector near the base of the console or running along the frame.
Before pulling anything apart, take a photo or use labeling tape to mark which wire goes where. Most connectors are keyed (meaning they only fit one way), but it’s still easy to mix them up.
Gently press the release tab (if present) and pull the connector straight out. Do not yank on the wires themselves—this can damage the internal connections.
Step 6: Lift or Slide the Console Out
Once all fasteners and connectors are removed, the console should come free. Depending on the design, you may need to:
- Lift it straight up
- Slide it forward or backward
- Tilt it at an angle to clear obstructions
Have a helper if the console is heavy or awkwardly shaped. Support it evenly to prevent bending or cracking.
Step 7: Inspect and Clean
With the console removed, take the opportunity to clean the exposed area. Use a vacuum to remove dust, crumbs, or pet hair from the cavity. Wipe down the frame with a dry or slightly damp cloth.
Check for signs of wear, loose screws, or damaged wiring. If you find issues, now is the time to address them before reassembly.
Reinstalling the Center Console
Once your maintenance or repair is complete, it’s time to put everything back together. Reassembly is essentially the reverse of removal, but attention to detail ensures everything works properly.
Step 1: Reconnect Electrical Components
If you disconnected any wiring, plug the connectors back in according to your labels or photos. Make sure each connection is fully seated and secure. Avoid forcing anything—if it doesn’t fit easily, double-check the orientation.
Step 2: Position the Console
Carefully align the console with the seat frame. Ensure that any grooves, slots, or alignment pins match up. Gently lower or slide it into place.
Step 3: Secure Fasteners
Reinsert all screws, bolts, or clips in the reverse order of removal. Tighten them snugly but don’t over-tighten, as this can strip threads or crack plastic parts.
Step 4: Test Functionality
Plug the loveseat back in and test all features. Check that cup holders move smoothly, storage lids open and close properly, and any electrical components (like USB ports) are working.
If something isn’t working, don’t panic. Double-check your connections and fasteners. Sometimes a loose wire or misaligned part is all that’s needed.
Step 5: Final Inspection
Sit on the loveseat and use the console as you normally would. Listen for unusual noises, feel for wobbling, and ensure everything feels secure. Make minor adjustments if needed.
Common Mistakes to Avoid
Even with the best intentions, things can go wrong. Here are some common pitfalls and how to avoid them:
Forcing Components
Never use excessive force to remove or reinstall the console. If it’s not coming loose, there’s likely a hidden fastener or latch. Forcing it can break clips, crack plastic, or damage the frame.
Ignoring Electrical Safety
Always unplug the loveseat before working on electrical components. Working on live circuits can cause shocks, short circuits, or damage to the console’s electronics.
Losing Small Parts
Screws, washers, and clips are easy to misplace. Use a labeled container or tray to keep track of everything. Taking photos during disassembly can also help you remember where each part belongs.
Skipping the Manual
Your owner’s manual contains specific instructions for your model. Skipping it in favor of guesswork can lead to mistakes. If you don’t have the manual, search online using your model number.
Reassembling Incorrectly
Putting parts back in the wrong order can prevent the console from functioning properly. Follow your disassembly steps in reverse, and double-check alignment before tightening fasteners.
Neglecting Maintenance
Use the removal process as a chance to clean and inspect. Ignoring buildup or wear can lead to bigger problems down the line.
Tips for Maintaining Your Loveseat Console
Now that you know how to remove the center console from your loveseat, here are some tips to keep it in great condition between removals:
Regular Cleaning
Wipe down the console weekly with a dry or slightly damp cloth. For sticky spills, use a mild cleaner recommended for your upholstery type. Avoid harsh chemicals that can degrade materials.
Deep Cleaning Annually
Once a year, remove the console (if possible) and vacuum the cavity thoroughly. This prevents dust and debris from accumulating and potentially damaging mechanisms.
Lubricate Moving Parts
If your console has hinges, sliders, or reclining mechanisms, apply a small amount of silicone-based lubricant every 6–12 months. Avoid oil-based lubricants, which can attract dirt.
Check Fasteners Periodically
Over time, screws and bolts can loosen due to regular use. Every few months, give them a gentle tighten—but don’t overdo it.
Protect from Spills
Use coasters or drink sleeves to minimize the risk of spills. If a spill does occur, clean it immediately to prevent staining or damage to internal components.
Inspect Wiring
If your console is electrical, periodically check the power cord and connectors for fraying, cracks, or loose connections. Replace damaged cords immediately.
When to Call a Professional
While most console removals are DIY-friendly, there are situations where calling a professional is the best choice:
Complex Wiring Issues
If you’re not comfortable working with electrical components or suspect a wiring fault, hire a qualified technician. Electrical work can be dangerous if done incorrectly.
Structural Damage
If the console or frame is cracked, bent, or otherwise damaged, a professional can assess whether repairs are possible or if replacement is needed.
Warranty Concerns
If your loveseat is still under warranty, DIY repairs might void it. Check your warranty terms before proceeding.
Lack of Tools or Space
If you don’t have the right tools or a safe workspace, it’s better to hire someone than risk injury or damage.
Repeated Problems
If the console keeps coming loose or malfunctioning after reassembly, there may be an underlying issue that requires expert diagnosis.
Remember, there’s no shame in calling a pro. Sometimes, paying for professional help saves time, stress, and money in the long run.
Conclusion
Learning how to remove the center console from your loveseat empowers you to maintain, repair, and customize your furniture with confidence. Whether you’re tackling a simple cleaning job or replacing a faulty USB port, the process is more manageable than it seems—especially when you follow a clear, step-by-step approach.
Start by understanding your loveseat’s design, gather the right tools, and work carefully to avoid damage. Take your time, label everything, and don’t hesitate to consult your manual or seek help when needed. With practice, you’ll find that what once seemed like a daunting task becomes second nature.
Your loveseat is more than just furniture—it’s where memories are made, conversations flow, and relaxation happens. Keeping it in top condition ensures it continues to serve you well for years to come. So go ahead, give that console the attention it deserves. You’ve got this!
Frequently Asked Questions
Can I remove the center console without tools?
Some loveseats have tool-free consoles that snap or slide into place. Check for latches or release buttons. However, most models require at least a screwdriver or Allen wrench.
Will removing the console void my warranty?
It depends on your manufacturer’s policy. Some warranties allow DIY maintenance, while others require professional service. Check your warranty terms before proceeding.
What if I can’t find any screws or latches?
Look under the console, inside storage compartments, or along the sides. Some fasteners are hidden under fabric or removable panels. Consult your manual or contact the manufacturer.
Is it safe to remove an electrical console myself?
Yes, as long as you unplug the loveseat first and handle wires carefully. If you’re unsure about electrical work, consider hiring a professional.
How often should I remove the console for cleaning?
Once a year is usually sufficient for deep cleaning. However, wipe down the surface weekly and address spills immediately to prevent buildup.
What if the console doesn’t fit back properly after removal?
Double-check that all parts are aligned and fasteners are tightened evenly. Ensure no wires are pinched and that clips or latches are fully engaged. Refer to your disassembly photos if needed.

At CarLegit, we believe information should be clear, factual, and genuinely helpful. That’s why every guide, review, and update on our website is created with care, research, and a strong focus on user experience.