
Tar on your car’s paint can be stubborn and unsightly, but removing it doesn’t have to mean risking scratches or clear coat damage. With the right tools and techniques—like using clay bars, tar removers, or household items—you can safely dissolve and lift tar without harming your vehicle’s finish. This guide walks you through step-by-step methods, safety tips, and preventive measures to keep your car looking clean and protected.
In This Article
- 1 Key Takeaways
- 2 📑 Table of Contents
- 3 Why Tar Is a Problem for Your Car’s Paint
- 4 Tools and Products You’ll Need
- 5 Step-by-Step Guide to Removing Tar Safely
- 6 Alternative Methods for Tar Removal
- 7 Common Mistakes to Avoid
- 8 Preventing Tar Buildup in the Future
- 9 When to Call a Professional
- 10 Conclusion
- 11 Frequently Asked Questions
Key Takeaways
- Act quickly: The sooner you remove tar, the easier it is to prevent it from bonding permanently to the paint.
- Use the right products: Choose pH-neutral tar removers or automotive-specific solvents designed to break down tar without stripping wax or clear coat.
- Clay bars are effective: A detailing clay bar can safely lift embedded tar and contaminants when used with a lubricant.
- Avoid harsh scrubbing: Scratching the surface with abrasive tools or rough cloths can cause permanent damage—always use soft microfiber towels.
- Test in a small area first: Before applying any cleaner, test it on an inconspicuous spot to ensure it doesn’t discolor or damage the paint.
- Wash and wax after removal: Once tar is gone, wash the area thoroughly and apply wax to restore protection and shine.
- Prevent future buildup: Regular washing and waxing create a protective barrier that makes tar easier to remove in the future.
📑 Table of Contents
Why Tar Is a Problem for Your Car’s Paint
Tar—often from road construction, fresh asphalt, or roofing materials—can be one of the most frustrating substances to deal with on your car’s exterior. It’s sticky, dark, and tends to cling tenaciously to painted surfaces. If left untreated, tar can harden over time, making it even more difficult to remove. Worse, improper removal techniques can scratch the clear coat or even the base paint, leading to costly repairs.
Unlike dirt or dust, tar is oil-based and chemically bonds with the paint surface. This means water and regular car soap won’t cut it. You need targeted solutions that break down the tar’s molecular structure without attacking the protective layers of your car’s finish. The good news? With the right approach, you can remove tar safely and effectively—without needing professional detailing services.
Understanding why tar is harmful goes beyond aesthetics. Prolonged exposure can lead to oxidation, especially if the tar traps moisture against the paint. This creates a breeding ground for rust and corrosion, particularly around wheel wells and lower body panels where tar is most common. That’s why prompt and proper removal isn’t just about keeping your car looking good—it’s about preserving its long-term value and integrity.
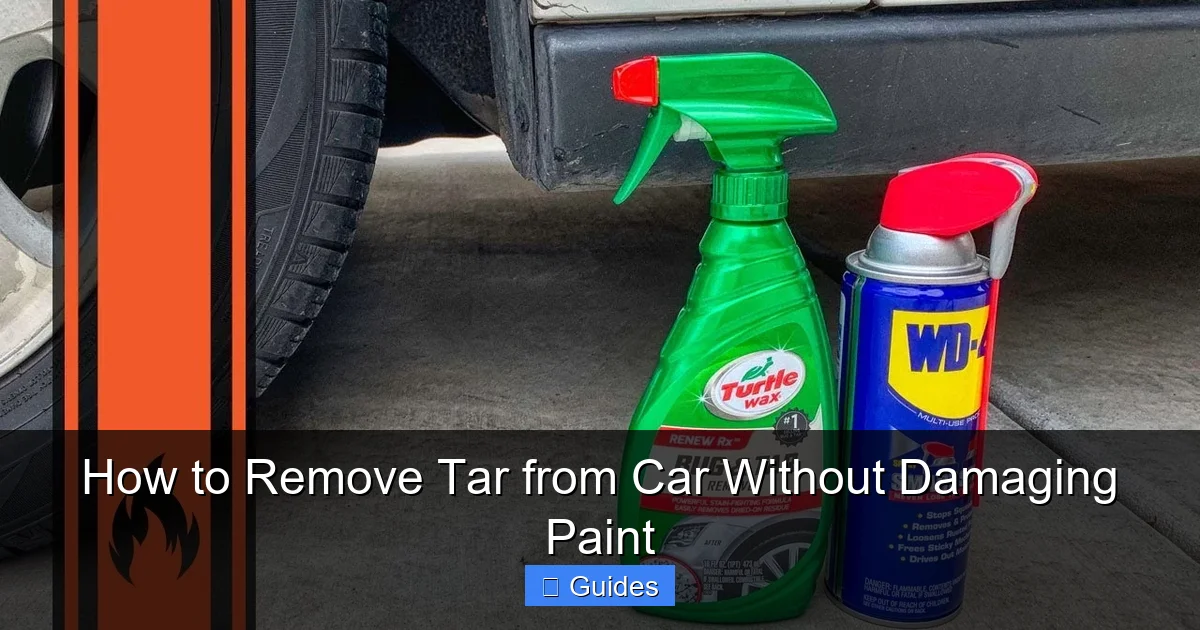
Tools and Products You’ll Need
Before you start, gather the right tools and products. Using the wrong cleaner or tool can do more harm than good. The goal is to dissolve or lift the tar without abrasion or chemical damage. Here’s a list of essentials:
Visual guide about How to Remove Tar from Car Without Damaging Paint
Image source: carsupercare.com
Automotive Tar Removers
These are specially formulated solvents designed to break down tar, sap, and grease. Look for products labeled as “safe for clear coat” or “pH-neutral.” Popular brands include Goo Gone Automotive, 3M Tar Remover, and Mothers California Gold Bug & Tar Remover. These products typically come in spray bottles for easy application and are applied directly to the affected area.
Detailing Clay Bars
A clay bar is a pliable, putty-like material that picks up contaminants embedded in the paint. When used with a lubricant (like a quick detailer spray), it glides over the surface and lifts tar, overspray, and industrial fallout. Clay bars are especially useful for light to moderate tar buildup and are completely non-abrasive when used correctly.
Microfiber Towels
Always use clean, soft microfiber towels for wiping. Avoid paper towels, rags, or abrasive cloths, which can scratch the paint. Have at least two towels on hand—one for applying the cleaner and another for buffing.
Lubricants and Quick Detailers
If you’re using a clay bar, you’ll need a lubricant to prevent it from sticking to the paint. A spray-on quick detailer or clay lubricant works perfectly. These also help when using tar removers, as they allow the product to spread evenly and reduce friction during wiping.
Plastic Razor Blades (Optional)
For thick, hardened tar, a plastic razor blade can help gently scrape it off without scratching metal. Never use metal blades—they will damage the paint. Plastic blades are flexible and safe when used at a shallow angle with plenty of lubricant.
Car Wash Soap and Water
After removing the tar, you’ll want to wash the area to remove any residue from the cleaning products. Use a high-quality car wash soap (not dish soap, which can strip wax) and rinse thoroughly.
Wax or Sealant
Once the area is clean and dry, apply a layer of wax or paint sealant to restore protection and shine. This step is crucial because cleaning can strip away existing wax, leaving the paint vulnerable.
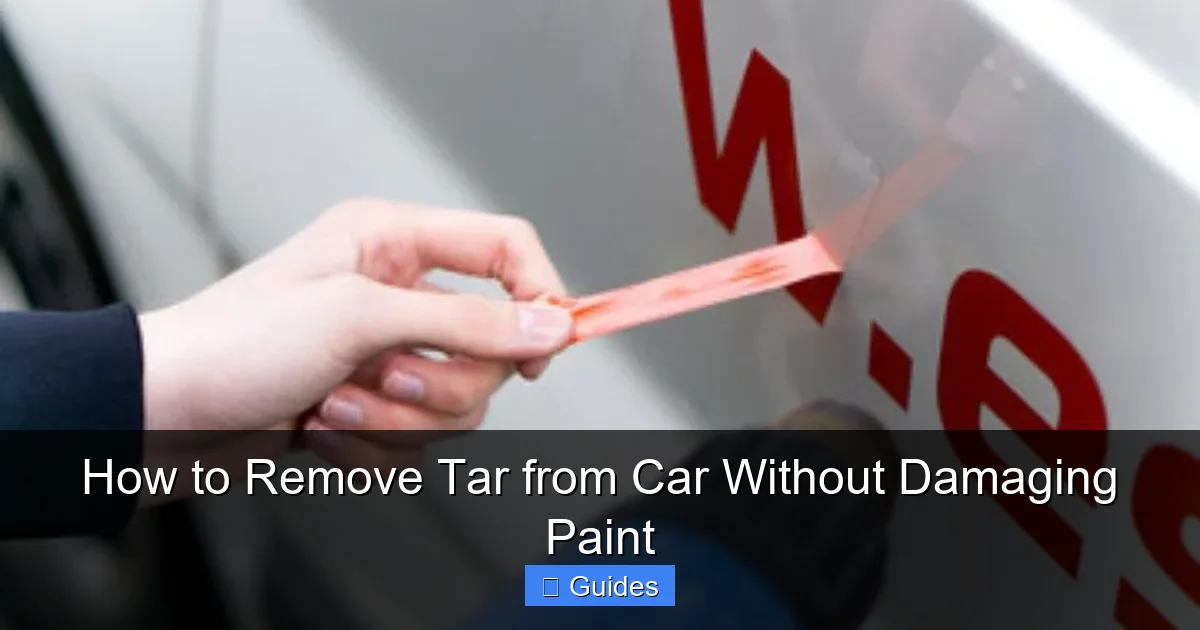
Step-by-Step Guide to Removing Tar Safely
Now that you have your tools, it’s time to get to work. Follow these steps carefully to remove tar without damaging your car’s paint. Patience and precision are key—rushing can lead to scratches or chemical damage.
Visual guide about How to Remove Tar from Car Without Damaging Paint
Image source: automotiveplanner.com
Step 1: Wash the Affected Area
Start by washing the tar-covered section with car soap and water. This removes surface dirt and grime that could scratch the paint during the tar removal process. Use a soft wash mitt and rinse thoroughly. Let the area dry completely before proceeding. Skipping this step might seem like a time-saver, but it increases the risk of embedding dirt into the paint when you apply solvents.
Step 2: Test the Cleaner
Before applying any tar remover or clay bar, test it on a small, hidden area—like behind the fuel door or under the bumper. Apply a small amount, wait a few minutes, and check for discoloration, cloudiness, or paint damage. If the test area looks fine, you’re good to proceed. This simple step can save you from costly mistakes.
Step 3: Apply Tar Remover
Spray the tar remover directly onto the affected area. Let it sit for 30 to 60 seconds—don’t let it dry. The solvent needs time to penetrate and break down the tar. Avoid applying in direct sunlight or on a hot surface, as this can cause the product to evaporate too quickly.
Step 4: Gently Wipe Away the Tar
Using a clean microfiber towel, gently wipe the area in a circular motion. The tar should start to lift and transfer onto the towel. If it’s stubborn, reapply the remover and wait another 30 seconds. Never scrub aggressively—let the product do the work. For thick tar, you may need to repeat the process 2–3 times.
Step 5: Use a Clay Bar for Residue
If any tar residue remains, use a detailing clay bar. Knead the clay to expose a clean surface, then spray the area with a lubricant. Glide the clay back and forth over the spot. You’ll feel it grabbing the contaminants. Wipe away the residue with a fresh microfiber towel. The paint should feel smooth and clean.
Step 6: Wash and Wax
Once all tar is removed, wash the entire panel with car soap to remove any leftover solvent or lubricant. Dry with a clean microfiber towel. Finally, apply a layer of wax or sealant to restore protection and enhance shine. This step also makes future tar removal easier, as wax creates a barrier that repels sticky substances.
Alternative Methods for Tar Removal
Not everyone has access to commercial tar removers, and that’s okay. There are several household alternatives that can work in a pinch—just use them with caution.
Visual guide about How to Remove Tar from Car Without Damaging Paint
Image source: automotiveplanner.com
WD-40
WD-40 is a popular DIY solution for tar removal. Spray it on the affected area, let it sit for a minute, then wipe with a microfiber towel. It’s effective because it’s a solvent that breaks down oils. However, WD-40 is not designed for automotive paint and can leave a greasy residue. Always wash the area thoroughly afterward and reapply wax.
Peanut Butter
Yes, peanut butter! The oils in natural peanut butter can help dissolve tar. Apply a small amount to the tar spot, let it sit for 5–10 minutes, then wipe it off with a cloth. Follow up with soap and water to remove the oily residue. This method is gentle but may require multiple applications for heavy tar.
Vegetable Oil or Olive Oil
Similar to peanut butter, cooking oils can soften tar. Apply a small amount, let it sit, then wipe away. Again, this is a temporary fix and requires thorough cleaning afterward to prevent attracting dirt.
Isopropyl Alcohol (70% or Higher)
Rubbing alcohol can dissolve tar, but it’s stronger than other household options. Use it sparingly and always test first. Apply with a cotton ball or cloth, then wipe clean. Alcohol can dry out wax and clear coat if overused, so follow up with wax immediately.
While these alternatives can work, they’re not as reliable or safe as automotive-specific products. Use them only in emergencies and always prioritize proper cleaning and waxing afterward.
Common Mistakes to Avoid
Even with the best intentions, it’s easy to make mistakes that can damage your car’s paint. Here are the most common pitfalls and how to avoid them.
Using Abrasive Tools
Scrubbing with steel wool, rough sponges, or metal scrapers will scratch the paint. Always use soft microfiber towels and plastic tools. If you need to scrape, use a plastic razor blade at a low angle with plenty of lubricant.
Letting Tar Remover Dry
Most tar removers are designed to be wiped off before they dry. If they dry on the paint, they can leave a hazy residue or even etch the surface. Always follow the product instructions and wipe within the recommended time.
Skipping the Wash Step
Washing before tar removal removes grit that could scratch the paint during cleaning. Skipping this step increases the risk of swirl marks and micro-scratches.
Using Dish Soap
Dish soap is too harsh for car paint. It strips wax and can dry out the clear coat. Always use a pH-balanced car wash soap.
Ignoring Wax After Cleaning
Cleaning removes protective wax. Failing to reapply wax leaves the paint exposed to UV rays, dirt, and future tar buildup. Make waxing a non-negotiable final step.
Working in Direct Sunlight
Heat causes cleaners to evaporate too quickly, reducing their effectiveness and increasing the risk of streaking. Work in the shade or during cooler parts of the day.
Preventing Tar Buildup in the Future
Once you’ve removed the tar, take steps to prevent it from becoming a recurring problem. A little prevention goes a long way in maintaining your car’s appearance.
Regular Washing
Wash your car every 1–2 weeks, especially after driving on freshly paved roads or construction zones. Frequent washing prevents tar from hardening and bonding to the paint.
Apply Wax or Sealant
Waxing every 2–3 months creates a protective barrier that makes tar easier to remove. Sealants last even longer—up to 6 months—and offer superior protection.
Use Paint Protection Film (PPF)
For high-risk areas like the front bumper, hood, and fenders, consider installing paint protection film. This clear, durable film absorbs impacts and repels tar and sap.
Park Smart
Avoid parking near construction sites, freshly paved roads, or areas with roofing work. If you must drive through tar-covered roads, rinse your car as soon as possible.
Inspect Regularly
Make it a habit to inspect your car’s lower panels and wheel wells after long drives. Spotting tar early makes removal much easier.
When to Call a Professional
Most tar removal can be done at home, but there are times when it’s best to leave it to the experts.
Extensive or Old Tar Buildup
If tar has been on the car for months or covers large areas, it may have bonded deeply with the paint. Professionals have stronger solvents and tools like dual-action polishers to safely remove it.
Paint Damage Suspected
If you notice discoloration, cloudiness, or peeling after attempted removal, stop immediately. A detailer can assess whether the clear coat is compromised and recommend repair options.
Lack of Confidence
If you’re unsure about the process or don’t have the right tools, it’s better to pay for professional service than risk damaging your car. A good detailer can remove tar quickly and safely, often in under an hour.
Professional detailing isn’t cheap, but it’s a worthwhile investment if you’re dealing with a high-value vehicle or extensive contamination.
Conclusion
Removing tar from your car doesn’t have to be a stressful or damaging process. With the right products, techniques, and a little patience, you can restore your vehicle’s finish without harming the paint. Start by washing the area, use a quality tar remover or clay bar, and always finish with wax to protect the surface.
Remember, the key to success is acting quickly and avoiding harsh methods. Whether you’re using a commercial product or a household alternative, always test first and work gently. And don’t forget prevention—regular washing and waxing make future tar removal a breeze. Your car deserves to look its best, and now you have the knowledge to keep it that way.
Frequently Asked Questions
Can I use Goo Gone on car paint?
Yes, but only the automotive version. Regular Goo Gone contains citrus solvents that can damage clear coat. Goo Gone Automotive is formulated to be safe for car paint when used as directed.
Will tar remover remove wax?
Most tar removers will strip wax, which is why it’s important to reapply wax after cleaning. This restores protection and shine to the paint.
How long can tar stay on car paint?
It’s best to remove tar within a few days. The longer it sits, the more it bonds with the paint and the harder it becomes to remove without risking damage.
Can I use a clay bar on windows?
Yes, clay bars are safe for glass and can remove tar, sap, and water spots. Use a dedicated glass lubricant and wipe with a clean microfiber towel.
Is it safe to use vinegar to remove tar?
Vinegar is not recommended. It’s acidic and can damage clear coat over time. Stick to pH-neutral automotive products for safety.
What if tar has stained the paint?
If tar has left a stain or discoloration, it may have penetrated the clear coat. In such cases, professional polishing or paint correction may be needed to restore the finish.

At CarLegit, we believe information should be clear, factual, and genuinely helpful. That’s why every guide, review, and update on our website is created with care, research, and a strong focus on user experience.