
Dim headlights on your 2014 Nissan Altima can compromise safety and visibility. This guide walks you through practical, step-by-step solutions—from replacing bulbs to checking wiring—so you can restore bright, reliable illumination without a costly mechanic visit.
If you’ve noticed your 2014 Nissan Altima’s headlights aren’t as bright as they used to be, you’re not alone. Dim headlights are a common issue for this model year, and they can seriously affect your nighttime driving safety. Whether you’re navigating dark country roads or just trying to see the lane markings in the rain, poor visibility increases the risk of accidents. The good news? Most causes of dim headlights are fixable at home with basic tools and a little patience.
The 2014 Nissan Altima uses halogen headlight bulbs, which are reliable but naturally degrade over time. After 3–5 years of use, these bulbs lose up to 30% of their original brightness. Add in environmental factors like UV exposure, moisture, and road debris, and it’s no surprise that many Altima owners experience dimming. But before you assume it’s just “old age,” it’s worth investigating the root cause. In many cases, a simple fix—like cleaning the lens or replacing a corroded connector—can make a dramatic difference.
In this guide, we’ll walk you through the most effective ways to fix dim headlights on your 2014 Nissan Altima. We’ll cover everything from basic maintenance to electrical diagnostics and even upgrade options. Whether you’re a DIY beginner or a seasoned tinkerer, these steps are designed to be clear, safe, and effective. By the end, you’ll have brighter, safer headlights and the confidence to tackle similar issues in the future.
In This Article
- 1 Key Takeaways
- 2 📑 Table of Contents
- 3 Why Are My 2014 Nissan Altima Headlights Dim?
- 4 Step 1: Replace the Headlight Bulbs
- 5 Step 2: Clean or Restore the Headlight Lenses
- 6 Step 3: Inspect and Clean Electrical Connections
- 7 Step 4: Test the Headlight Switch and Relay
- 8 Step 5: Upgrade to LED or HID Bulbs (With Caution)
- 9 Step 6: Check the Alternator and Battery
- 10 Step 7: Consider a Wiring Harness Upgrade
- 11 Conclusion
- 12 Frequently Asked Questions
Key Takeaways
- Check and replace old bulbs: Over time, halogen bulbs dim and lose efficiency; replacing them with high-quality equivalents can restore brightness.
- Clean or replace foggy headlight lenses: Oxidation and UV damage cause yellowing, blocking light output; polishing or replacing lenses improves clarity.
- Inspect and clean electrical connections: Corroded or loose connectors increase resistance, reducing power to the headlights.
- Test the headlight switch and relay: A faulty switch or relay can limit voltage delivery, leading to dim lights.
- Upgrade to LED or HID bulbs (if compatible): Modern bulbs offer brighter, whiter light and longer life, but ensure they meet DOT standards.
- Check the alternator and battery: Weak electrical output from a failing alternator or old battery can cause overall dimming.
- Consider a wiring harness upgrade: Factory wiring may not support high-output bulbs; a relay harness ensures full power delivery.
📑 Table of Contents
- Why Are My 2014 Nissan Altima Headlights Dim?
- Step 1: Replace the Headlight Bulbs
- Step 2: Clean or Restore the Headlight Lenses
- Step 3: Inspect and Clean Electrical Connections
- Step 4: Test the Headlight Switch and Relay
- Step 5: Upgrade to LED or HID Bulbs (With Caution)
- Step 6: Check the Alternator and Battery
- Step 7: Consider a Wiring Harness Upgrade
- Conclusion
Why Are My 2014 Nissan Altima Headlights Dim?
Before jumping into repairs, it’s important to understand why your headlights are dim in the first place. Dim headlights aren’t always a single-issue problem—they can result from a combination of factors. Identifying the root cause will help you choose the right fix and avoid unnecessary replacements.
One of the most common reasons is simply bulb aging. Halogen bulbs work by heating a tungsten filament inside a gas-filled glass envelope. Over time, the filament wears down, and the gas inside can degrade, reducing light output. Even if the bulb still works, it may not be producing enough lumens to illuminate the road effectively. If your headlights are more than three years old, this is likely a contributing factor.
Another frequent culprit is lens oxidation. The polycarbonate plastic used in modern headlight lenses is durable but susceptible to UV damage. Over time, sunlight breaks down the outer layer, causing a yellowish or hazy appearance. This haze scatters and blocks light, making your headlights appear dim even if the bulbs are new. This is especially common in warmer climates or if the car is frequently parked outdoors.
Electrical issues also play a big role. The 2014 Altima’s headlight circuit includes fuses, relays, switches, and wiring. If any of these components are corroded, loose, or damaged, they can restrict the flow of electricity. This results in lower voltage reaching the bulbs, which directly impacts brightness. For example, a corroded ground connection might only deliver 10 volts instead of the standard 12–14 volts, significantly dimming the lights.
Finally, the vehicle’s overall electrical system health matters. A weak battery or failing alternator can’t maintain proper voltage, especially when multiple systems (like headlights, AC, and infotainment) are running. If your headlights dim when you turn on the radio or AC, it could be a sign of an electrical load issue.
Common Symptoms of Dim Headlights
Recognizing the signs of dim headlights can help you diagnose the problem early. Here are some telltale symptoms:
– Headlights appear noticeably dimmer than usual, especially at night.
– One headlight is significantly dimmer than the other.
– Lights flicker or fluctuate in brightness while driving.
– Headlights dim when other electrical systems are activated (e.g., turning on wipers or AC).
– The beam pattern looks uneven or scattered.
If you notice any of these, it’s time to investigate. Don’t wait until you’re caught in a storm with poor visibility—addressing the issue now can prevent safety hazards down the road.
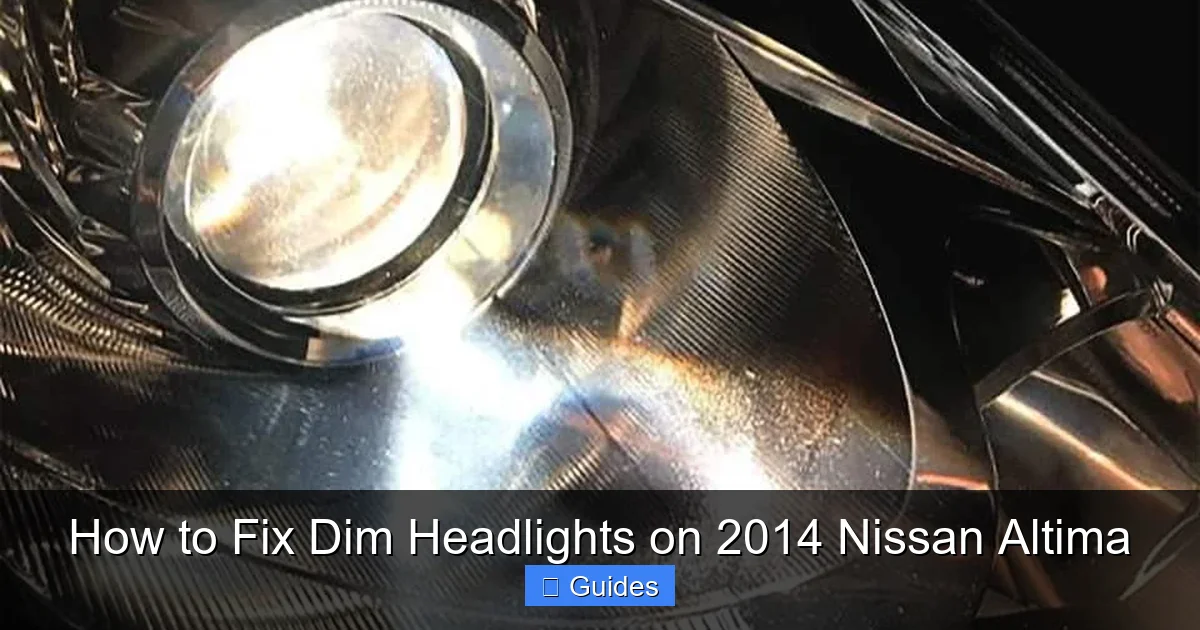
Step 1: Replace the Headlight Bulbs
Visual guide about How to Fix Dim Headlights on 2014 Nissan Altima
Image source: cdn.carcomplaints.com
The first and simplest fix for dim headlights is replacing the bulbs. Even if they’re not completely burned out, old halogen bulbs lose efficiency over time. Replacing them with new, high-quality bulbs can restore up to 30% more brightness.
The 2014 Nissan Altima uses H11 halogen bulbs for the low beams and 9005 (HB3) for the high beams. These are widely available and relatively easy to install. When shopping for replacements, avoid the cheapest options—low-quality bulbs may not last long and can even damage your headlight housing due to improper heat distribution.
How to Replace Headlight Bulbs on a 2014 Nissan Altima
Replacing the bulbs is a straightforward process that takes about 15–20 minutes per side. Here’s how to do it safely:
1. **Turn off the engine and remove the key.** This ensures no power is flowing to the headlight circuit.
2. **Open the hood and locate the headlight assembly.** The 2014 Altima has a sealed unit, but the bulb access panel is on the back.
3. **Remove the rubber dust cover.** Twist it counterclockwise and pull it off. Be gentle—these covers can become brittle with age.
4. **Disconnect the wiring harness.** Press the clip and pull the connector straight out.
5. **Release the bulb retainer clip.** This is a metal or plastic clip that holds the bulb in place. Push or lift it to release.
6. **Remove the old bulb.** Pull it straight out without touching the glass. If you do touch it, clean it with rubbing alcohol—oil from your skin can cause hot spots and shorten bulb life.
7. **Insert the new bulb.** Make sure it’s seated correctly and the tabs align with the housing.
8. **Reattach the retainer clip, wiring harness, and dust cover.** Ensure everything is secure and watertight.
9. **Test the headlights.** Turn them on to confirm they’re working and properly aligned.
Choosing the Right Replacement Bulbs
Not all bulbs are created equal. Here are some tips for selecting the best replacement:
– **Stick to reputable brands:** Philips, Sylvania, and GE offer reliable halogen bulbs with consistent performance.
– **Check lumens and color temperature:** Look for bulbs rated at 1,000–1,400 lumens for low beams. A color temperature of 3,200K–4,000K provides a bright white light without being too blue (which can reduce visibility in fog).
– **Avoid “super bright” or “xenon blue” bulbs:** These often don’t meet DOT standards and can blind oncoming drivers. They may also overload the factory wiring.
For a modest upgrade, consider **halogen bulbs with enhanced coatings**, such as Philips X-tremeVision or Sylvania SilverStar Ultra. These offer up to 30% more light than standard bulbs and are street-legal.
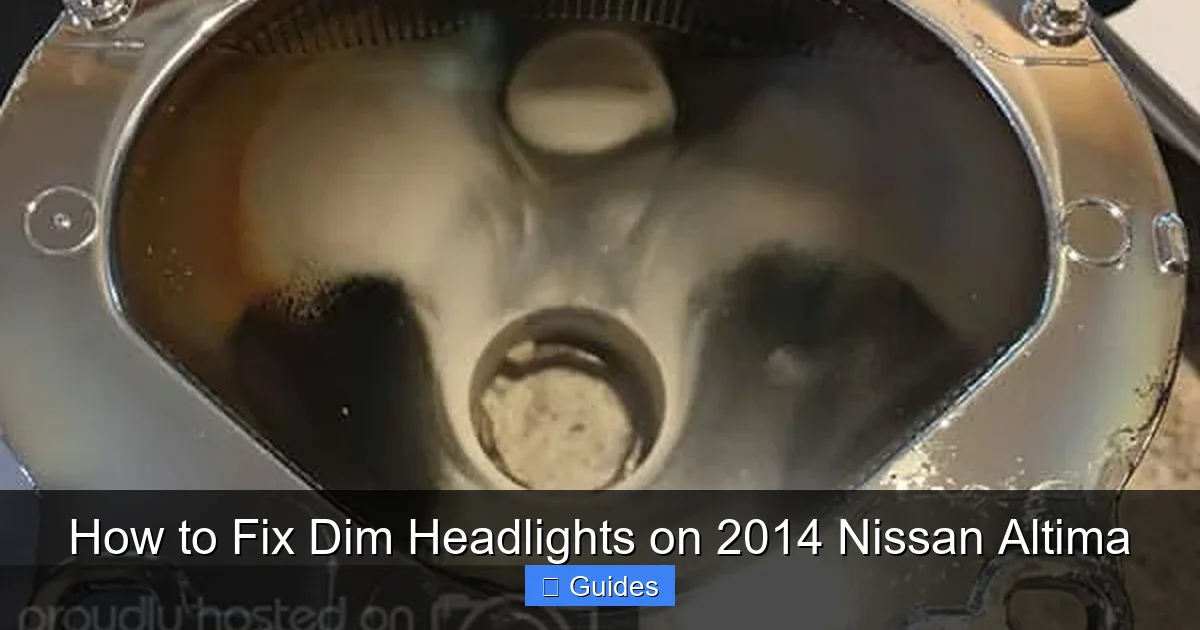
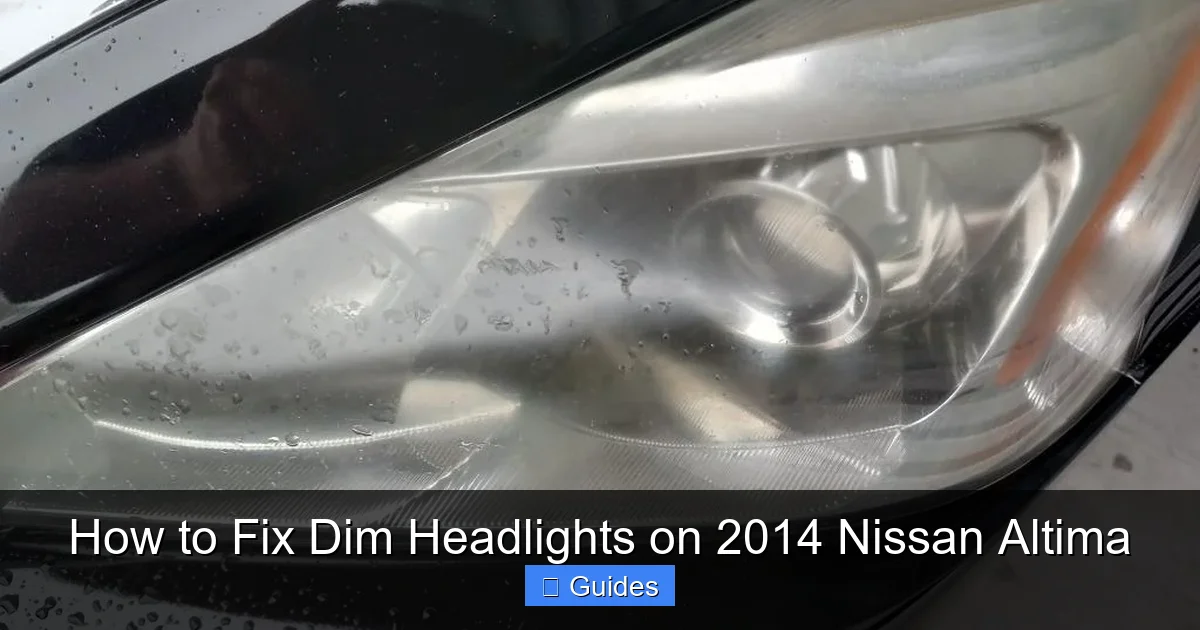
Step 2: Clean or Restore the Headlight Lenses
Visual guide about How to Fix Dim Headlights on 2014 Nissan Altima
Image source: cdn.carcomplaints.com
Even with new bulbs, dim headlights can persist if the lenses are foggy or yellowed. The plastic lenses on the 2014 Altima are prone to oxidation, especially if the car is exposed to sunlight and weather. This haze acts like a filter, blocking up to 50% of the light output.
Cleaning the lenses can make a dramatic difference. You don’t need professional tools—just a few household items and some elbow grease.
DIY Headlight Restoration Kit Method
You can buy a headlight restoration kit (like 3M or Sylvania) for around $15–$25. These kits usually include sandpaper, polishing compound, and a UV sealant. Here’s how to use one:
1. **Clean the lens.** Wash the headlight with soap and water, then dry it thoroughly.
2. **Tape off the surrounding area.** Use painter’s tape to protect the paint and trim.
3. **Sand the lens.** Start with 800-grit sandpaper (wet sanding) to remove the top oxidized layer. Rinse frequently. Move to 1000-grit, then 2000-grit for a smooth finish.
4. **Polish the lens.** Apply the included polishing compound with a microfiber cloth or drill attachment. Buff in circular motions until the lens is clear.
5. **Apply UV sealant.** This protects the plastic from future yellowing. Let it cure as directed.
Alternative: Toothpaste or Baking Soda Paste
If you don’t have a kit, you can use toothpaste (non-gel, whitening type) or a baking soda and water paste as a mild abrasive. Apply with a soft cloth, rub in circles for 2–3 minutes per lens, then rinse and dry. Follow with a UV protectant like wax or a dedicated headlight sealant.
When to Replace the Headlight Assembly
If the lenses are deeply cracked, warped, or the internal reflector is damaged, polishing won’t help. In that case, consider replacing the entire headlight assembly. OEM replacements can be expensive ($200–$400 per side), but aftermarket options are available for $80–$150. Ensure any replacement is DOT-compliant and properly sealed to prevent moisture buildup.
Step 3: Inspect and Clean Electrical Connections
Visual guide about How to Fix Dim Headlights on 2014 Nissan Altima
Image source: cdn.carcomplaints.com
Electrical resistance is a hidden cause of dim headlights. Corrosion, loose connections, or damaged wiring can reduce the voltage reaching your bulbs, leading to poor performance—even with new bulbs and clean lenses.
The 2014 Altima’s headlight circuit includes several key points: the bulb socket, ground connection, fuse box, and relay. A problem at any of these points can cause dimming.
How to Check and Clean Connections
1. **Inspect the bulb socket.** Look for green or white corrosion, melted plastic, or loose pins. If corroded, clean with electrical contact cleaner and a small brush. If damaged, replace the socket.
2. **Check the ground connection.** Locate the ground wire (usually black) connected to the chassis near the headlight. Remove the bolt, clean the contact point with sandpaper, and reattach tightly.
3. **Test the fuse.** The headlight fuse is in the engine compartment fuse box (usually 10A or 15A). Use a multimeter to check for continuity. Replace if blown.
4. **Test the relay.** The headlight relay is also in the fuse box. Swap it with a known good relay (like the horn relay) to see if the problem moves. If so, replace the faulty relay.
Using a Multimeter to Test Voltage
A multimeter can help you pinpoint electrical issues. Set it to DC voltage and probe the positive and negative terminals at the bulb socket with the headlights on. You should see 12–14 volts. If it’s below 11 volts, there’s a voltage drop somewhere in the circuit.
Common causes of voltage drop include:
– Corroded connectors
– Undersized wiring
– Faulty switches
– High resistance in the ground path
If you find a significant drop, trace the circuit back to the source. Clean connections, repair damaged wires, or consider upgrading to a relay harness (see Step 5).
Step 4: Test the Headlight Switch and Relay
The headlight switch and relay are critical components in the lighting system. If either fails, it can limit power delivery and cause dim or flickering lights.
The 2014 Altima uses a combination switch on the steering column to control headlights, high beams, and turn signals. Over time, the contacts inside can wear out or become dirty, leading to poor conductivity.
How to Test the Headlight Switch
Testing the switch requires some electrical knowledge, but here’s a simple method:
1. **Turn on the headlights.** Observe if both sides are dim or just one.
2. **Wiggle the switch.** If the lights flicker or brighten when you move the stalk, the switch may be faulty.
3. **Check for voltage at the switch output.** Use a multimeter to test the wire going to the relay. If there’s no voltage when the switch is on, the switch is likely bad.
Replacing the combination switch is a moderate DIY job. It involves removing the steering column covers and disconnecting the electrical connectors. Parts cost $50–$100, and installation takes about an hour.
Testing and Replacing the Relay
The headlight relay is located in the engine compartment fuse box. It acts as a switch that allows high current to flow to the bulbs when the headlight switch is activated.
To test it:
– Locate the relay (refer to your owner’s manual or fuse box diagram).
– Swap it with a similar relay (e.g., horn or fog light relay).
– Turn on the headlights. If they now work properly, the original relay is faulty.
Relays are inexpensive ($10–$20) and easy to replace—just pull out the old one and push in the new one.
Step 5: Upgrade to LED or HID Bulbs (With Caution)
Many 2014 Altima owners consider upgrading to LED or HID bulbs for brighter, whiter light. While these can improve visibility, they come with important caveats.
LED Bulb Upgrades
LED bulbs are energy-efficient, long-lasting, and produce a crisp white light. However, most plug-and-play LED bulbs are not truly compatible with halogen housings. The 2014 Altima’s reflector design is optimized for halogen filaments, which emit light in all directions. LEDs emit light in a narrow beam, which can cause glare, poor beam pattern, and reduced visibility.
If you choose to upgrade:
– **Select CANBUS-compatible LEDs.** These prevent error messages on the dashboard.
– **Look for bulbs with adjustable beam patterns.** Some LEDs allow you to rotate the chip to match the housing.
– **Avoid extremely bright LEDs.** They may overload the factory wiring or cause overheating.
Popular options include the **Auxbeam H11 LED** or **BEAMTECH H11 LED**, which are designed for halogen reflectors.
HID (Xenon) Bulb Upgrades
HID bulbs produce intense, bright light and are common in luxury vehicles. However, they require a ballast and are not plug-and-play. Installing HIDs in a halogen housing can create dangerous glare and is often illegal unless the housing is projector-style (which the 2014 Altima does not have).
If you want HID-level brightness, consider a **complete HID conversion kit with projector lenses**. This is a more involved upgrade but ensures proper beam control and legality.
Important Legal and Safety Notes
– **DOT compliance:** Only use bulbs that are DOT-approved. Non-compliant bulbs can result in fines or failed inspections.
– **Aim your headlights:** After any bulb change, check the beam alignment. Misaligned lights can blind oncoming drivers.
– **Avoid “blue” or “purple” bulbs:** These reduce visibility in rain and fog and are often illegal.
Step 6: Check the Alternator and Battery
If your headlights dim when you turn on other electrical systems—like the AC, radio, or wipers—it could be a sign of a weak electrical system. The alternator charges the battery while the engine runs, and if it’s failing, it can’t keep up with demand.
How to Test the Alternator
Use a multimeter to check the voltage at the battery:
– With the engine off: 12.4–12.7 volts (fully charged).
– With the engine running: 13.8–14.4 volts (alternator charging).
If the voltage is below 13.8 volts with the engine running, the alternator may be failing. Other signs include:
– Dimming dashboard lights
– Slow cranking
– Battery warning light on the dash
A failing alternator should be replaced promptly—continuing to drive can lead to a dead battery and stranded vehicle.
Testing the Battery
Even a healthy alternator can’t compensate for a weak battery. Use a multimeter or visit an auto parts store for a free battery test. Most batteries last 3–5 years. If yours is older or shows low voltage, replace it.
Step 7: Consider a Wiring Harness Upgrade
The factory wiring in the 2014 Altima is designed for standard halogen bulbs. If you’ve upgraded to high-output LEDs or HIDs, the existing wiring may not deliver full power, leading to dim or flickering lights.
A **relay harness** bypasses the factory wiring and connects the headlights directly to the battery through a relay. This ensures maximum voltage and reduces strain on the headlight switch.
Benefits of a Relay Harness
– Delivers full 12–14 volts to the bulbs
– Reduces heat and wear on the headlight switch
– Prevents voltage drop over long wire runs
– Improves brightness and consistency
Installation involves connecting the harness to the battery, relay, and headlight sockets. Most kits include detailed instructions and take about 30–60 minutes to install.
Popular brands include **LASFIT** and **OPT7**, which offer plug-and-play harnesses for the Altima.
Conclusion
Dim headlights on your 2014 Nissan Altima don’t have to be a permanent problem. By following the steps in this guide—replacing bulbs, cleaning lenses, checking electrical connections, and upgrading components when needed—you can restore bright, reliable illumination and improve your nighttime driving safety.
Start with the simplest fixes: new bulbs and lens restoration. These often solve the issue completely. If problems persist, move on to electrical diagnostics. Test voltage, inspect connections, and consider a relay harness if you’ve upgraded your bulbs.
Remember, safety comes first. Always use DOT-compliant parts, aim your headlights properly, and avoid modifications that could blind other drivers. With a little effort, your Altima’s headlights can shine as bright as the day you bought it.
Frequently Asked Questions
Why are only one of my headlights dim?
This usually points to a problem with that specific side—such as a failing bulb, corroded socket, or poor ground connection. Check the bulb first, then inspect the wiring and ground point on that side.
Can I use LED bulbs in my 2014 Nissan Altima?
Yes, but choose CANBUS-compatible LEDs designed for halogen reflectors. Avoid ultra-bright or blue-tinted LEDs, as they may cause glare or legal issues.
How often should I replace my headlight bulbs?
Halogen bulbs typically last 500–1,000 hours. Replace them every 3–5 years or when you notice dimming, flickering, or one side going out.
Is it safe to drive with dim headlights?
No. Dim headlights reduce visibility and increase accident risk, especially at night or in bad weather. Address the issue as soon as possible.
Will cleaning my headlights really make them brighter?
Yes! Oxidized lenses can block up to 50% of light output. Restoring them with a kit or DIY method can significantly improve brightness.
Do I need a mechanic to fix dim headlights?
Not necessarily. Most fixes—like bulb replacement, lens cleaning, and connection checks—can be done at home with basic tools. Only complex electrical issues may require professional help.

At CarLegit, we believe information should be clear, factual, and genuinely helpful. That’s why every guide, review, and update on our website is created with care, research, and a strong focus on user experience.