
Installing a front license plate on your Hyundai Elantra is a simple but essential task for staying legal and avoiding fines. This guide walks you through the entire process—from checking local laws to mounting the plate securely—using basic tools and clear instructions.
In This Article
- 1 Key Takeaways
- 2 📑 Table of Contents
- 3 Why You Need a Front License Plate on Your Hyundai Elantra
- 4 Understanding Your Hyundai Elantra’s Front Bumper Design
- 5 Tools and Materials You’ll Need
- 6 Step-by-Step Installation Guide
- 7 Common Mistakes to Avoid
- 8 Maintenance and Long-Term Care
- 9 Alternative Installation Methods
- 10 Conclusion
- 11 Frequently Asked Questions
- 11.1 Do all Hyundai Elantras come with front license plate brackets?
- 11.2 Can I install a front license plate without drilling?
- 11.3 What size drill bit should I use for the bumper?
- 11.4 Will drilling damage my Elantra’s bumper?
- 11.5 Can I use the same bracket for different Elantra models?
- 11.6 Is it legal to drive without a front license plate in my state?
Key Takeaways
- Check local laws first: Many states require front license plates, and driving without one can result in fines or tickets.
- Use the right tools: A drill, screwdriver, measuring tape, and license plate bracket are typically needed for installation.
- Locate the factory mounting points: Most Hyundai Elantras have pre-drilled holes or designated spots for front plate installation.
- Choose the correct bracket: OEM or aftermarket brackets ensure a secure and clean fit without damaging your bumper.
- Avoid common mistakes: Over-tightening screws, misaligning the plate, or using incorrect hardware can cause damage or rattling.
- Test for stability: After installation, gently tug the plate to ensure it’s firmly attached and won’t fall off while driving.
- Maintain regularly: Check screws and alignment periodically, especially after car washes or long trips.
📑 Table of Contents
Why You Need a Front License Plate on Your Hyundai Elantra
If you’re driving a Hyundai Elantra, you might be wondering whether you really need a front license plate. The short answer? In many places, yes—and it’s not just about avoiding a ticket. While some states don’t require front plates, a growing number do, and the rules are strictly enforced. For example, states like California, New York, Texas, and Florida all mandate front license plates. Even if you live in a state that doesn’t require it, having one can improve your vehicle’s visibility and help law enforcement identify your car in case of an incident.
Beyond legality, there are practical reasons to install a front plate. It helps with automated license plate recognition (ALPR) systems used by police and toll roads. It can also deter theft or vandalism, as your vehicle is easier to track. Plus, if you ever sell your Elantra, having both plates properly installed adds to the car’s professionalism and resale value.
Now, you might be thinking, “But my Elantra doesn’t come with a front plate bracket!” That’s common. Hyundai often ships vehicles without the front bracket installed, especially in states where it’s not required. But don’t worry—installing one is easier than you think. With the right tools and a little patience, you can have your front license plate securely mounted in under 30 minutes.
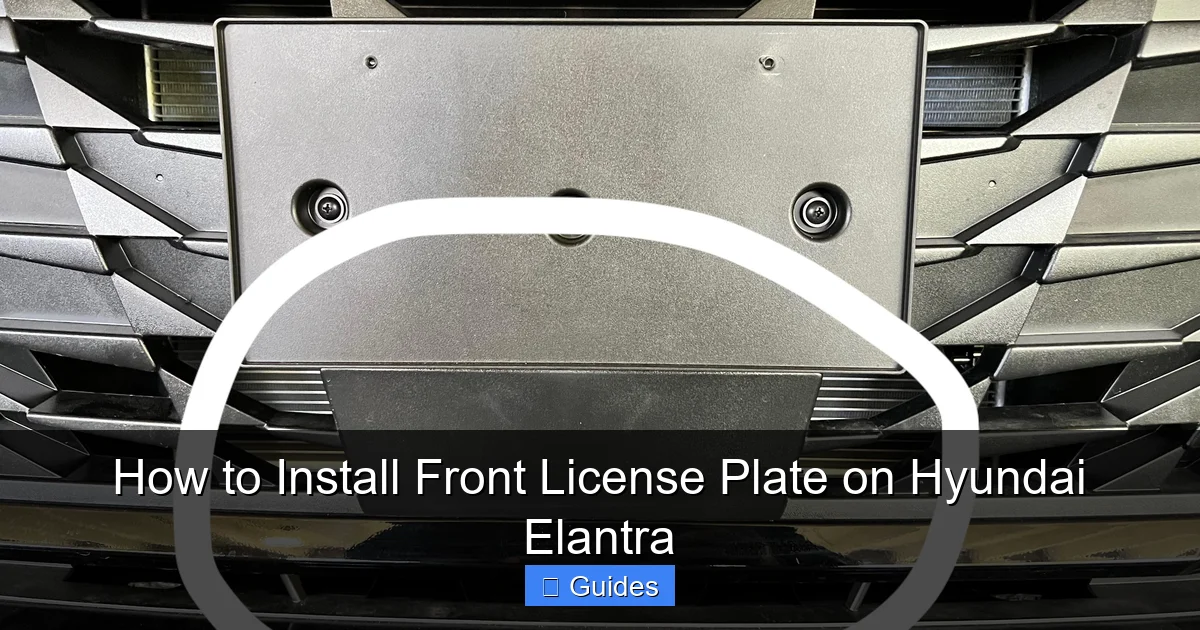
Understanding Your Hyundai Elantra’s Front Bumper Design

Visual guide about How to Install Front License Plate on Hyundai Elantra
Image source: thecarhow.com
Before you start drilling or screwing anything into your bumper, it’s important to understand how the Hyundai Elantra is designed. The Elantra has evolved over the years, and bumper styles have changed with each generation. However, most models—especially from 2011 onward—have a plastic front bumper with pre-marked or pre-drilled locations for a license plate bracket.
On newer models (2017–2023), Hyundai often includes small indentations or dimples on the lower front bumper where the bracket should go. These are not holes yet, but they indicate where you should drill. This design helps maintain the car’s aerodynamics and aesthetics while allowing for easy installation when needed.
If you have an older Elantra (2007–2016), you might find that the bumper has no markings at all. In that case, you’ll need to measure and mark the spot yourself. The standard license plate is 12 inches wide and 6 inches tall, so the bracket should be centered horizontally on the bumper, usually about 2–4 inches above the lower edge.
One thing to note: the Elantra’s front bumper is made of flexible plastic. This means you don’t need to drill into metal—just the plastic itself. However, you should still use caution to avoid cracking or damaging the material. Using a sharp drill bit and low speed will help prevent splintering.
Locating the Mounting Points
To find the correct spot for your bracket, stand in front of your car and look at the center of the bumper. Most Elantras have a subtle vertical seam or alignment line down the middle. Use this as your guide. Measure 12 inches wide from center to determine where the left and right edges of the plate will sit.
Next, look for small bumps or depressions. These are often where Hyundai intends for you to drill. If you don’t see any, don’t panic—just use a measuring tape to find the center and mark it lightly with a pencil. From there, measure 5.5 inches to the left and right to mark the screw holes (standard plate brackets are about 11 inches wide between screw centers).
Dealing with Different Elantra Models
Not all Elantras are the same. The 2021–2023 models, for example, have a more aggressive front fascia with a wide grille and integrated air dams. This can make bracket placement trickier. In these cases, you may need a low-profile bracket that sits flush with the bumper to avoid interfering with the grille or sensors.
Hybrid and N-Line versions may also have different bumper designs. The Elantra N-Line, for instance, has a sportier front end with larger air intakes. You’ll want to choose a bracket that doesn’t block airflow or look out of place. Some owners opt for a custom bracket or a plate frame that matches the car’s sporty aesthetic.
No matter your model, the key is to maintain symmetry and avoid obstructing any sensors, cameras, or parking assist systems. The front bumper on newer Elantras often houses radar sensors for adaptive cruise control or forward collision warning. Drilling too high or too low could interfere with these systems.
Tools and Materials You’ll Need
Visual guide about How to Install Front License Plate on Hyundai Elantra
Image source: i.redd.it
Before you begin, gather all the necessary tools and materials. Having everything ready will make the process smoother and reduce the chance of mistakes. Here’s a checklist of what you’ll need:
– License plate bracket (OEM or aftermarket)
– License plate screws (usually 1/4-inch or M6 size)
– Drill with a 1/8-inch or 3/16-inch drill bit
– Screwdriver (Phillips or flathead, depending on your screws)
– Measuring tape
– Pencil or marker
– Masking tape
– Safety glasses
– Optional: Threaded inserts or self-tapping screws for extra security
You can find a license plate bracket at most auto parts stores, Hyundai dealerships, or online retailers like Amazon or RockAuto. OEM brackets are designed specifically for your Elantra model and usually fit perfectly. Aftermarket brackets are often cheaper and come in various styles, including chrome, black, or carbon fiber finishes.
If you’re unsure which bracket to buy, check your owner’s manual or search online using your Elantra’s year, make, and model. Many forums and YouTube videos show exact bracket models that work well.
Choosing the Right Bracket
There are two main types of brackets: bolt-on and clip-on. Bolt-on brackets require drilling and are more secure, making them ideal for long-term use. Clip-on brackets attach to existing holes or use adhesive, but they’re less reliable and may not hold up in harsh weather or high-speed driving.
For the Elantra, a bolt-on bracket is recommended. It provides a sturdy mount and prevents the plate from vibrating or rattling. Look for a bracket that includes rubber grommets or washers to protect the bumper and reduce noise.
Some brackets come with built-in license plate frames, which can give your car a cleaner look. Just make sure the frame doesn’t cover any part of the plate—this could be illegal in some states.
Safety First: Protecting Yourself and Your Car
Always wear safety glasses when drilling to protect your eyes from plastic shards. Work in a well-lit area, preferably outdoors or in a garage. If you’re using a power drill, set it to a low speed to avoid cracking the bumper.
Before drilling, place a piece of masking tape over the spot. This helps prevent the drill bit from slipping and reduces chipping. Mark the center of each hole with a pencil, then drill slowly and steadily.
After drilling, clean up any plastic debris with a soft brush or compressed air. This ensures a clean surface for the bracket and prevents moisture from getting trapped behind the plate.
Step-by-Step Installation Guide
Visual guide about How to Install Front License Plate on Hyundai Elantra
Image source: renewlg405.weebly.com
Now that you’ve got your tools and bracket ready, it’s time to install the front license plate. Follow these steps carefully to ensure a secure and professional-looking installation.
Step 1: Prepare the Area
Start by cleaning the front bumper with soap and water. Remove any dirt, grease, or wax that could interfere with drilling or adhesion. Dry the area completely with a microfiber cloth.
Next, locate the center of the bumper using the vertical seam or alignment line. Measure 12 inches wide and mark the left and right edges of where the plate will sit. Then, measure 5.5 inches inward from each edge to find the screw hole locations. Mark these spots lightly with a pencil.
Use masking tape to cover the area around the marks. This will help prevent the drill bit from slipping and reduce chipping.
Step 2: Drill the Holes
Put on your safety glasses and set your drill to a low speed. Use a 1/8-inch or 3/16-inch drill bit—small enough to avoid cracking the plastic but large enough to fit the screws.
Drill straight into each marked spot. Apply gentle, steady pressure. Don’t force it—let the drill do the work. Drill just deep enough to go through the plastic (usually about 1/4 to 1/2 inch). Avoid drilling too deep, as you could damage components behind the bumper.
After drilling, remove the masking tape and clean up any plastic shavings.
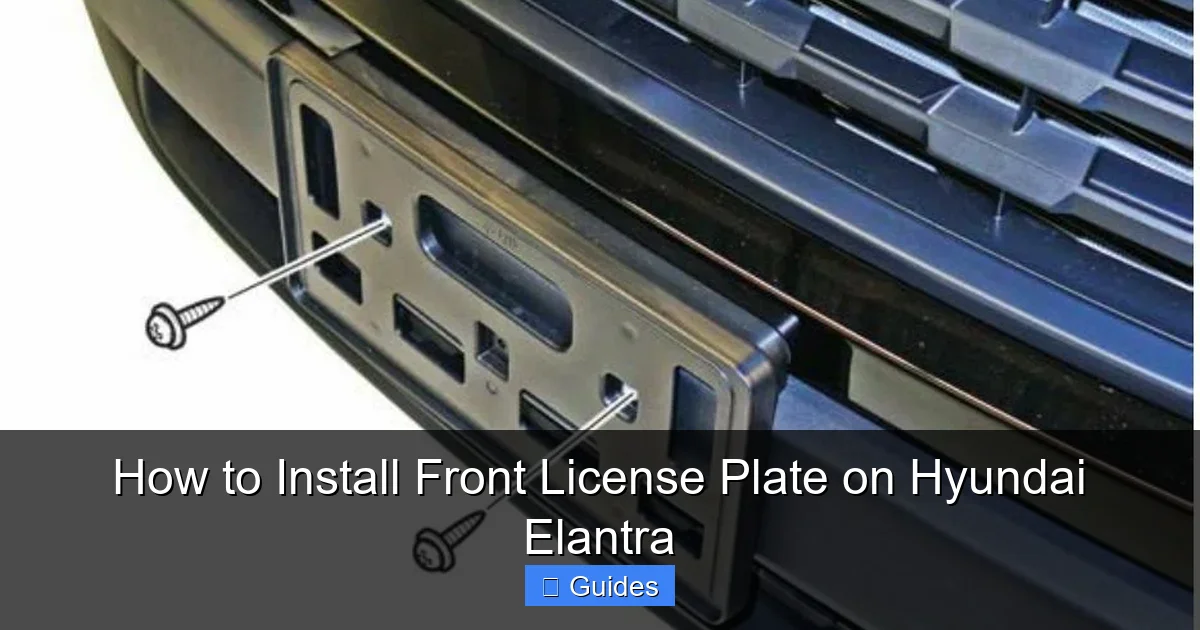
Step 3: Attach the Bracket
Place the bracket over the drilled holes. Align it so the plate will sit level and centered. Most brackets have slotted holes, which allow for minor adjustments.
Insert the screws through the bracket and into the holes. Use a screwdriver or drill with a screwdriver bit to tighten them. Be careful not to over-tighten—this can strip the plastic or crack the bumper. Tighten just enough so the bracket is secure and doesn’t wiggle.
If your bracket includes rubber washers or grommets, install them between the bracket and the bumper to reduce vibration and noise.
Step 4: Mount the License Plate
Once the bracket is secure, attach your license plate. Place the plate over the bracket and insert the screws through the plate holes and into the bracket.
Tighten the screws evenly, alternating between top and bottom to ensure the plate sits flat. Again, avoid over-tightening. The plate should be snug but not warped.
If your plate has rounded corners, make sure it’s oriented correctly—most states require the plate to be readable from the front, so the text should be right-side up.
Step 5: Test and Adjust
Give the plate a gentle tug to make sure it’s firmly attached. It shouldn’t move or rattle. If it does, check the screws and tighten them slightly.
Take a step back and look at the plate from different angles. Make sure it’s level and centered. If it’s crooked, loosen the screws, adjust the bracket, and retighten.
Finally, take your car for a short drive to test for vibrations or noise. If you hear rattling, double-check the screws and consider adding rubber washers for extra cushioning.
Common Mistakes to Avoid
Even with careful planning, mistakes can happen. Here are some common pitfalls and how to avoid them:
Drilling in the Wrong Spot
One of the biggest mistakes is drilling too high or too low. This can block sensors, interfere with the grille, or make the plate look awkward. Always measure twice and use the centerline as your guide. If you’re unsure, consult your owner’s manual or look up installation videos for your specific Elantra model.
Over-Tightening Screws
Plastic bumpers are fragile. Over-tightening screws can crack the material or strip the holes, making the bracket loose. Use a manual screwdriver instead of a power drill for the final tightening. Stop as soon as the bracket feels secure.
Using the Wrong Screws
Some people use wood screws or drywall anchors, which are too large and can damage the bumper. Stick to the screws that come with the bracket or use M6 or 1/4-inch self-tapping screws designed for automotive use.
Ignoring Local Laws
Even if you install the plate correctly, it might not be legal if it’s obstructed or improperly mounted. Make sure the plate is fully visible, not covered by a frame, and illuminated at night (if required). Some states also require the plate to be mounted horizontally—not tilted or angled.
Skipping the Bracket
Trying to mount the plate directly to the bumper with adhesive or zip ties is a bad idea. It won’t hold up in wind, rain, or car washes. Always use a proper bracket for a secure and legal installation.
Maintenance and Long-Term Care
Once your front license plate is installed, it’s important to maintain it. Over time, screws can loosen due to vibration, and dirt can build up around the plate.
Check the screws every few months, especially after long trips or car washes. Tighten them if needed, but again, avoid over-tightening.
Clean the plate regularly with glass cleaner and a soft cloth to keep it readable. If you live in a snowy area, make sure snow and ice don’t accumulate around the plate, as this can obscure it.
If you ever need to remove the plate (for detailing or repairs), store the screws and bracket safely so you can reinstall it quickly.
Alternative Installation Methods
If you’re not comfortable drilling into your bumper, there are alternatives—though they’re not always recommended.
Adhesive Mounts
Some people use heavy-duty double-sided tape or adhesive mounts to attach the bracket. While this avoids drilling, it’s less secure and can fail in extreme heat or cold. It’s also harder to remove without damaging the paint.
Clip-On Brackets
These brackets clip onto existing holes or edges of the bumper. They’re easy to install but may not hold up under stress. They’re best for temporary use or in states where front plates aren’t strictly enforced.
Magnetic Mounts
Magnetic license plate holders are available, but they’re illegal in most states because they can fall off. They’re also not strong enough for highway speeds.
For most drivers, drilling and using a proper bracket is the best long-term solution.
Conclusion
Installing a front license plate on your Hyundai Elantra doesn’t have to be intimidating. With the right tools, a little patience, and attention to detail, you can complete the job quickly and safely. Not only will you stay compliant with the law, but you’ll also improve your car’s visibility and resale value.
Remember to check your local regulations, choose the right bracket, and avoid common mistakes like over-tightening or drilling in the wrong spot. Once installed, maintain the plate regularly to ensure it stays secure and readable.
Whether you’re a first-time DIYer or a seasoned car enthusiast, this project is well within your reach. So grab your drill, follow the steps, and get that front plate mounted—your Elantra (and your wallet) will thank you.
Frequently Asked Questions
Do all Hyundai Elantras come with front license plate brackets?
No, most Hyundai Elantras do not come with front license plate brackets pre-installed, especially in states where front plates are not required. You’ll need to purchase and install one separately.
Can I install a front license plate without drilling?
Yes, but it’s not recommended. Adhesive or clip-on mounts are available, but they’re less secure and may not hold up in harsh conditions. Drilling provides the most reliable and legal installation.
What size drill bit should I use for the bumper?
Use a 1/8-inch or 3/16-inch drill bit. These sizes are small enough to avoid cracking the plastic but large enough to fit standard license plate screws.
Will drilling damage my Elantra’s bumper?
If done carefully, drilling will not damage the bumper. Use a sharp bit, low speed, and masking tape to prevent chipping. The holes are small and can be filled later if needed.
Can I use the same bracket for different Elantra models?
Not always. Brackets are often model-specific due to differences in bumper design. Check compatibility by year, make, and model before purchasing.
Is it legal to drive without a front license plate in my state?
It depends on your state. Over 30 states require front license plates. Check your local DMV website to confirm the laws in your area.

At CarLegit, we believe information should be clear, factual, and genuinely helpful. That’s why every guide, review, and update on our website is created with care, research, and a strong focus on user experience.