
Recharging the AC system in your 2009 Toyota Camry with Freon is a manageable DIY task if done correctly. This guide walks you through the process, tools needed, safety tips, and common mistakes to avoid—ensuring your car stays cool all summer long.
In This Article
- 1 Key Takeaways
- 2 📑 Table of Contents
- 3 Why Your 2009 Toyota Camry’s AC Might Need Freon
- 4 Understanding How Your Camry’s AC System Works
- 5 Signs Your Camry Needs a Freon Recharge
- 6 Tools and Materials You’ll Need
- 7 Step-by-Step Guide to Putting Freon in Your 2009 Toyota Camry
- 8 Safety Tips and Common Mistakes to Avoid
- 9 When to Call a Professional
- 10 Maintaining Your Camry’s AC System
- 11 Conclusion
- 12 Frequently Asked Questions
- 12.1 Can I put Freon in my 2009 Toyota Camry myself?
- 12.2 How much Freon does a 2009 Toyota Camry take?
- 12.3 What happens if I overfill the AC system?
- 12.4 Why is my AC still warm after adding Freon?
- 12.5 Is it safe to use AC recharge kits with stop-leak additives?
- 12.6 How often should I recharge my Camry’s AC?
Key Takeaways
- Check for leaks first: Adding Freon won’t fix a leaky system—always inspect hoses, seals, and connections before recharging.
- Use the correct refrigerant: The 2009 Toyota Camry uses R-134a refrigerant, not older types like R-12 or newer R-1234yf.
- Safety is essential: Wear gloves and eye protection—refrigerant can cause frostbite or eye damage on contact.
- Low pressure means low cooling: If the AC blows warm air, low refrigerant levels are often the culprit—but don’t overfill.
- Use a recharge kit with a gauge: This helps monitor pressure and prevents overcharging, which can damage the compressor.
- Run the engine and AC at max: Always recharge with the engine running and AC set to coldest setting and fan on high.
- Know when to call a pro: If the system won’t hold pressure or the compressor isn’t engaging, seek professional help.
📑 Table of Contents
- Why Your 2009 Toyota Camry’s AC Might Need Freon
- Understanding How Your Camry’s AC System Works
- Signs Your Camry Needs a Freon Recharge
- Tools and Materials You’ll Need
- Step-by-Step Guide to Putting Freon in Your 2009 Toyota Camry
- Safety Tips and Common Mistakes to Avoid
- When to Call a Professional
- Maintaining Your Camry’s AC System
- Conclusion
Why Your 2009 Toyota Camry’s AC Might Need Freon
If you’ve noticed your 2009 Toyota Camry’s air conditioning isn’t blowing as cold as it used to—or worse, it’s blowing warm air—there’s a good chance your AC system is low on refrigerant, commonly referred to as “Freon.” While the term “Freon” is often used generically, it technically refers to a brand of refrigerant. In modern vehicles like the 2009 Camry, the correct refrigerant is R-134a, which is environmentally safer than older types like R-12.
Over time, even well-maintained AC systems can lose refrigerant due to tiny leaks, worn seals, or degraded hoses. Unlike engine oil or coolant, refrigerant isn’t consumed during normal operation—so if your system is low, it’s almost always due to a leak. That’s why simply adding more Freon without addressing the root cause is only a temporary fix.
But don’t panic. Recharging your AC system with R-134a is one of the more accessible DIY automotive tasks, especially if you’re comfortable working under the hood. With the right tools, a little patience, and attention to safety, you can restore cool air to your Camry in under an hour. This guide will walk you through every step—from identifying the problem to safely adding refrigerant and knowing when it’s time to call in a professional.
Understanding How Your Camry’s AC System Works
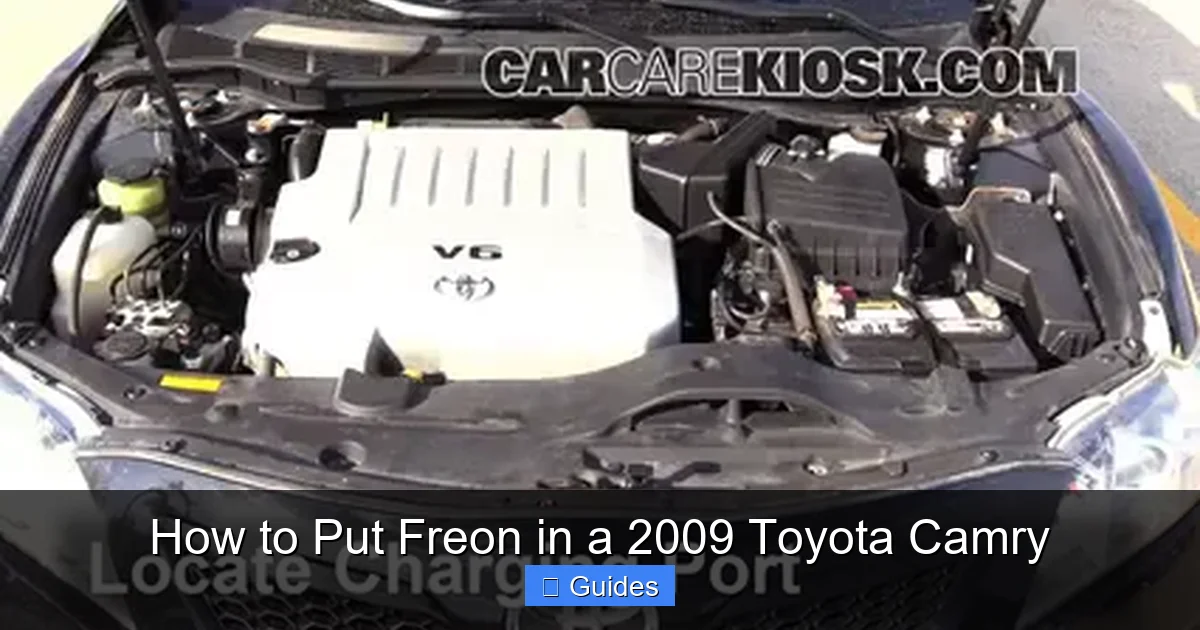
Visual guide about How to Put Freon in a 2009 Toyota Camry
Image source: d2n97g4vasjwsk.cloudfront.net
Before you start pouring refrigerant into your car, it helps to understand how the AC system actually works. Think of it like a heat pump: it doesn’t create cold air, but rather removes heat from the cabin and releases it outside. The key player in this process is the refrigerant—R-134a in your 2009 Camry.
The AC system operates in a closed loop. The compressor, driven by a belt connected to the engine, pressurizes the refrigerant gas. This hot, high-pressure gas travels to the condenser (located in front of the radiator), where it cools down and turns into a liquid. From there, it moves to the receiver-drier, which filters out moisture and debris. Next, the refrigerant passes through an expansion valve or orifice tube, where it rapidly expands and cools. Finally, it enters the evaporator inside the dashboard, where it absorbs heat from the cabin air. A blower fan then pushes the now-cool air into the interior.
For this cycle to work efficiently, the system must maintain proper pressure and refrigerant levels. If the pressure is too low—often due to a leak—the compressor won’t engage, or the system won’t cool effectively. That’s why checking pressure and adding refrigerant (if needed) is crucial.
It’s also important to note that the 2009 Toyota Camry uses a fixed orifice tube system, not a thermal expansion valve. This design is simpler and more common in vehicles of this era. The orifice tube meters the flow of refrigerant into the evaporator, and it’s located in the high-pressure line between the condenser and evaporator.
Signs Your Camry Needs a Freon Recharge
Visual guide about How to Put Freon in a 2009 Toyota Camry
Image source: justanswer.com
Not every warm breeze from your vents means you need more Freon. But there are clear signs that your AC system is low on refrigerant. Here’s what to look for:
Warm or Weak Airflow
If your AC used to blow ice-cold air but now only produces lukewarm or slightly cool air—even on the coldest setting—low refrigerant could be the issue. This happens because insufficient refrigerant reduces the system’s ability to absorb heat.
Longer Cool-Down Times
Does it take much longer than usual for your car to cool down after being parked in the sun? A properly charged system should cool the cabin within a few minutes. If it’s taking 10–15 minutes or more, refrigerant levels may be low.
AC Compressor Not Engaging
Pop the hood and turn on the AC. Watch the compressor clutch (the pulley on the front of the compressor). If it doesn’t click on and start spinning, the system may be too low on refrigerant to activate. Modern vehicles have safety switches that prevent the compressor from running if pressure is too low.
Bubbling or Hissing Sounds
Listen for unusual noises from under the hood when the AC is running. A hissing sound could indicate a refrigerant leak, especially near hoses, connections, or the compressor. Bubbling sounds in the sight glass (if your system has one) can also signal low refrigerant.
Visible Oil Stains or Residue
Refrigerant leaks often leave behind oily residue. Check around AC hoses, the compressor, condenser, and firewall for dark, greasy spots. These are signs of a leak that needs repair before recharging.
Frost on AC Components
In rare cases, low refrigerant can cause the evaporator to freeze up, leading to frost on the evaporator housing or suction line. This restricts airflow and reduces cooling.
If you notice any of these symptoms, it’s time to check your refrigerant levels. But remember: adding Freon is only part of the solution. If there’s a leak, it will continue to lose refrigerant over time.
Tools and Materials You’ll Need

Visual guide about How to Put Freon in a 2009 Toyota Camry
Image source: trucksauthority.com
Before you begin, gather all the necessary tools and supplies. Having everything ready will make the process smoother and safer.
Refrigerant (R-134a)
Make sure you purchase the correct type: R-134a. Do not use R-12 or R-1234yf—they are incompatible with your 2009 Camry. Most auto parts stores sell R-134a in 12-ounce cans. One or two cans are usually sufficient for a top-off. Avoid “stop-leak” additives unless recommended by a professional—they can cause more harm than good.
Recharge Kit with Gauge
A recharge kit includes a hose, pressure gauge, and trigger dispenser. The gauge is essential—it lets you monitor system pressure and avoid overcharging. Look for a kit designed for R-134a with a low-pressure port adapter. Popular brands include Interdynamics, Arctic Freeze, and A/C Pro.
Safety Gear
Refrigerant is cold enough to cause frostbite on contact. Always wear:
– Safety goggles or glasses
– Nitrile or rubber gloves
– Long sleeves and pants
Basic Tools
You may need:
– A flashlight to locate ports
– A rag or shop towel
– A wrench or socket set (if accessing hard-to-reach areas)
Leak Detection Kit (Optional but Recommended)
If you suspect a leak, consider using a UV dye kit or electronic leak detector. These tools help pinpoint the source of the leak so you can fix it before recharging.
Owner’s Manual
Your Camry’s manual may have specific instructions or warnings about the AC system. It’s always a good idea to consult it before starting.
Work in a Well-Ventilated Area
Never work in a closed garage. Refrigerant is heavier than air and can displace oxygen, leading to dizziness or asphyxiation in enclosed spaces.
Step-by-Step Guide to Putting Freon in Your 2009 Toyota Camry
Now that you’re prepared, let’s walk through the process of recharging your AC system. Follow these steps carefully to ensure safety and effectiveness.
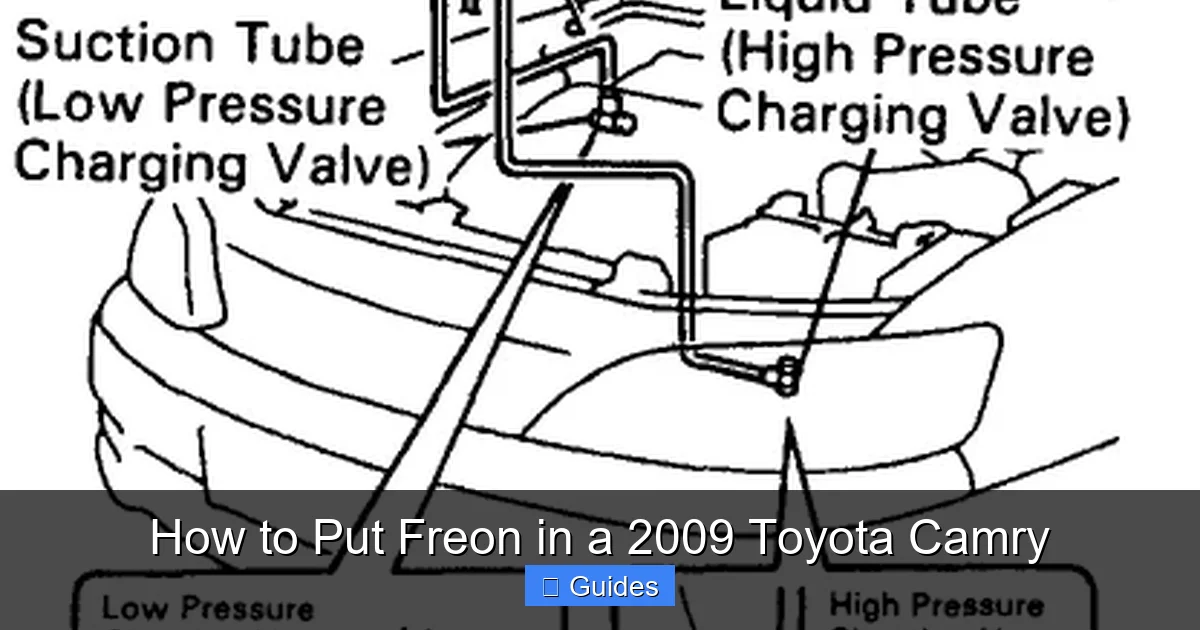
Step 1: Locate the Low-Pressure Port
The refrigerant is added through the low-pressure side of the AC system. In the 2009 Camry, this port is typically located on the passenger side of the engine bay, near the firewall. It’s a blue or black cap labeled “L” or “LOW.” The high-pressure port (red cap, labeled “H”) is not used for recharging and should never be opened unless by a professional.
Remove the cap and inspect the port. It should be clean and free of debris. If you see dirt or moisture, wipe it with a clean rag.
Step 2: Prepare the Recharge Kit
Shake the refrigerant can well. Attach the hose from the recharge kit to the can. Make sure the valve on the hose is closed (turned clockwise). Then, connect the other end of the hose to the low-pressure port. Hand-tighten only—do not over-tighten.
Step 3: Start the Engine and Turn On the AC
Start your Camry and turn the AC to the coldest setting. Set the fan to high and make sure the recirculation mode is on (this helps the system cool faster). Let the engine run for a few minutes to allow the AC system to stabilize.
Step 4: Check the Gauge Reading
Look at the pressure gauge on your recharge kit. The ideal low-side pressure for R-134a in a properly functioning system is between 25 and 45 psi, depending on ambient temperature. For example:
– At 70°F (21°C), expect 25–35 psi
– At 90°F (32°C), expect 35–45 psi
If the pressure is below 25 psi, the system is low and needs refrigerant.
Step 5: Begin Adding Refrigerant
Hold the can upright and slowly open the valve on the recharge hose. You should hear a hissing sound as refrigerant flows into the system. Keep the can upright to avoid introducing liquid refrigerant into the system, which can damage the compressor.
Add refrigerant in short bursts—about 30 seconds at a time—then close the valve and check the gauge. Wait a minute for the pressure to stabilize. Repeat until the pressure reaches the recommended range.
Step 6: Monitor the Compressor Clutch
As you add refrigerant, watch the compressor clutch. It should engage (click and start spinning) once the pressure is sufficient. If it doesn’t engage even after reaching proper pressure, there may be an electrical issue or a faulty compressor.
Step 7: Stop When Full
Do not overfill the system. Overcharging can cause high pressure, reduced cooling, and potential compressor damage. Once the gauge reads within the normal range and the AC is blowing cold air, close the valve and disconnect the hose.
Replace the low-pressure port cap securely.
Step 8: Test the AC
Let the car run for 10–15 minutes with the AC on. Check that the air is cold and the compressor cycles on and off normally. If the air is still warm, there may be a leak or another issue.
Safety Tips and Common Mistakes to Avoid
Working with refrigerant requires caution. Here are essential safety tips and pitfalls to avoid:
Never Add Refrigerant to a Leaking System
If you see oil stains, hear hissing, or the system loses refrigerant quickly after recharging, there’s a leak. Adding more Freon won’t fix it—and it’s a waste of money. Use a leak detection kit or visit a mechanic to find and repair the leak first.
Don’t Overcharge the System
More is not better. Overcharging increases pressure, which can damage the compressor, hoses, or seals. Always use a gauge and stop when pressure is in the normal range.
Avoid Inverted Cans
Never turn the refrigerant can upside down. Liquid refrigerant entering the low-side port can cause “liquid slugging,” which damages the compressor. Always keep the can upright.
Don’t Ignore Warning Signs
If the compressor doesn’t engage, the clutch is damaged, or the system won’t hold pressure, stop and consult a professional. Forcing refrigerant into a faulty system can cause further damage.
Dispose of Cans Properly
Empty refrigerant cans are considered hazardous waste. Take them to a recycling center or auto parts store that accepts them. Do not puncture or incinerate.
Work in a Safe Environment
Always recharge in a well-ventilated area. Avoid sparks, open flames, or smoking—refrigerant can decompose into toxic gases when exposed to high heat.
When to Call a Professional
While recharging your AC is a great DIY project, some issues require a certified technician. Call a professional if:
– The system won’t hold pressure after recharging
– The compressor clutch doesn’t engage
– You suspect a major leak (e.g., from the compressor or condenser)
– The AC still blows warm air after a proper recharge
– You’re unsure about any step in the process
A mechanic has specialized tools like a vacuum pump and electronic leak detector to properly evacuate, test, and recharge your system. They can also perform a full AC service, including replacing the receiver-drier and orifice tube if needed.
Maintaining Your Camry’s AC System
To keep your AC running efficiently and reduce the need for future recharges:
– Run the AC for 10 minutes every week, even in winter. This keeps seals lubricated and prevents leaks.
– Replace the cabin air filter annually. A clogged filter reduces airflow and strains the system.
– Have the AC system inspected every 2–3 years or during routine maintenance.
– Watch for signs of leaks or performance issues and address them early.
Regular maintenance not only extends the life of your AC components but also improves fuel efficiency—since a struggling AC system can increase engine load.
Conclusion
Recharging the AC system in your 2009 Toyota Camry with Freon is a practical and rewarding DIY task that can save you money and keep you cool during hot weather. By using the correct R-134a refrigerant, following safety procedures, and monitoring pressure with a gauge, you can safely restore cold air to your cabin in under an hour.
Remember, though, that adding refrigerant is only effective if the system is intact. Always check for leaks first, and don’t ignore warning signs like compressor failure or persistent warm air. When in doubt, consult a professional.
With the right tools and knowledge, you’re well-equipped to tackle this common automotive maintenance job. Stay cool, stay safe, and enjoy the comfort of your Camry’s AC all summer long.
Frequently Asked Questions
Can I put Freon in my 2009 Toyota Camry myself?
Yes, you can safely recharge the AC system yourself if you follow proper procedures and use the correct R-134a refrigerant. Always wear safety gear and use a recharge kit with a pressure gauge.
How much Freon does a 2009 Toyota Camry take?
The 2009 Camry typically holds about 18–24 ounces of R-134a refrigerant. Most recharge kits include one 12-ounce can, so you may need one or two cans depending on how low the system is.
What happens if I overfill the AC system?
Overcharging can cause high pressure, reduced cooling, and damage to the compressor or hoses. Always monitor the pressure gauge and stop when readings are in the normal range (25–45 psi).
Why is my AC still warm after adding Freon?
If the AC still blows warm air, there may be a leak, a faulty compressor, or a clogged orifice tube. Adding refrigerant won’t fix these issues—professional diagnosis is recommended.
Is it safe to use AC recharge kits with stop-leak additives?
Stop-leak additives can clog the system or damage components. It’s best to avoid them unless recommended by a technician. Fix leaks properly instead of masking them.
How often should I recharge my Camry’s AC?
A properly sealed system should never need recharging. If you’re frequently adding Freon, there’s likely a leak that needs repair. Recharge only when necessary and after fixing any leaks.

At CarLegit, we believe information should be clear, factual, and genuinely helpful. That’s why every guide, review, and update on our website is created with care, research, and a strong focus on user experience.