
Resetting the brake system light on your Honda Civic isn’t as complicated as it seems—but it’s important to do it right. This guide walks you through the process for various model years, explains what the light means, and helps you avoid common mistakes. Whether you’ve just replaced brake pads or completed a service, you’ll learn how to turn off that warning light with confidence.
In This Article
- 1 Key Takeaways
- 2 📑 Table of Contents
- 3 Why Is the Brake System Light On?
- 4 When Should You Reset the Brake Light?
- 5 How to Reset the Brake Light on Older Honda Civics (Pre-2012)
- 6 How to Reset the Brake Light on Newer Honda Civics (2012 and Later)
- 7 Common Mistakes to Avoid When Resetting the Brake Light
- 8 Preventing Future Brake Light Warnings
- 9 Conclusion
- 10 Frequently Asked Questions
- 10.1 Can I drive my Honda Civic if the brake light is on?
- 10.2 How much does it cost to reset the brake light at a dealership?
- 10.3 Will disconnecting the battery reset the brake light?
- 10.4 How often should I check my brake fluid?
- 10.5 Can I reset the brake light myself, or do I need a mechanic?
- 10.6 Why does the brake light come on after replacing brake pads?
Key Takeaways
- Understand the brake warning light: It can signal low brake fluid, worn pads, ABS issues, or parking brake engagement—don’t ignore it.
- Check the basics first: Always inspect brake fluid level, pad thickness, and parking brake before attempting a reset.
- Model year matters: Reset procedures vary between older (pre-2012) and newer Honda Civics (2012 and later).
- Use the correct method: Manual resets work on older models; newer ones may require a scan tool or OBD2 device.
- Never reset without fixing the issue: Clearing the light without addressing the root cause can lead to unsafe driving conditions.
- When to see a mechanic: If the light returns after reset, or you’re unsure about the problem, professional diagnosis is essential.
- Prevent future warnings: Regular maintenance and timely brake service reduce the chances of unexpected alerts.
📑 Table of Contents
- Why Is the Brake System Light On?
- When Should You Reset the Brake Light?
- How to Reset the Brake Light on Older Honda Civics (Pre-2012)
- How to Reset the Brake Light on Newer Honda Civics (2012 and Later)
- Common Mistakes to Avoid When Resetting the Brake Light
- Preventing Future Brake Light Warnings
- Conclusion
Why Is the Brake System Light On?
The brake system warning light on your Honda Civic dashboard is one of the most important alerts you’ll see. It’s not just a random warning—it’s your car’s way of saying, “Hey, something’s not right with your brakes.” Ignoring it could put you and others at risk.
This light can mean several things. It might be as simple as the parking brake being slightly engaged. Or it could indicate low brake fluid, worn brake pads, a problem with the anti-lock braking system (ABS), or even a sensor malfunction. In some cases, it appears after routine maintenance like brake pad replacement, especially if the system wasn’t properly reset.
Understanding why the light is on is the first step toward fixing it. For example, if you recently had your brake pads changed and the light came on afterward, it’s likely because the brake pad wear sensor was triggered or the system needs a reset. On the other hand, if the light appears suddenly while driving, it could signal a serious issue like a fluid leak or failing brake components.
It’s also worth noting that different Honda Civic models display brake warnings in slightly different ways. Older models (like the 8th generation, 2006–2011) often use a single brake warning light, while newer models (9th and 10th generation, 2012–2023) may show separate lights for the parking brake, ABS, and general brake system. This means the reset process can vary depending on your car’s year and trim level.
Before you even think about resetting the light, take a moment to assess the situation. Ask yourself: Did I just service the brakes? Is the parking brake fully released? Is there any unusual noise or feel when braking? These clues can help you determine whether a simple reset will solve the problem or if further inspection is needed.
Common Causes of the Brake Warning Light
Let’s break down the most common reasons your Honda Civic’s brake light might be on:
- Low brake fluid: The brake fluid reservoir under the hood should be between the MIN and MAX lines. If it’s low, top it up with the correct DOT 3 or DOT 4 fluid specified in your owner’s manual. Low fluid can indicate a leak or worn brake pads.
- Worn brake pads: Many Civics have a brake pad wear sensor that triggers the light when the pads are too thin. If you hear squealing or grinding, this is likely the cause.
- Parking brake engaged: It sounds obvious, but sometimes the parking brake isn’t fully released. Check the lever or pedal and make sure it’s disengaged.
- ABS system fault: The ABS light may appear alongside the brake light if there’s an issue with the anti-lock braking system. This could be a faulty wheel speed sensor or control module problem.
- Brake light switch malfunction: A faulty switch near the brake pedal can send incorrect signals to the dashboard.
- Electrical or sensor issues: Corrosion, loose connections, or damaged wiring can cause false warnings.
If you’re not sure what’s causing the light, start with the simplest checks: fluid level, parking brake, and visual inspection of the brake components. If everything looks fine but the light remains on, it’s time to consider a reset—especially after maintenance.
When Should You Reset the Brake Light?
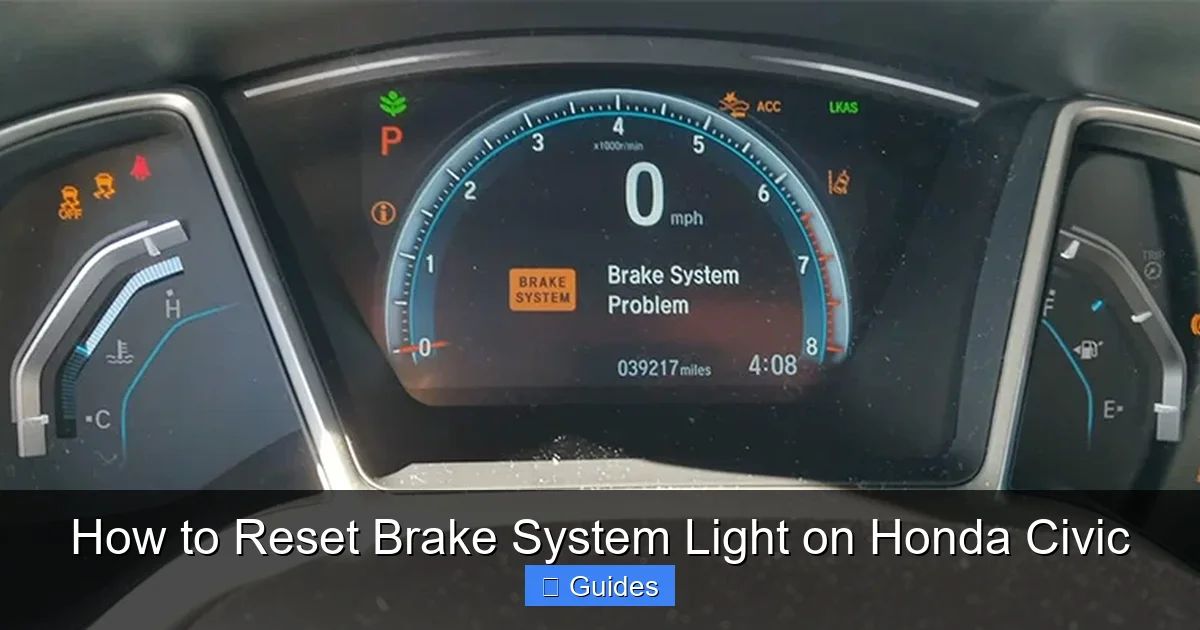
Visual guide about How to Reset Brake System Light on Honda Civic
Image source: carmechan.com
Not every time the brake light comes on requires a reset. In fact, resetting the light without fixing the underlying issue is like putting a bandage on a broken bone—it might hide the problem temporarily, but it won’t make it go away.
You should only reset the brake system light after you’ve addressed the root cause. For example:
- You’ve replaced worn brake pads and the wear sensor was triggered.
- You’ve topped up low brake fluid and confirmed there are no leaks.
- You’ve repaired an ABS sensor or module issue.
- You’ve fixed a faulty brake light switch.
- You’ve completed a brake system service and the light remains on due to system memory.
A good rule of thumb: if the light came on after a repair or maintenance, and you’re confident the work was done correctly, then a reset is appropriate. But if the light appeared out of nowhere, especially while driving, don’t reset it until you’ve diagnosed the problem.
One common scenario is after replacing brake pads. Many Honda Civics have a brake pad wear indicator—a small sensor embedded in the pad that contacts the rotor when the pad is worn down. When you install new pads, this sensor may still be “active” or the system may not recognize the new pads, causing the light to stay on. In this case, a reset is often necessary to clear the warning.
Another situation is after a brake fluid change or flush. If air got into the system or the fluid level dropped during the process, the light might come on. Once the system is bled and the fluid is at the correct level, a reset can help the car recognize that everything is back to normal.
But again—never reset the light just to make it go away. If the problem persists after a reset, or if the light comes back on shortly after, you need to investigate further. Safety should always come first.
Signs You Should NOT Reset the Light
There are times when resetting the brake light is not just unnecessary—it’s dangerous. Avoid resetting if:
- The brake pedal feels spongy or sinks to the floor—this could indicate air in the lines or a hydraulic leak.
- You hear grinding, squealing, or clicking noises when braking—this often means the pads are worn down to the metal.
- The car pulls to one side when braking—this could signal a stuck caliper or uneven pad wear.
- You notice fluid leaks under the car near the wheels—this is a serious issue that needs immediate attention.
- The ABS light is also on—this suggests a deeper electrical or sensor problem.
In these cases, resetting the light won’t fix the problem and could give you a false sense of security. Always prioritize safety and consult a professional mechanic if you’re unsure.
How to Reset the Brake Light on Older Honda Civics (Pre-2012)
Visual guide about How to Reset Brake System Light on Honda Civic
Image source: earnhardthonda.com
If you drive an older Honda Civic—say, from the 7th or 8th generation (2001–2011)—you’re in luck. These models often allow a manual reset of the brake system light without needing special tools. The process is straightforward and can usually be done in under five minutes.
The most common method involves using the brake pedal and ignition switch in a specific sequence. This procedure resets the brake pad wear indicator and clears the warning light after new pads are installed.
Step-by-Step Manual Reset (Pre-2012 Models)
Follow these steps carefully:
- Turn the ignition to the “ON” position. Do not start the engine—just turn the key so the dashboard lights up. You should see all the warning lights illuminate briefly.
- Press and hold the brake pedal. Keep it fully depressed throughout the process.
- While holding the brake, turn the ignition to the “OFF” position. Wait about 5 seconds.
- Turn the ignition back to “ON” while still holding the brake. Watch the dashboard.
- Wait for the brake light to flash or turn off. On some models, the light will blink several times before going out. This indicates the reset was successful.
- Release the brake pedal and turn off the ignition. Start the car normally. The brake light should remain off.
This method works on many 2006–2011 Honda Civics, especially those without advanced electronic brake systems. It essentially tells the car’s computer that the brake system has been serviced and the warning can be cleared.
Tips for Success
- Make sure the parking brake is fully released before starting.
- Use a helper if needed—one person can hold the brake while the other operates the key.
- If the light doesn’t go off after the first try, repeat the process. Sometimes it takes two or three attempts.
- Check your owner’s manual—some older Civics have slightly different procedures based on trim level or region.
If the manual reset doesn’t work, it could mean the brake pad wear sensor wasn’t properly reset or there’s still an issue with the system. In that case, you may need to inspect the sensor or consider a professional scan tool.
How to Reset the Brake Light on Newer Honda Civics (2012 and Later)
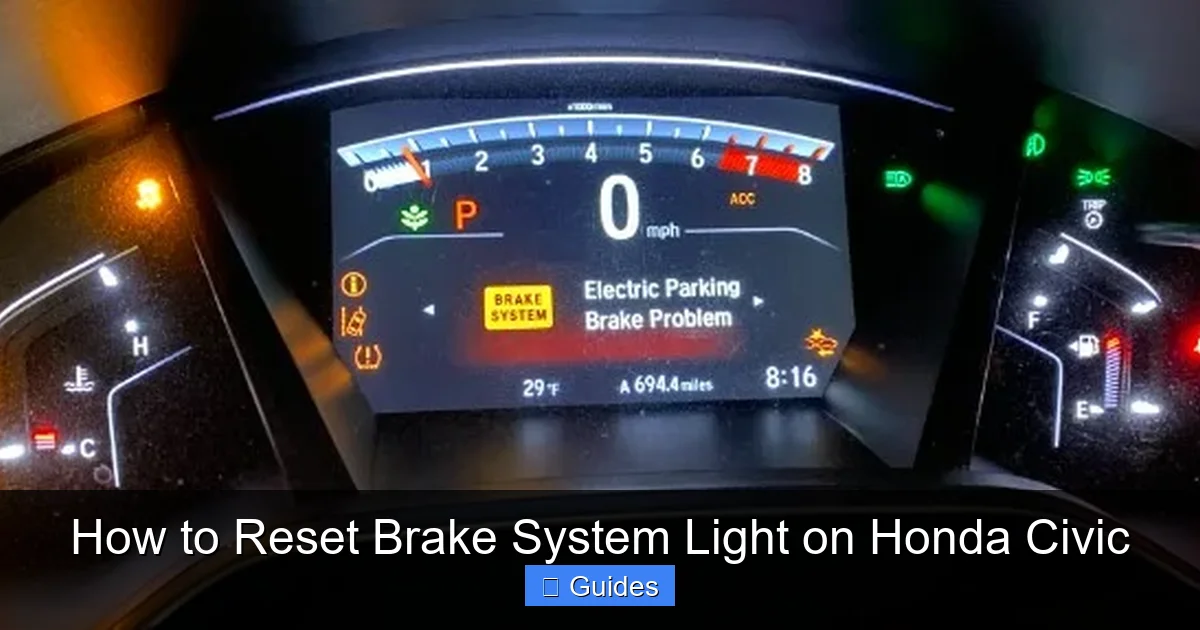
Visual guide about How to Reset Brake System Light on Honda Civic
Image source: dashlights.net
Newer Honda Civics—especially from the 9th generation (2012–2015) and 10th generation (2016–2023)—come with more advanced electronics and safety systems. As a result, the brake system light reset process is often more complex and may require specialized tools.
These models typically use an electronic brake control module (EBCM) that monitors brake pad wear, fluid levels, and ABS functionality. Simply pressing the brake pedal won’t reset the system—you’ll likely need an OBD2 scanner or a Honda-specific diagnostic tool.
Using an OBD2 Scanner to Reset the Light
An OBD2 scanner is a small device that plugs into your car’s diagnostic port (usually under the dashboard near the steering wheel). Many modern scanners can read and clear brake system codes, including those related to pad wear and ABS faults.
Here’s how to use one:
- Turn off the ignition and locate the OBD2 port. It’s typically under the dashboard on the driver’s side.
- Plug in the OBD2 scanner. Turn the ignition to “ON” (do not start the engine).
- Follow the scanner’s instructions to access the brake system menu. Look for options like “Reset Brake Pad Wear” or “Clear ABS Codes.”
- Select the appropriate reset function. The scanner will communicate with the car’s computer and clear the warning.
- Turn off the ignition and unplug the scanner. Start the car to confirm the light is off.
Many affordable OBD2 scanners (like the BlueDriver or Autel MaxiCOM) support Honda-specific functions and can reset brake lights on newer Civics. Some even come with smartphone apps for easier navigation.
Honda HDS (Honda Diagnostic System) – Professional Method
For the most accurate and complete reset, dealerships and certified mechanics use the Honda HDS system. This is a proprietary diagnostic tool that can access all of the car’s electronic modules, including the brake control unit.
With HDS, a technician can:
- Read detailed trouble codes related to the brake system.
- Reset the brake pad wear indicator after replacement.
- Relearn sensor values and calibrate the ABS system.
- Perform system tests to ensure everything is functioning correctly.
If you’ve tried an OBD2 scanner and the light won’t reset, or if the ABS light is also on, a visit to a Honda service center may be necessary. They can use HDS to perform a full diagnostic and reset.
Alternative: Brake Pad Wear Sensor Bypass
On some newer Civics, the brake pad wear sensor is a one-time use component. When the pads wear down, the sensor breaks and triggers the light. After replacing the pads, you may need to replace the sensor or install a bypass resistor to trick the system into thinking the pads are new.
This is a more advanced fix and usually requires removing the wheel and caliper to access the sensor. If you’re not comfortable with this, it’s best left to a professional.
Common Mistakes to Avoid When Resetting the Brake Light
Even with the right method, it’s easy to make mistakes when resetting the brake system light. These errors can lead to the light staying on, returning later, or even causing safety issues.
Resetting Without Fixing the Problem
This is the biggest mistake. If your brake pads are worn, fluid is low, or there’s a sensor fault, resetting the light won’t solve anything. It will just come back on—or worse, you might forget there was a problem in the first place.
Always diagnose the issue first. Use the checklist earlier in this guide to rule out common causes.
Using the Wrong Reset Procedure
Not all Civics use the same reset method. Trying a manual reset on a 2020 model won’t work, and using an OBD2 scanner on a 2005 model might not be necessary. Always check your owner’s manual or look up the correct procedure for your specific year and model.
Ignoring the ABS Light
If the ABS light is on along with the brake light, don’t assume a simple reset will fix it. ABS issues often require professional diagnosis. Resetting the brake light alone won’t address the underlying problem.
Not Checking Brake Fluid
Low brake fluid can trigger the warning light. Before resetting, always check the reservoir and top it up if needed. Use only the type specified in your owner’s manual (usually DOT 3 or DOT 4).
Skipping a Test Drive
After resetting the light, take your car for a short test drive. Pay attention to how the brakes feel. If the pedal is soft, the car pulls to one side, or you hear noises, stop driving and get it checked.
Using the Wrong Tools
Not all OBD2 scanners can reset Honda brake systems. Make sure your scanner supports Honda-specific functions. Cheap or generic scanners may only read generic codes, not manufacturer-specific ones.
Preventing Future Brake Light Warnings
The best way to deal with the brake system light is to avoid it altogether. Regular maintenance and good driving habits can go a long way in preventing unexpected warnings.
Follow the Maintenance Schedule
Your Honda Civic’s owner’s manual includes a recommended maintenance schedule. Stick to it. This includes:
- Inspecting brake pads and rotors every 10,000–15,000 miles.
- Changing brake fluid every 2–3 years (or as recommended).
- Checking brake lines and hoses for leaks or damage.
- Testing the parking brake regularly.
Listen to Your Car
Unusual noises, vibrations, or changes in braking performance are early warning signs. Don’t wait for the light to come on—address issues as soon as you notice them.
Use Quality Parts
When replacing brake components, use OEM (Original Equipment Manufacturer) or high-quality aftermarket parts. Cheap pads or sensors may not work properly and can trigger false warnings.
Keep the System Clean
Dirt, grease, and corrosion can affect brake sensors and switches. Keep the wheel wells and brake components clean, especially in winter when salt and grime buildup is common.
Get Professional Inspections
Even if everything seems fine, have your brakes inspected by a professional at least once a year. They can spot issues you might miss and ensure the system is in top condition.
Conclusion
Resetting the brake system light on your Honda Civic doesn’t have to be intimidating. With the right knowledge and tools, you can safely clear the warning and get back on the road with confidence.
Remember, the light is there for a reason. Always diagnose the issue first—don’t just reset it to make it go away. Whether you’re driving an older model that allows a manual reset or a newer one that needs an OBD2 scanner, follow the correct procedure for your vehicle.
Regular maintenance, attention to detail, and a proactive approach to brake care will help prevent future warnings and keep you safe. And if you’re ever in doubt, don’t hesitate to consult a professional mechanic.
Your brakes are one of the most critical safety systems in your car. Treat them with respect, and they’ll take care of you mile after mile.
Frequently Asked Questions
Can I drive my Honda Civic if the brake light is on?
It depends on the cause. If it’s just the parking brake or a minor sensor issue, short-distance driving may be safe. But if the pedal feels soft, you hear grinding, or fluid is low, do not drive—get it checked immediately.
How much does it cost to reset the brake light at a dealership?
Dealerships typically charge $50–$150 for a brake system reset, depending on the model and whether additional diagnostics are needed. Using an OBD2 scanner at home can save you money.
Will disconnecting the battery reset the brake light?
Disconnecting the battery may reset some warning lights, but it won’t reliably clear the brake system light on most Honda Civics—especially newer models with electronic control modules.
How often should I check my brake fluid?
Check your brake fluid every time you get an oil change (about every 5,000–7,500 miles). Also inspect it if the brake light comes on or you notice changes in braking performance.
Can I reset the brake light myself, or do I need a mechanic?
Yes, you can reset it yourself on older models using the manual method. Newer Civics may require an OBD2 scanner, which many DIYers own. If you’re unsure or the light returns, see a mechanic.
Why does the brake light come on after replacing brake pads?
This is common. The brake pad wear sensor may still be active, or the system needs to be reset to recognize the new pads. A proper reset should clear the warning.

At CarLegit, we believe information should be clear, factual, and genuinely helpful. That’s why every guide, review, and update on our website is created with care, research, and a strong focus on user experience.