
Changing a brake light on a 2018 Hyundai Elantra is a simple DIY task that takes under 15 minutes and requires only basic tools. This guide walks you through every step—from identifying the faulty bulb to testing the new one—so you can stay safe on the road without a costly mechanic visit.
In This Article
- 1 Key Takeaways
- 2 📑 Table of Contents
- 3 Why Changing a Brake Light Matters
- 4 Tools and Materials You’ll Need
- 5 Step-by-Step Guide to Replacing the Brake Light
- 6 Common Mistakes to Avoid
- 7 When to Seek Professional Help
- 8 Maintenance Tips to Extend Bulb Life
- 9 Conclusion
- 10 Frequently Asked Questions
- 10.1 What type of bulb does the 2018 Hyundai Elantra use for the brake light?
- 10.2 Can I change the brake light bulb without removing the exterior trim?
- 10.3 Why shouldn’t I touch the bulb with my bare hands?
- 10.4 How do I know if the brake light switch is faulty?
- 10.5 Can I use an LED bulb instead of a halogen one?
- 10.6 How often should I check my brake lights?
Key Takeaways
- Identify the correct bulb type: The 2018 Hyundai Elantra uses a 7443 dual-filament bulb for the brake light and turn signal.
- Access the brake light assembly from inside the trunk: No need to remove the exterior trim—just open the trunk and locate the access panel.
- Use caution when handling bulbs: Avoid touching the glass with bare hands to prevent oil residue from shortening bulb life.
- Test the new bulb before reassembly: Turn on the ignition and press the brake pedal to confirm the light works properly.
- Keep spare bulbs in your glove compartment: Having backups on hand can save you from being stranded with a broken brake light.
- Check all three brake lights: Ensure the center high-mounted stop lamp (CHMSL) and both rear brake lights are functioning.
- Follow safety precautions: Always park on a flat surface, turn off the engine, and use wheel chocks if needed.
📑 Table of Contents
Why Changing a Brake Light Matters
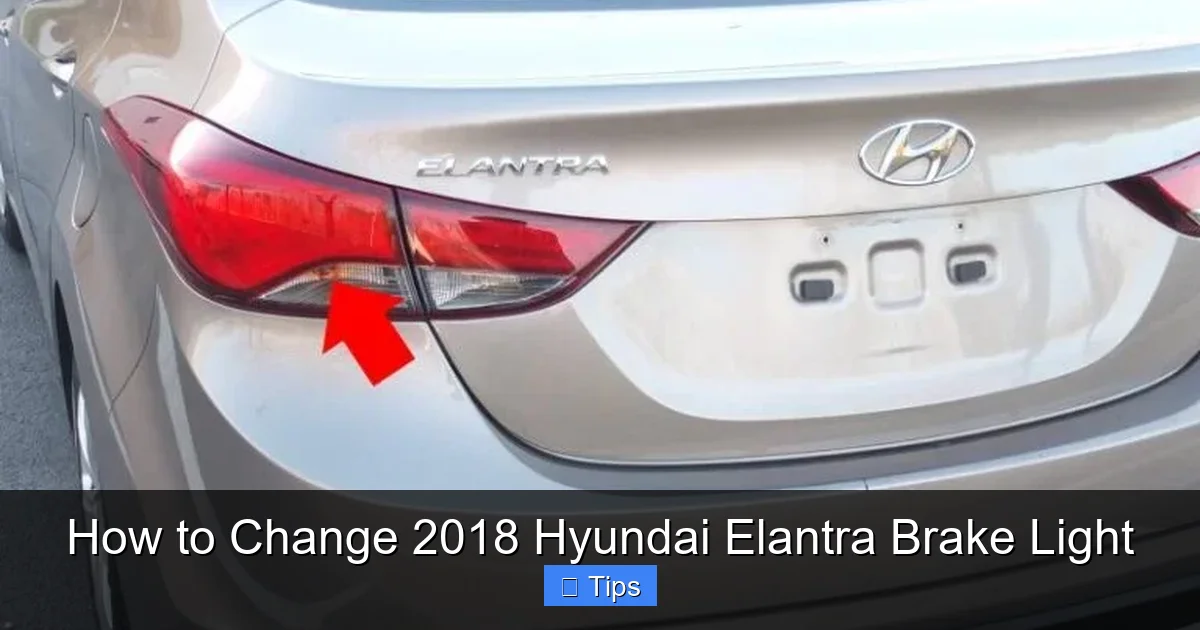
Your brake lights are one of the most critical safety features on your vehicle. They alert drivers behind you when you’re slowing down or stopping, helping prevent rear-end collisions. On the 2018 Hyundai Elantra, the brake lights are integrated into the rear combination lamp assembly, which also includes the turn signals and taillights. When one of these bulbs fails, it’s not just an inconvenience—it’s a potential hazard.
Ignoring a burnt-out brake light can lead to traffic citations, failed inspections, or worse, accidents. The good news? Replacing a brake light bulb on a 2018 Hyundai Elantra is one of the easiest and most cost-effective maintenance tasks you can do yourself. You don’t need special tools, mechanical expertise, or a trip to the dealership. With just a few minutes and a replacement bulb, you can restore full functionality and keep yourself and others safe on the road.
This guide will walk you through the entire process, from diagnosing the issue to installing the new bulb and testing it. Whether you’re a first-time DIYer or a seasoned car enthusiast, you’ll find this repair straightforward and rewarding. Plus, you’ll save money on labor costs and gain confidence in handling future car maintenance tasks.
Tools and Materials You’ll Need
Visual guide about How to Change 2018 Hyundai Elantra Brake Light
Image source: hyundaimaintenance.com
Before you begin, it’s important to gather the right tools and materials. Having everything ready ahead of time will make the process smoother and faster. The good news is that you likely already have most of what you need at home.
First and foremost, you’ll need the correct replacement bulb. For the 2018 Hyundai Elantra, the rear brake light and turn signal use a 7443 dual-filament bulb. This bulb has two filaments—one for the brake light (brighter) and one for the turn signal (dimmer). Make sure you purchase a high-quality bulb from a reputable brand like Philips, Sylvania, or GE. You can find these at auto parts stores, big-box retailers, or online. It’s also a smart idea to buy an extra bulb or two to keep in your glove compartment or trunk for emergencies.
Next, you’ll need a clean cloth or gloves. As mentioned earlier, you should avoid touching the glass part of the bulb with your bare fingers. The natural oils from your skin can create hot spots on the bulb, leading to premature failure. If you do accidentally touch it, wipe it gently with a clean, lint-free cloth dampened with rubbing alcohol.
Other helpful tools include a flathead screwdriver (for prying open access panels, if needed), a flashlight (to see inside the trunk area), and a small container or tray to hold screws and clips so you don’t lose them. If you’re working in low light, a headlamp can free up your hands and improve visibility.
Lastly, make sure your vehicle is parked on a level surface, the engine is off, and the parking brake is engaged. For extra safety, especially if you’re working near traffic, consider using wheel chocks or placing the car in “Park” (for automatic transmissions) or in gear (for manuals).
Step-by-Step Guide to Replacing the Brake Light

Visual guide about How to Change 2018 Hyundai Elantra Brake Light
Image source: hyundaimaintenance.com
Now that you’re prepared, let’s get into the actual process of changing the brake light on your 2018 Hyundai Elantra. The procedure is designed to be user-friendly, with most of the work done from inside the trunk. This means you won’t need to remove the exterior trim or deal with adhesives or sealants.
Step 1: Open the Trunk and Locate the Access Panel
Start by opening the trunk of your Elantra. Once inside, look toward the rear of the vehicle, near the top of the trunk opening. You’ll see a plastic panel directly behind the brake light assembly. This panel is held in place by plastic clips and is your gateway to the bulb housing.
Use your fingers or a flathead screwdriver to gently pry off the access panel. Be careful not to force it—these clips are designed to pop out with light pressure. If one feels stuck, wiggle it slightly rather than pulling hard. Once the panel is removed, set it aside in a safe place so it doesn’t get damaged or lost.
Step 2: Identify the Bulb Socket
Behind the access panel, you’ll see the back of the brake light assembly. There are typically three bulb sockets: one for the brake light/turn signal, one for the taillight, and one for the reverse light. The brake light socket is usually the largest and is located in the center or upper section of the assembly.
The socket will have a wiring harness connected to it. Gently grasp the base of the socket (not the wires) and twist it counterclockwise about a quarter turn. This will unlock it from the housing. Once it’s loose, carefully pull the socket straight out. You should now see the old bulb attached to the socket.
Step 3: Remove the Old Bulb
With the socket in hand, locate the bulb. The 7443 bulb has a wedge base, meaning it doesn’t screw in but instead pushes into the socket and locks in place with small tabs. To remove it, gently wiggle the bulb back and forth while pulling it straight out. Avoid twisting it, as this can damage the socket.
Once the bulb is out, inspect it. If the filament is broken or the glass is blackened, that confirms it’s burnt out. Dispose of the old bulb responsibly—many auto parts stores offer recycling programs for used bulbs.
Step 4: Install the New Bulb
Take your new 7443 bulb out of the packaging. Remember, don’t touch the glass with your bare hands. If you do, clean it with a cloth and rubbing alcohol. Align the tabs on the bulb base with the slots in the socket and push it in firmly until it seats properly. You should feel it click into place.
Once the bulb is installed, reinsert the socket into the brake light housing. Make sure it’s oriented correctly—the tabs on the socket should align with the slots in the housing. Push it in and twist it clockwise about a quarter turn to lock it in place.
Step 5: Test the Brake Light
Before you put everything back together, it’s crucial to test the new bulb. Have a friend stand behind the car while you press the brake pedal, or use a piece of cardboard or your foot to hold the pedal down. Turn on the ignition (you don’t need to start the engine) and check that the brake light illuminates brightly.
Also, test the turn signal to ensure the same bulb is working for both functions. If the brake light doesn’t come on, double-check that the bulb is seated properly and that the socket is fully inserted. If it still doesn’t work, try another bulb to rule out a defective replacement.
Step 6: Reassemble the Access Panel
Once you’ve confirmed the new bulb is working, it’s time to put everything back. Carefully align the access panel with the clips and press it firmly into place until you hear it snap. Make sure it’s flush with the surrounding trim and there are no gaps.
Close the trunk and give the area a quick wipe with a clean cloth to remove any fingerprints or dust. Your brake light replacement is now complete!
Common Mistakes to Avoid
Visual guide about How to Change 2018 Hyundai Elantra Brake Light
Image source: youcanic.com
Even though changing a brake light is a simple task, there are a few common mistakes that can trip up even experienced DIYers. Being aware of these pitfalls can save you time, frustration, and potentially damage to your vehicle.
One of the most frequent errors is using the wrong bulb type. The 2018 Hyundai Elantra uses a 7443 bulb, but some owners mistakenly install a 7440 or 7444, which are similar but not compatible. Always double-check the part number before purchasing. You can find this information in your owner’s manual or on the old bulb itself.
Another mistake is forcing the bulb or socket. The components are designed to fit together smoothly, so if something feels stuck, don’t yank or twist it aggressively. Instead, check the alignment and try again with gentle pressure. Forcing parts can crack the housing or damage the wiring.
Touching the bulb with bare hands is another common oversight. While it might seem harmless, the oils from your skin can cause the bulb to overheat and fail prematurely. Always handle the bulb by its base or wear gloves.
Skipping the test step is also risky. It’s easy to assume the new bulb will work, but defects can occur during manufacturing or shipping. Testing ensures everything is functioning before you close up the trunk.
Finally, forgetting to check all three brake lights is a safety hazard. The 2018 Elantra has two rear brake lights and a center high-mounted stop lamp (CHMSL) on the rear windshield. If one is out, the others might be close to failing. Take a moment to inspect all three and replace any that are dim or burnt out.
When to Seek Professional Help
While most brake light issues are due to a simple burnt-out bulb, there are situations where the problem may be more complex. If you’ve replaced the bulb and the light still doesn’t work, it could indicate a deeper electrical issue.
For example, a blown fuse could prevent the brake light from receiving power. The 2018 Elantra has a fuse box under the dashboard on the driver’s side. Check the owner’s manual for the correct fuse number (usually labeled “STOP” or “Brake”) and inspect it for damage. If the fuse is blown, replace it with one of the same amperage.
Another possibility is a faulty brake light switch. This switch, located near the brake pedal, activates the lights when you press the pedal. If it’s malfunctioning, the lights won’t come on even with a new bulb. Symptoms include inconsistent lighting or lights that stay on constantly. Replacing the switch requires more advanced tools and knowledge, so it’s best left to a professional.
Wiring issues, such as frayed or corroded wires, can also cause brake light failure. These problems are harder to diagnose and repair without specialized equipment. If you suspect an electrical fault, it’s wise to consult a certified mechanic or visit a Hyundai service center.
Additionally, if the brake light housing is cracked or filled with moisture, it may need to be replaced. Water ingress can damage the bulb and socket, leading to repeated failures. A professional can assess the seal and recommend the best course of action.
Maintenance Tips to Extend Bulb Life
To get the most out of your brake light bulbs and reduce the frequency of replacements, follow a few simple maintenance tips. These practices can help prevent premature burnout and keep your lights shining bright.
First, avoid slamming the trunk. Repeated impact can loosen connections or damage the bulb socket over time. Close the trunk gently and ensure it’s fully latched to prevent vibrations that could affect the electrical components.
Second, keep the brake light assembly clean. Dirt, grime, and road salt can accumulate on the lens, reducing visibility. Regularly wash the rear of your car, paying special attention to the taillights. Use a mild soap and water solution, and avoid harsh chemicals that could degrade the plastic.
Third, inspect your brake lights monthly. Make it a habit to check all exterior lights during routine maintenance. You can do this by turning on the ignition and walking around the car, or by using reflective surfaces like windows or garage doors to see the lights.
Fourth, consider upgrading to LED bulbs. While the 2018 Elantra uses halogen bulbs from the factory, LED replacements are available for the 7443 socket. LEDs last longer, consume less power, and offer brighter illumination. However, ensure the LED bulb is compatible with your vehicle’s electrical system and doesn’t cause hyperflashing (rapid blinking) of the turn signal.
Finally, keep a record of when you replace bulbs. This helps you track their lifespan and anticipate future replacements. Most halogen bulbs last between 500 and 1,000 hours, but driving habits and environmental conditions can affect this.
Conclusion
Changing a brake light on a 2018 Hyundai Elantra is a quick, easy, and rewarding DIY task that enhances your safety and saves you money. With the right bulb, a few basic tools, and this step-by-step guide, you can complete the job in under 15 minutes. Remember to handle the bulb carefully, test the new light before reassembly, and check all three brake lights for optimal performance.
Regular maintenance and awareness of common issues can help you avoid future problems and keep your Elantra in top condition. Whether you’re a seasoned DIYer or tackling your first car repair, this project is a great way to build confidence and take control of your vehicle’s upkeep.
By staying proactive and informed, you’ll not only extend the life of your brake lights but also contribute to safer roads for everyone. So the next time a brake light goes out, don’t panic—grab a replacement bulb and get to work. Your wallet (and your fellow drivers) will thank you.
Frequently Asked Questions
What type of bulb does the 2018 Hyundai Elantra use for the brake light?
The 2018 Hyundai Elantra uses a 7443 dual-filament bulb for the brake light and turn signal. This bulb has two filaments—one for the brighter brake light and one for the dimmer turn signal.
Can I change the brake light bulb without removing the exterior trim?
Yes, you can access the brake light bulb from inside the trunk. Simply remove the plastic access panel located behind the brake light assembly to reach the bulb socket.
Why shouldn’t I touch the bulb with my bare hands?
Oils from your skin can create hot spots on the bulb glass, causing it to overheat and fail prematurely. Always handle the bulb by its base or wear gloves.
How do I know if the brake light switch is faulty?
If the brake lights don’t come on even with a new bulb, or if they stay on constantly, the brake light switch near the pedal may be malfunctioning. A mechanic can diagnose and replace it if needed.
Can I use an LED bulb instead of a halogen one?
Yes, LED 7443 bulbs are available and offer longer life and brighter light. However, ensure the LED is compatible with your vehicle to avoid electrical issues like hyperflashing.
How often should I check my brake lights?
It’s a good idea to inspect your brake lights monthly during routine maintenance. This helps catch issues early and ensures all lights are functioning properly.

At CarLegit, we believe information should be clear, factual, and genuinely helpful. That’s why every guide, review, and update on our website is created with care, research, and a strong focus on user experience.