
Adding a compact airhorn to your car horn is a simple, affordable way to boost your vehicle’s sound and safety. With basic tools and a little DIY know-how, you can install one in under an hour—no mechanic required.
This is a comprehensive guide about How To Add Compact Airhorn To Any Car Horn.
In This Article
- 1 Key Takeaways
- 2 Why Upgrade Your Car Horn?
- 3 What Is a Compact Airhorn?
- 4 Choosing the Right Compact Airhorn for Your Car
- 5 Tools and Materials You’ll Need
- 6 Step-by-Step Installation Guide
- 7 Maintenance and Troubleshooting Tips
- 8 Legal and Safety Considerations
- 9 Conclusion
- 10 Frequently Asked Questions
- 10.1 Is it legal to install a compact airhorn on my car?
- 10.2 Will a compact airhorn drain my car battery?
- 10.3 Can I install a compact airhorn myself?
- 10.4 Do I need to remove my factory horn?
- 10.5 How loud is a compact airhorn compared to a regular horn?
- 10.6 Can I use a compact airhorn on a motorcycle or boat?
Key Takeaways
- Enhanced Safety: A louder, more attention-grabbing horn improves visibility in traffic and helps prevent accidents.
- Easy Installation: Most compact airhorn kits are plug-and-play or require minimal wiring, making them beginner-friendly.
- Weather-Resistant Design: Quality airhorns are built to withstand rain, snow, and extreme temperatures.
- Legal Compliance: Check local noise ordinances—most compact airhorns meet legal decibel limits when used responsibly.
- Compact Size: These horns fit in tight spaces like under hoods or behind bumpers without major modifications.
- Affordable Upgrade: You can add a powerful airhorn for under $50, far cheaper than replacing your entire horn system.
- Versatile Use: Great for daily drivers, off-road vehicles, RVs, and even boats with 12V systems.
[FEATURED_IMAGE_PLACEHOLDER]
Why Upgrade Your Car Horn?
Let’s be honest—most factory car horns are underwhelming. They’re quiet, tinny, and often fail to grab attention in busy traffic or emergency situations. Whether you’re stuck behind a distracted driver, trying to warn someone backing out of a driveway, or navigating heavy rain, a weak horn just doesn’t cut it. That’s where a compact airhorn comes in.
A compact airhorn delivers a deep, powerful blast that cuts through noise and gets noticed. It’s not just about being loud—it’s about being heard when it matters most. Think of it as an insurance policy for your safety. In fact, studies show that vehicles with louder, more distinct horns are less likely to be involved in low-speed collisions. A strong horn can alert others to your presence, giving them time to react and avoid a potential accident.
But you don’t need to spend hundreds on a full air compressor system. Modern compact airhorns are small, efficient, and designed specifically for everyday vehicles. They use compressed air or electromagnetic diaphragms to produce a loud, resonant sound without draining your battery or requiring complex setup. Best of all, they’re easy to install—even if you’ve never touched a car’s electrical system before.
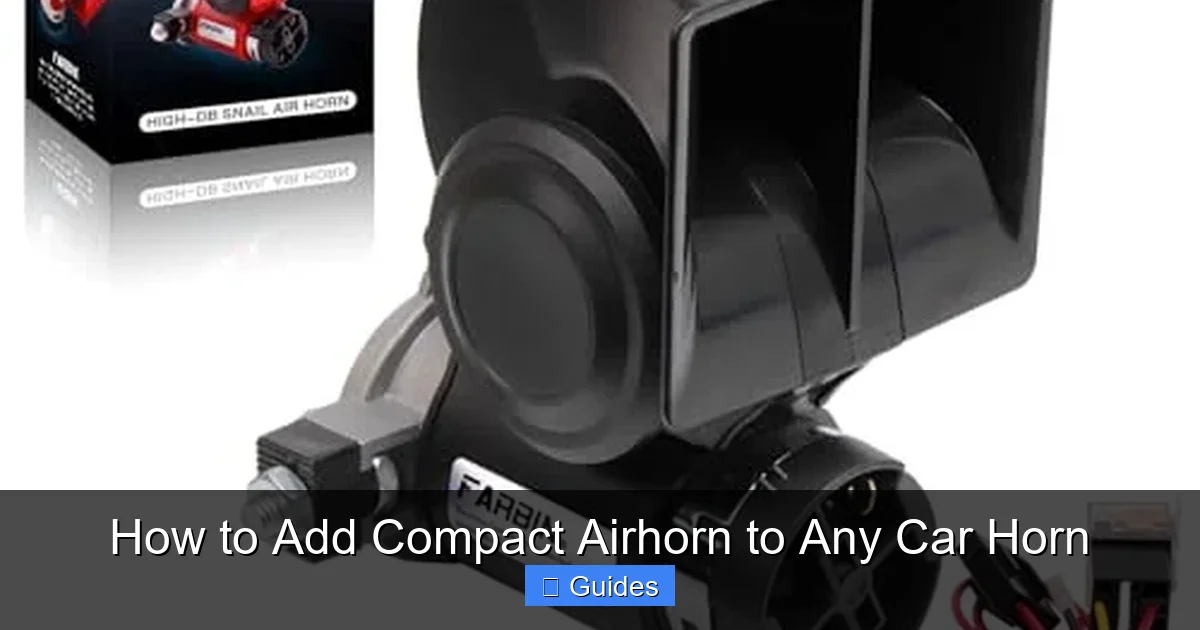
What Is a Compact Airhorn?
A compact airhorn is a small, self-contained horn unit that produces a much louder and deeper sound than a standard car horn. Unlike traditional electric horns that rely solely on vibration, compact airhorns use air pressure to amplify sound, resulting in a more powerful and attention-grabbing tone. These units are typically powered by your car’s 12-volt electrical system and come in kits that include the horn, mounting hardware, wiring, and sometimes a relay.
There are two main types of compact airhorns: air-driven and electric diaphragm. Air-driven models use a small compressor to generate compressed air, which is then released through a trumpet-shaped horn to create sound. These are the loudest and most durable but may require a bit more space and wiring. Electric diaphragm horns, on the other hand, use a vibrating diaphragm powered by an electromagnet—similar to a regular horn but with enhanced design for louder output. They’re quieter than air-driven models but still significantly louder than stock horns and easier to install.
One of the biggest advantages of compact airhorns is their size. Most units are no bigger than a soda can, making them perfect for tight engine bays or hidden mounting spots. They’re also built to last, with corrosion-resistant materials and sealed components that protect against moisture and dirt. Whether you drive a compact sedan, a rugged SUV, or a classic truck, there’s a compact airhorn that fits your ride.
Common Features of Compact Airhorns
- 12V DC Power: Runs directly off your car’s battery—no extra power source needed.
- Weatherproof Housing: Sealed against rain, snow, and road grime.
- Easy Mounting Brackets: Most include universal brackets for quick installation.
- Relay Included: Prevents electrical overload and protects your car’s wiring.
- Dual-Tone Options: Some models offer two different tones for a more distinctive sound.
- Compact Dimensions: Typically under 6 inches long and 3 inches wide.
Choosing the Right Compact Airhorn for Your Car
Not all compact airhorns are created equal. Picking the right one depends on your vehicle, your sound preferences, and how much installation effort you’re willing to take on. Here’s what to consider before you buy.
First, think about sound output. Most compact airhorns range from 105 to 125 decibels (dB)—loud enough to be heard over traffic but still within legal limits in most areas. For reference, a standard car horn is around 110 dB, while a train horn can exceed 130 dB. A good compact airhorn should hit at least 115 dB to make a noticeable difference.
Next, consider the type of horn. If you want maximum volume and don’t mind a slightly more involved install, go for an air-driven model. These are louder and have a deeper, more commanding tone—perfect for trucks, SUVs, or off-road vehicles. Electric diaphragm horns are quieter but easier to wire and maintain, making them ideal for daily drivers or beginners.
Size and mounting location are also important. Measure the space under your hood or behind your bumper to ensure the horn will fit. Some kits come with flexible hoses or remote trumpets, allowing you to mount the compressor in one spot and the horn in another—great for tight spaces.
Don’t forget about brand and build quality. Stick with reputable brands like Hella, Wolo, or PIAA. Cheap knockoffs may save you a few bucks upfront but often fail within months due to poor materials or weak compressors. Look for reviews that mention durability, weather resistance, and ease of installation.
Finally, check legal requirements. While most compact airhorns are street-legal, some states or cities have strict noise ordinances. Avoid horns that exceed 120 dB unless you’re using them off-road or on private property. Also, make sure your horn has a functional tone—some jurisdictions require a dual-tone or specific pitch for safety.
Top Compact Airhorn Recommendations
- Wolo 515-Mega Horn: Air-driven, 120 dB, compact design, includes relay and mounting kit.
- Hella Supertone Horn: Electric diaphragm, 118 dB, dual-tone, easy plug-and-play install.
- PIAA 9000 Series: Weatherproof, 115 dB, sleek design, great for modern vehicles.
- HornBlasters Conductor’s Special: Air-driven, 125 dB, louder but requires more space and wiring.
Tools and Materials You’ll Need
Before you start installing your compact airhorn, gather all the necessary tools and materials. Having everything ready will save you time and frustration during the process. The good news? You probably already have most of these items in your garage.
Here’s a complete list of what you’ll need:
- Compact airhorn kit: Includes the horn, relay, wiring, and mounting hardware.
- Wire strippers: For removing insulation from electrical wires.
- Crimping tool: To secure wire connectors.
- Electrical tape or heat shrink tubing: For insulating connections.
- Zip ties: To secure wires and prevent rattling.
- Drill and drill bits: For mounting the horn (if needed).
- Screwdrivers (Phillips and flathead): For removing panels and securing brackets.
- Socket wrench set: Useful for accessing tight spaces under the hood.
- Multimeter (optional): To test voltage and ensure proper wiring.
- Fuse tap or add-a-circuit: For safely connecting to your car’s fuse box.
Most compact airhorn kits come with detailed instructions and all necessary wiring. However, it’s always a good idea to double-check the contents before you begin. If anything is missing, contact the manufacturer or pick up the part at an auto store.
Safety First: Precautions Before Installation
Working with your car’s electrical system can be risky if you’re not careful. Always follow these safety tips:
- Disconnect the battery: Remove the negative terminal to prevent short circuits or accidental shocks.
- Work in a well-lit, dry area: Avoid installing in rain or on wet ground.
- Wear safety glasses: Protect your eyes from debris when drilling or removing panels.
- Use insulated tools: Reduce the risk of electrical shock.
- Double-check wiring: Incorrect connections can damage your car’s electronics or cause a fire.
Taking these precautions ensures a smooth, safe installation process.
Step-by-Step Installation Guide
Now for the fun part—installing your compact airhorn! This step-by-step guide will walk you through the entire process, from planning your layout to testing your new horn. Even if you’re a beginner, you can do this in under an hour.
Step 1: Choose the Mounting Location
The first step is deciding where to mount your airhorn. You want a spot that’s secure, protected from water and debris, and close enough to your existing horn wiring for easy connection. Common locations include:
- Behind the front bumper
- Inside the wheel well
- Under the hood near the radiator support
- Inside the fender liner (with proper sealing)
Avoid placing the horn near hot engine components like the exhaust manifold or turbocharger. Heat can damage the unit over time. Also, make sure the horn faces forward or slightly downward to project sound effectively.
Once you’ve chosen a spot, hold the horn in place and mark the mounting holes with a marker. Use the included bracket or drill new holes if necessary. Most kits come with self-tapping screws, but you may need to use a drill bit slightly smaller than the screw diameter for a secure fit.
Step 2: Disconnect the Battery
Safety first! Pop the hood and locate your car’s battery. Use a wrench to loosen the nut on the negative terminal (usually marked with a “-” or black cable) and carefully remove the cable. Tuck it aside so it doesn’t accidentally touch the terminal during installation.
This step prevents accidental short circuits while you’re working with wires and electrical components.
Step 3: Remove the Old Horn (Optional)
You don’t have to remove your factory horn—many people wire the compact airhorn in parallel so both horns sound together. However, if you want a cleaner install or more space, you can remove the old horn.
Locate your stock horn—it’s usually near the radiator or behind the grille. Disconnect the wiring harness and unscrew the mounting bolt. Keep the old horn in case you ever want to revert to the original setup.
Step 4: Mount the Compact Airhorn
Position the airhorn in your chosen location and secure it using the included bracket and screws. Tighten the screws firmly, but don’t over-tighten—this can crack the housing or strip the threads.
If you’re mounting behind the bumper, consider using rubber grommets or washers to reduce vibration and noise. This also helps protect the horn from road vibrations.
Step 5: Wire the Horn
Now it’s time to connect the wiring. Most compact airhorn kits include a relay, which is essential for handling the higher current draw of the horn. Here’s how to wire it correctly:
- Connect the power wire: Run a 12-gauge wire from the positive terminal of the battery (through a fuse) to the relay’s “30” terminal. Use an inline fuse (usually 15–20 amps) near the battery to protect against overloads.
- Connect the ground wire: Attach a wire from the relay’s “85” terminal to a solid ground point on the car’s chassis. Sand the paint off the metal for a better connection.
- Connect the trigger wire: Run a wire from the relay’s “86” terminal to the positive wire of your existing horn. This allows the new horn to activate when you press the horn button.
- Connect the horn wire: Attach a wire from the relay’s “87” terminal to the positive terminal on the airhorn. The negative terminal of the horn should be grounded to the chassis.
Use crimp connectors and electrical tape or heat shrink tubing to secure all connections. Avoid soldering unless you’re experienced—improper solder joints can fail under vibration.
Step 6: Secure and Route the Wiring
Once everything is connected, use zip ties to secure the wires along existing harnesses or frame rails. Keep wires away from moving parts like belts, fans, or suspension components. Loose wires can get caught and cause damage or short circuits.
If you’re running wires through the firewall, use a grommet to prevent chafing. Most cars have pre-drilled holes with rubber grommets for this purpose.
Step 7: Reconnect the Battery and Test
Reattach the negative battery cable and tighten the nut securely. Now, press the horn button on your steering wheel. You should hear a loud, powerful blast from your new compact airhorn.
If the horn doesn’t sound, double-check your wiring. Use a multimeter to test for power at the relay and horn terminals. Common issues include loose connections, blown fuses, or incorrect grounding.
Step 8: Final Adjustments
Once the horn is working, make any final adjustments. Tighten loose screws, reposition wires for a cleaner look, and ensure the horn is angled correctly for maximum sound projection.
You’re done! Enjoy your upgraded horn and the added peace of mind on the road.
Maintenance and Troubleshooting Tips
Your compact airhorn is built to last, but a little maintenance goes a long way. Here’s how to keep it sounding strong for years to come.
Regular Cleaning
Dirt, salt, and moisture can build up on the horn and affect performance. Every few months, wipe down the exterior with a damp cloth and mild soap. Avoid high-pressure washers directly on the horn, as they can force water into sealed components.
Check Connections
Vibration from driving can loosen wires over time. Every oil change or service, inspect your horn’s wiring and connections. Tighten any loose terminals and replace damaged insulation.
Listen for Changes
If your horn starts sounding weak, distorted, or intermittent, it could indicate a problem. Common issues include:
- Weak sound: Low battery voltage, poor ground, or a failing compressor.
- No sound: Blown fuse, broken wire, or faulty relay.
- Intermittent sound: Loose connection or corroded terminal.
Use a multimeter to test voltage at the horn terminals. You should see around 12–14 volts when the horn is activated. If not, trace the circuit back to find the issue.
Replace the Fuse
If your horn stops working suddenly, check the inline fuse first. Replace it with the same amperage rating. Repeated blown fuses may indicate a short circuit or overload—have a professional inspect the wiring.
Legal and Safety Considerations
While a compact airhorn can be a great safety tool, it’s important to use it responsibly. Misuse can lead to fines, complaints, or even legal trouble.
Know Your Local Laws
Most states allow horns as long as they’re used for safety purposes and don’t exceed certain decibel levels. For example, California limits horn use to “reasonable” situations and prohibits excessive noise. Check your local Department of Motor Vehicles (DMV) or transportation website for specific rules.
Avoid using your horn in residential areas late at night or in quiet zones unless absolutely necessary. A loud blast can disturb neighbors and may violate noise ordinances.
Use It Wisely
Your horn is a safety device, not a toy. Use it to warn others of danger—like when someone is about to pull out in front of you or drift into your lane. Don’t use it to express frustration, honk at pedestrians unnecessarily, or create noise pollution.
Responsible use ensures your horn remains a helpful tool and keeps you on the right side of the law.
Conclusion
Adding a compact airhorn to your car is one of the easiest and most effective upgrades you can make. It enhances your safety, improves your vehicle’s presence on the road, and takes less than an hour to install. With the right kit, basic tools, and a little patience, anyone can do it.
Whether you’re driving through busy city streets, navigating rural backroads, or hitting the trails, a powerful horn gives you confidence and peace of mind. You’ll be heard when it matters most—and that’s worth every penny.
So why wait? Grab a compact airhorn kit today, follow this guide, and give your car the voice it deserves. Your safety—and the safety of others—depends on it.
Frequently Asked Questions
Is it legal to install a compact airhorn on my car?
Yes, in most areas, as long as the horn is used responsibly and doesn’t exceed local noise limits. Check your state or city regulations to ensure compliance.
Will a compact airhorn drain my car battery?
No, compact airhorns are designed to run efficiently on a 12V system and draw minimal power. They won’t drain your battery under normal use.
Can I install a compact airhorn myself?
Absolutely! Most kits are designed for DIY installation and include all necessary parts and instructions. No professional mechanic required.
Do I need to remove my factory horn?
No, you can wire the compact airhorn in parallel with your existing horn so both sound together, or replace the old one entirely.
How loud is a compact airhorn compared to a regular horn?
Most compact airhorns are 10–15 dB louder than factory horns, producing a deeper, more attention-grabbing sound.
Can I use a compact airhorn on a motorcycle or boat?
Yes, as long as the vehicle uses a 12V electrical system. Many compact airhorns are versatile and work on cars, trucks, motorcycles, and boats.

At CarLegit, we believe information should be clear, factual, and genuinely helpful. That’s why every guide, review, and update on our website is created with care, research, and a strong focus on user experience.