

Blowing out RV water lines is a crucial step in winterizing your RV to prevent costly freeze damage. This guide walks you through the entire process—from gathering tools to safely using compressed air—so you can protect your plumbing system with confidence.
In This Article
- 1 Key Takeaways
- 2 📑 Table of Contents
- 3 Why Blowing Out RV Water Lines Is Essential
- 4 When Should You Blow Out Your RV Water Lines?
- 5 Tools and Equipment You’ll Need
- 6 Step-by-Step Guide to Blowing Out RV Water Lines
- 7 Common Mistakes to Avoid
- 8 Alternative Methods: When to Use Antifreeze Instead
- 9 Maintaining Your RV Plumbing Year-Round
- 10 Final Thoughts: Protect Your RV Investment
- 11 Frequently Asked Questions
- 11.1 Can I use a regular air compressor to blow out RV water lines?
- 11.2 Do I need to blow out both hot and cold water lines?
- 11.3 How long does it take to blow out RV water lines?
- 11.4 Can I blow out water lines without draining the tanks first?
- 11.5 Is it safe to use compressed air on RV plumbing?
- 11.6 Should I use antifreeze after blowing out the lines?
Key Takeaways
- Prevent freezing damage: Blowing out water lines removes standing water that can freeze, expand, and crack pipes, faucets, or tanks.
- Use the right air pressure: Keep compressed air below 50 PSI to avoid damaging seals, valves, or fittings in your RV’s plumbing system.
- Drain all water sources first: Always empty freshwater tanks, water heater, and low-point drains before using air to ensure maximum effectiveness.
- Work systematically: Start from the farthest fixture and move toward the water pump to ensure all lines are cleared.
- Use an air compressor with a regulator: A regulated compressor gives you control over pressure and prevents over-pressurization.
- Test after blowing out: Turn on faucets and flush toilets to confirm all water is removed and no air leaks exist.
- Combine with antifreeze for full protection: For complete winterization, follow blowing out with non-toxic RV antifreeze in drain traps and toilet bowls.
📑 Table of Contents
- Why Blowing Out RV Water Lines Is Essential
- When Should You Blow Out Your RV Water Lines?
- Tools and Equipment You’ll Need
- Step-by-Step Guide to Blowing Out RV Water Lines
- Common Mistakes to Avoid
- Alternative Methods: When to Use Antifreeze Instead
- Maintaining Your RV Plumbing Year-Round
- Final Thoughts: Protect Your RV Investment
Why Blowing Out RV Water Lines Is Essential
If you’re an RV owner, you know that winter can be tough on your home on wheels. One of the biggest threats during cold weather is frozen water lines. When water freezes, it expands—sometimes by nearly 9%. That expansion can crack pipes, burst fittings, and damage your water pump, water heater, and even your freshwater tank. The cost to repair these issues can run into hundreds or even thousands of dollars.
That’s why blowing out RV water lines is such a vital part of winterizing your RV. It’s a simple, low-cost preventive measure that can save you from major headaches down the road. By using compressed air to push water out of your plumbing system, you remove the moisture that could turn into ice. This process is especially important if you live in or travel through regions where temperatures drop below freezing.
But it’s not just about avoiding damage. Blowing out your water lines also helps maintain the overall health of your RV’s plumbing. Stagnant water can lead to bacteria growth, unpleasant odors, and sediment buildup. Clearing the lines ensures your system stays clean and ready for your next adventure.
When Should You Blow Out Your RV Water Lines?
Timing is everything when it comes to winterizing your RV. You don’t want to wait until the first frost hits—by then, it might be too late. Ideally, you should blow out your water lines before temperatures consistently drop below 32°F (0°C). For most RVers, this means doing it in late fall, before storing the RV for the winter or heading south for warmer climates.
But it’s not just about seasonal storage. If you’re planning a winter trip and expect sub-freezing temperatures, you should blow out the lines before you leave and again when you return. Even a brief cold snap can cause damage if water is left sitting in the pipes.
Another good time to blow out your lines is after a long period of non-use. If your RV has been sitting in storage for weeks or months, moisture may have accumulated in the plumbing. Blowing out the lines ensures everything is dry and ready to go when you hit the road again.
Tools and Equipment You’ll Need
Before you start, make sure you have the right tools on hand. You don’t need anything fancy—just a few basic items that most RVers already own or can easily purchase.
Air Compressor
The most important tool is a portable air compressor. Look for one that can deliver at least 5–10 CFM (cubic feet per minute) and has a built-in pressure regulator. A pancake-style compressor works well and is easy to transport. Avoid using high-pressure industrial compressors—they can deliver too much force and damage your RV’s plumbing.

Visual guide about How to Blow Out Rv Water Lines
Image source: wikihow.com
Visual guide about How to Blow Out Rv Water Lines
Image source: camperupgrade.com
Air Hose and Adapter
You’ll need a standard air hose to connect the compressor to your RV. Most RVs have a city water inlet that can be adapted for air. You’ll also need a blow-out plug or an adapter that fits your specific water inlet. These are inexpensive and widely available at RV supply stores or online.
Pressure Gauge
While many compressors have built-in gauges, it’s smart to double-check with a separate pressure gauge. This ensures you’re not exceeding the recommended 30–50 PSI limit. Too much pressure can blow out seals or crack plastic fittings.
Wrench or Pliers
You may need these to open low-point drain valves or access panels. Keep them handy in case you need to make adjustments during the process.
Safety Gear
Always wear safety glasses when working with compressed air. Even at low pressures, air can carry debris or cause injury if it hits your eyes. Gloves are also recommended to protect your hands.
Non-Toxic RV Antifreeze (Optional)
While not required for blowing out lines, antifreeze is essential for complete winterization. You’ll use it in drain traps, toilet bowls, and sometimes the freshwater tank. Make sure it’s labeled “RV-safe” and non-toxic.
Step-by-Step Guide to Blowing Out RV Water Lines
Now that you’re prepared, let’s walk through the process step by step. This method works for most RVs, but always consult your owner’s manual for model-specific instructions.
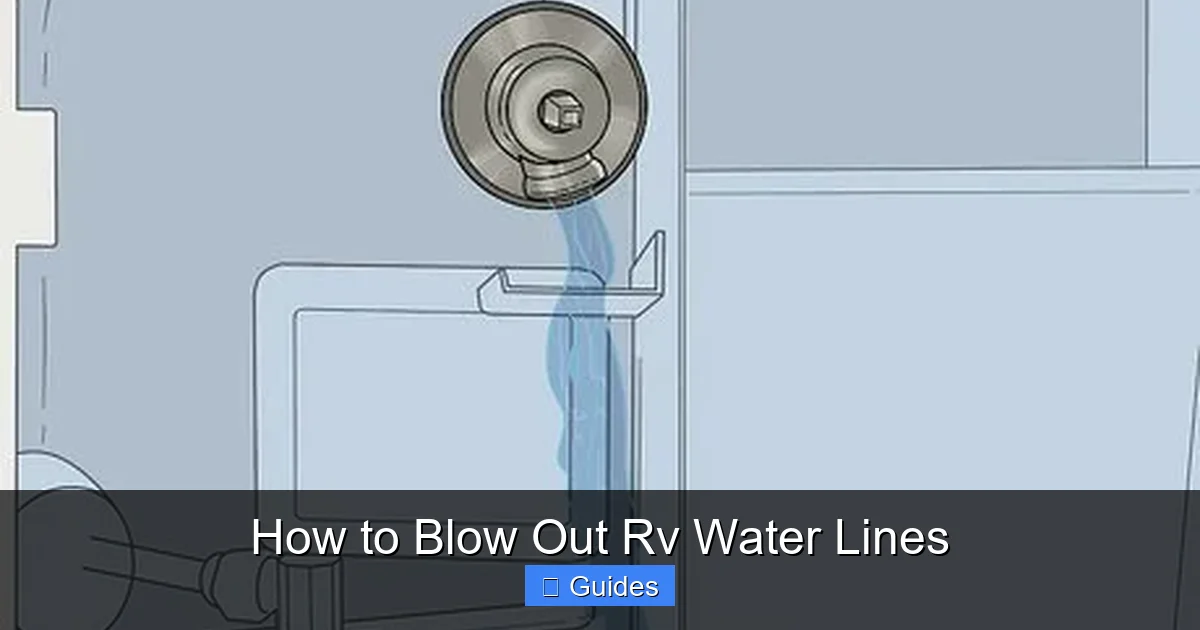
Step 1: Drain All Water Sources
Before you introduce air, you need to remove as much water as possible. Start by turning off the water heater and allowing it to cool. Then, open the pressure relief valve and drain plug to empty the tank completely. Next, locate the low-point drain valves—usually found under the RV near the water lines. Open them to let water flow out. Don’t forget the freshwater tank drain valve. Open it and let the tank empty fully.
Visual guide about How to Blow Out Rv Water Lines
Image source: wikihow.com
Step 2: Open All Faucets and Fixtures
Turn on every faucet in the RV—both hot and cold—in the kitchen, bathroom, and outdoor shower if you have one. Flush the toilet several times to clear the water from the bowl and tank. This helps release trapped water and prepares the system for air pressure.
Step 3: Connect the Air Compressor
Attach your air hose to the compressor and connect the other end to the city water inlet using the blow-out plug or adapter. Make sure the connection is secure to prevent air leaks. Double-check that the compressor is set to the correct pressure—ideally between 30 and 50 PSI.
Step 4: Begin Blowing Out the Lines
Turn on the compressor and slowly open the air valve. You should hear air moving through the lines. Start with the faucet farthest from the water pump—this is usually the bathroom sink or shower. Leave it open until you hear only air coming out, then close it. Move to the next fixture and repeat. Work your way back toward the water pump, covering every faucet, showerhead, and toilet.
Step 5: Check for Residual Water
After blowing out all fixtures, go back and briefly open each one again. If you hear sputtering or see a few drops of water, blow it out once more. This ensures no pockets of water remain.
Step 6: Disconnect and Secure
Once all lines are clear, turn off the compressor and disconnect the air hose. Close all faucets and drain valves. Replace any caps or covers on the city water inlet and low-point drains. Store your tools and compressor properly.
Common Mistakes to Avoid
Even experienced RVers can make mistakes when blowing out water lines. Here are some common pitfalls and how to avoid them.
Using Too Much Air Pressure
One of the biggest errors is using air pressure that’s too high. While it might seem like more pressure means faster results, it can actually damage your plumbing. Most RV manufacturers recommend keeping pressure under 50 PSI. Exceeding this can blow out O-rings, crack plastic fittings, or even damage the water pump. Always use a regulator and monitor the gauge.
Skipping the Drain Step
Some people try to blow out lines without first draining the tanks and low-point valves. This is ineffective because the air can’t push all the water out if large volumes remain. Always drain first, then blow. Think of it like trying to blow water out of a hose that’s still full—it just won’t work.
Forgetting Outdoor Fixtures
It’s easy to focus on indoor faucets and forget about outdoor showers, hose connections, or external water outlets. These are just as vulnerable to freezing. Make sure to blow out every water source, including any external spigots or quick-connect fittings.
Not Testing After Blowing
After you’re done, don’t just assume everything is clear. Turn on each faucet again and listen. If you hear gurgling or see water, you may have missed a line. Also, check for air leaks around connections. A hissing sound means air is escaping, which reduces efficiency.
Using the Wrong Adapter
Using a poorly fitting adapter can lead to air leaks or even damage the city water inlet. Invest in a quality blow-out plug that matches your RV’s inlet size. Universal adapters work for many models, but check compatibility before use.
Alternative Methods: When to Use Antifreeze Instead
While blowing out water lines is effective, it’s not always the best option. In some cases, using non-toxic RV antifreeze is a better choice.
When Antifreeze Is Recommended
If you’re storing your RV in extremely cold climates—where temperatures drop well below freezing for extended periods—antifreeze provides an extra layer of protection. It’s also useful if your RV has complex plumbing with hard-to-reach areas that air might not fully clear. Additionally, if you’re not confident in your ability to blow out the lines properly, antifreeze is a safer bet.
How to Use Antifreeze
To use antifreeze, you’ll need to bypass the water heater and freshwater tank (if possible) and use a hand pump or antifreeze kit to draw the solution into the system. Run it through each faucet until you see pink antifreeze coming out. Pour antifreeze directly into drain traps and the toilet bowl. This method is more thorough but also more time-consuming and slightly more expensive.
Combining Both Methods
Many RVers use a hybrid approach: blow out the lines first to remove most of the water, then add antifreeze to the traps and toilet. This gives you the best of both worlds—efficient water removal and guaranteed freeze protection in critical areas.
Maintaining Your RV Plumbing Year-Round
Blowing out water lines is just one part of RV plumbing care. To keep your system in top shape, follow these maintenance tips throughout the year.
Inspect Seals and Connections
Regularly check for leaks, cracks, or worn seals around faucets, valves, and connections. Even small drips can lead to bigger problems over time. Replace any damaged parts promptly.
Use a Water Filter
Installing a water filter at the city water inlet helps remove sediment and impurities. This protects your plumbing and improves the taste of your drinking water.
Flush the Water Heater
At least once a year, drain and flush your water heater to remove sediment buildup. This improves efficiency and extends the life of the unit.
Store with Empty Tanks
Whenever possible, store your RV with empty freshwater and water heater tanks. This reduces the risk of freezing and prevents stagnant water from developing odors or bacteria.
Check for Rodent Damage
Mice and other rodents love to nest in RVs and can chew through water lines. Inspect your plumbing regularly, especially after long storage periods. Use steel wool or rodent deterrents to keep them away.
Final Thoughts: Protect Your RV Investment
Blowing out RV water lines might seem like a small task, but it’s one of the most important things you can do to protect your RV. A few hours of preparation can save you from expensive repairs and downtime. Whether you’re storing your RV for the winter or preparing for a cold-weather trip, this simple process ensures your plumbing stays intact and functional.
Remember, the key is to be thorough and methodical. Drain everything first, use the right tools, and work systematically through each fixture. Don’t rush—take your time to do it right. And if you’re ever unsure, consult your owner’s manual or reach out to an RV technician for guidance.
By making this a regular part of your RV maintenance routine, you’ll enjoy peace of mind knowing your home on wheels is ready for whatever the road—and the weather—throws your way.
Frequently Asked Questions
Can I use a regular air compressor to blow out RV water lines?
Yes, as long as it has a pressure regulator and can deliver at least 5–10 CFM. Avoid high-pressure industrial compressors, as they can damage your plumbing. Always keep the pressure below 50 PSI.
Do I need to blow out both hot and cold water lines?
Yes. Both hot and cold lines can hold water that may freeze. Make sure to open and blow out every faucet, shower, and fixture on both sides of the system.
How long does it take to blow out RV water lines?
It typically takes 15–30 minutes, depending on the size of your RV and the number of fixtures. Take your time to ensure all lines are fully cleared.
Can I blow out water lines without draining the tanks first?
No. Draining the freshwater tank, water heater, and low-point valves first is essential. Air can’t effectively push out large volumes of water, so draining ensures better results.
Is it safe to use compressed air on RV plumbing?
Yes, as long as you use low pressure (under 50 PSI) and follow proper procedures. High pressure can damage seals and fittings, so always use a regulator and monitor the gauge.
Should I use antifreeze after blowing out the lines?
It’s not required, but recommended for complete protection. Use non-toxic RV antifreeze in drain traps, toilet bowls, and any hard-to-reach areas to prevent residual water from freezing.

At CarLegit, we believe information should be clear, factual, and genuinely helpful. That’s why every guide, review, and update on our website is created with care, research, and a strong focus on user experience.