
Changing the cabin air filter in your Toyota RAV4 is a quick, DIY-friendly task that takes under 15 minutes and requires no special tools. Regular replacement improves air quality inside your vehicle, protects your HVAC system, and ensures you breathe cleaner air on every drive.
In This Article
- 1 Key Takeaways
- 2 📑 Table of Contents
- 3 Why Changing Your Toyota RAV4 Cabin Air Filter Matters
- 4 When Should You Replace the Cabin Air Filter?
- 5 What You’ll Need to Change the Cabin Air Filter
- 6 Step-by-Step Guide: How to Change the Cabin Air Filter in a Toyota RAV4
- 7 Model-Specific Tips for Different RAV4 Generations
- 8 Common Mistakes to Avoid
- 9 Benefits of Regular Cabin Air Filter Maintenance
- 10 Final Thoughts
- 11 Frequently Asked Questions
- 11.1 How often should I change the cabin air filter in my Toyota RAV4?
- 11.2 Can I change the cabin air filter myself, or do I need a mechanic?
- 11.3 What happens if I don’t change the cabin air filter?
- 11.4 Where is the cabin air filter located in a Toyota RAV4?
- 11.5 Do I need a special tool to remove the cabin air filter?
- 11.6 Can I reuse or clean my cabin air filter?
Key Takeaways
- Easy DIY job: Most RAV4 models allow you to change the cabin air filter without tools or professional help.
- Improves air quality: A clean filter removes dust, pollen, and pollutants, making the cabin air fresher and healthier.
- Protects HVAC system: Prevents debris from clogging vents and overworking the blower motor.
- Recommended every 12,000–15,000 miles: Replace more often if you drive in dusty areas or heavy traffic.
- Located behind the glove box: Access is simple—just remove a few clips or screws depending on your model year.
- Use OEM or high-quality filters: Avoid cheap alternatives that may not fit properly or filter effectively.
- Check your owner’s manual: Confirm the correct filter type and replacement interval for your specific RAV4 year.
📑 Table of Contents
- Why Changing Your Toyota RAV4 Cabin Air Filter Matters
- When Should You Replace the Cabin Air Filter?
- What You’ll Need to Change the Cabin Air Filter
- Step-by-Step Guide: How to Change the Cabin Air Filter in a Toyota RAV4
- Model-Specific Tips for Different RAV4 Generations
- Common Mistakes to Avoid
- Benefits of Regular Cabin Air Filter Maintenance
- Final Thoughts
Why Changing Your Toyota RAV4 Cabin Air Filter Matters
You might not think much about the air inside your car, but it plays a big role in your comfort and health—especially if you or your passengers have allergies, asthma, or sensitivities to dust and pollen. The cabin air filter in your Toyota RAV4 is the unsung hero that keeps the air you breathe clean by trapping pollutants before they enter the cabin through the HVAC system.
Over time, this filter gets clogged with dirt, leaves, pollen, and other debris. When that happens, airflow drops, your AC or heater works harder, and unpleasant odors can start to build up. Worse, a dirty filter can lead to mold or bacteria growth, which then gets blown directly into your face every time you turn on the climate control. Replacing the cabin air filter is one of the easiest and most effective maintenance tasks you can do to keep your RAV4 feeling fresh and running efficiently.
Plus, it’s incredibly simple. Unlike oil changes or brake jobs, you don’t need ramps, jacks, or mechanical expertise. Most RAV4 owners can complete the job in under 15 minutes using just their hands—no tools required on many models. And the cost? Typically between $15 and $30 for a new filter. That’s a small price to pay for cleaner air and a healthier ride.
When Should You Replace the Cabin Air Filter?
So how often should you swap out that little filter? Toyota recommends replacing the cabin air filter every 12,000 to 15,000 miles—or once a year, whichever comes first. But that’s just a general guideline. Your actual driving conditions matter a lot.
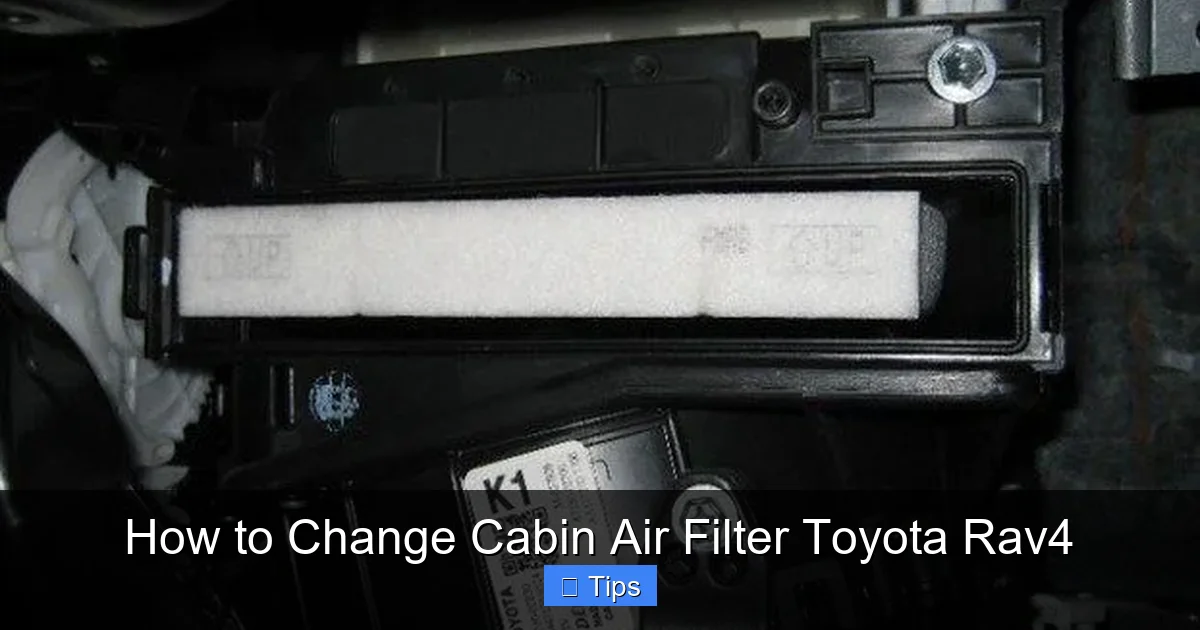
Visual guide about How to Change Cabin Air Filter Toyota Rav4
Image source: s3.amazonaws.com
Driving Conditions That Demand More Frequent Changes
If you regularly drive in heavy traffic, rural areas with lots of dirt roads, or regions with high pollen counts (hello, spring allergy season!), you may need to replace the filter more often—maybe every 6,000 to 10,000 miles. Similarly, if you notice reduced airflow from your vents, a musty smell when you turn on the AC, or visible dirt buildup around the glove box area, it’s definitely time for a change.
Signs Your Filter Needs Replacing
Here are a few telltale signs that your RAV4’s cabin air filter is past its prime:
- Weak airflow: Even on high fan speed, air feels weak coming out of the vents.
- Unpleasant odors: A damp or sour smell when the AC runs—often a sign of mold growth.
- Increased dust inside the car: You’re constantly wiping surfaces clean.
- Allergy flare-ups: You or passengers sneeze more or feel congested while driving.
- Visible grime: When you peek behind the glove box, the filter looks dark and clogged.
Don’t wait until your next service appointment if you notice these symptoms. A quick filter swap can make a world of difference.
What You’ll Need to Change the Cabin Air Filter
Before you start, gather a few basic items. The good news? You probably already have most of them at home.
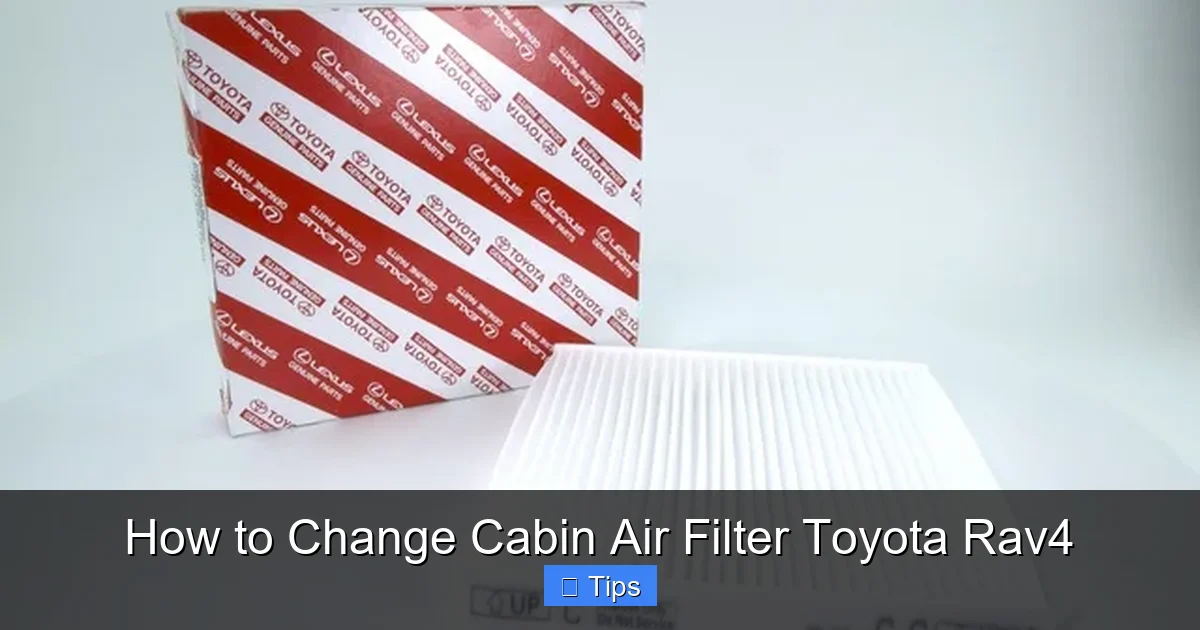
Visual guide about How to Change Cabin Air Filter Toyota Rav4
Image source: s3.amazonaws.com
Tools and Supplies Checklist
- New cabin air filter: Make sure it’s compatible with your RAV4’s year and trim. OEM (Toyota Genuine) filters are ideal, but high-quality aftermarket brands like Fram, K&N, or Bosch also work well.
- Gloves (optional): Keep your hands clean, especially if the old filter is dirty.
- Flashlight: Helps you see into tight spaces behind the glove box.
- Small vacuum or rag: To clean up any debris that falls during removal.
No socket wrenches, no jack stands—just your hands and maybe a Phillips screwdriver if your model requires it (more on that below). Always double-check your owner’s manual or look up your specific RAV4 year online to confirm the exact process and filter type.
Choosing the Right Filter
Not all cabin air filters are created equal. Basic particle filters capture dust and pollen, while activated carbon filters also absorb odors and harmful gases like exhaust fumes. If you live in a city with heavy traffic or want maximum air purification, go for a carbon-enhanced filter. They cost a bit more (around $25–$35), but the extra filtration is worth it for many drivers.
Avoid ultra-cheap filters sold in bulk bins—they often use thin materials that don’t seal properly or filter effectively. Stick with reputable brands and check reviews. And always verify the part number matches your RAV4. For example, a 2019 RAV4 LE uses a different filter than a 2023 RAV4 Hybrid XSE—even though they look similar.
Step-by-Step Guide: How to Change the Cabin Air Filter in a Toyota RAV4
Now for the fun part! The process varies slightly depending on your RAV4’s generation, but the core steps are the same. Below, we’ll walk through the most common method used in RAV4 models from 2006 to 2024.
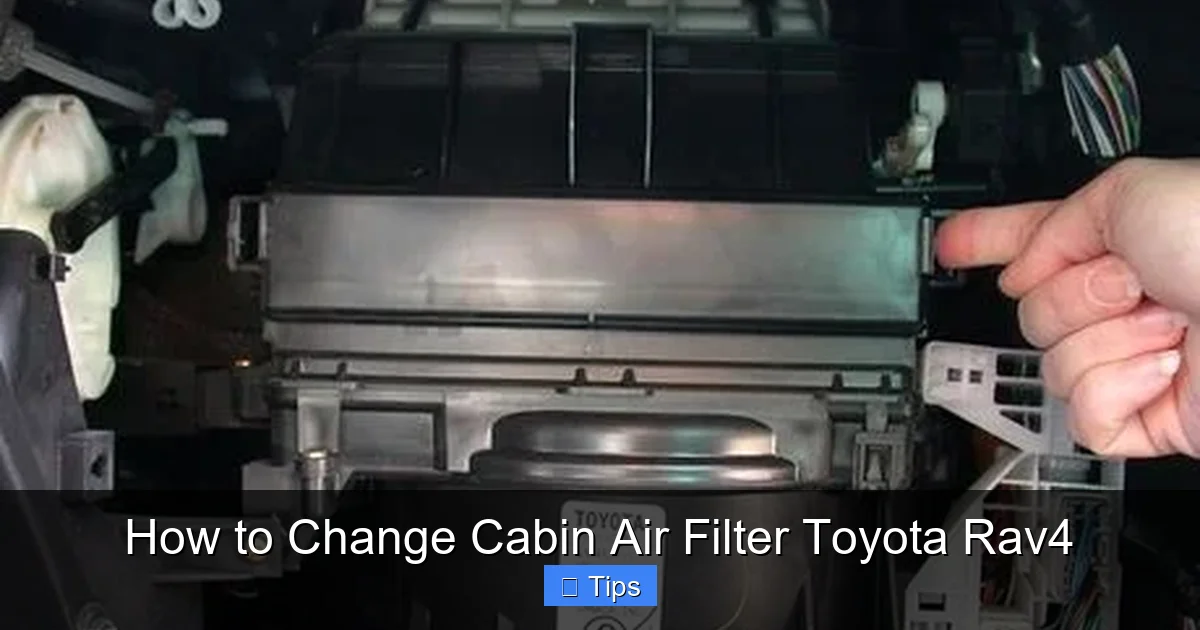
Visual guide about How to Change Cabin Air Filter Toyota Rav4
Image source: wikihow.com
Step 1: Locate the Cabin Air Filter Housing
The cabin air filter is housed behind the glove box on the passenger side. Open the glove box and empty it completely. Then, look for two small dampers or stop arms on either side of the glove box interior. These prevent the glove box from falling all the way down when opened.
Gently squeeze the sides of each damper inward (they’re usually made of plastic and flexible) and detach them from the glove box frame. Once both are released, the glove box will drop down freely, revealing a rectangular plastic cover—the cabin air filter housing.
Step 2: Remove the Old Filter
The housing cover is held in place by clips or a simple latch. On most RAV4 models (especially 2013–2024), you can simply press the tabs on the sides of the cover and pull it straight out. No screws! Older models (like 2006–2012) may have one or two Phillips screws—use your screwdriver to remove them first.
Once the cover is off, you’ll see the old filter slid into a slot. Note the direction of the airflow arrows printed on the filter frame—this tells you which way it should face when reinstalling. Gently pull the filter straight out. It may be snug, but it shouldn’t require force. If it’s stuck, wiggle it slightly while pulling.
Step 3: Clean the Housing (Optional but Recommended)
Before inserting the new filter, take a moment to inspect the housing. Use a flashlight to check for leaves, dirt, or debris that may have accumulated. Wipe the interior with a dry rag or use a small handheld vacuum to suck out loose particles. This ensures your new filter starts clean and lasts longer.
Step 4: Install the New Filter
Take your new cabin air filter and align it with the slot, making sure the airflow arrows point toward the cabin (usually downward or toward the back of the vehicle—refer to the old filter’s orientation if unsure). Slide it in gently until it seats fully. Don’t force it; if it doesn’t go in easily, double-check the direction.
Once the filter is in place, reattach the housing cover. Press the clips or latch until you hear a click. For older models with screws, reinstall them securely but don’t overtighten—plastic threads can strip easily.
Step 5: Reattach the Glove Box
Lift the glove box back into position and reattach the two dampers by snapping them onto the mounting points. Close the glove box and test that it opens and closes smoothly. Turn on your HVAC system and feel the airflow—it should feel stronger and fresher right away.
Congratulations! You’ve just completed a maintenance task that dealerships often charge $50–$100 to do. And you did it in under 15 minutes.
Model-Specific Tips for Different RAV4 Generations
While the basic process is consistent, a few RAV4 generations have quirks worth noting.
2006–2012 RAV4 (Third Generation)
These models often require removing one or two screws to access the filter housing. Keep a Phillips screwdriver handy. Also, the glove box dampers are stiffer—take your time detaching them to avoid breaking the plastic clips.
2013–2018 RAV4 (Fourth Generation)
This is where Toyota simplified the design. No screws—just clips. The filter slides in vertically, and the airflow arrows typically point downward. Many owners report this as the easiest cabin filter change in any vehicle.
2019–2024 RAV4 (Fifth Generation)
The process remains nearly identical to the fourth gen, but some trims (especially hybrids) may have slightly tighter clearance. If the filter feels tight, rotate it slightly as you insert it. Also, newer models often come with a cabin air filter indicator light on the dashboard—reset it after replacement if needed (check your manual).
Regardless of your RAV4’s year, always consult your owner’s manual or a trusted online forum (like Toyota Nation or RAV4 World) if you’re unsure. Photos and videos from other owners can be incredibly helpful.
Common Mistakes to Avoid
Even simple jobs can go sideways if you rush or overlook details. Here are a few pitfalls to dodge:
- Installing the filter backward: Airflow direction matters! Reversing it reduces efficiency and can damage the HVAC system over time.
- Forcing the filter: If it doesn’t slide in easily, double-check the size and orientation. Forcing it can crack the housing.
- Skipping the housing cleanup: Dirt left behind shortens the new filter’s life and reduces performance.
- Using the wrong filter type: Carbon vs. standard filters aren’t always interchangeable. Match the specs exactly.
- Not reattaching the glove box properly: Loose dampers can cause rattling or the glove box to fall unexpectedly.
Take your time, follow the steps, and you’ll avoid these issues entirely.
Benefits of Regular Cabin Air Filter Maintenance
Beyond just cleaner air, changing your cabin air filter offers several real-world benefits:
- Better fuel efficiency: A clogged filter makes your HVAC system work harder, which can slightly increase engine load and reduce MPG.
- Longer HVAC lifespan: Less strain on the blower motor and evaporator means fewer repairs down the road.
- Improved defrost performance: Stronger airflow helps clear fogged windows faster in cold weather.
- Enhanced resale value: Documented maintenance—including filter changes—shows potential buyers you’ve cared for the vehicle.
Think of it as a small investment with big returns—for your health, your car, and your wallet.
Final Thoughts
Changing the cabin air filter in your Toyota RAV4 isn’t just a chore—it’s an act of self-care for you and your passengers. It’s quick, affordable, and makes a noticeable difference in how your vehicle feels and performs. Whether you’re navigating city streets or heading out on a road trip, clean air makes every mile more enjoyable.
So the next time you’re due for a change, don’t put it off. Grab a filter, follow these steps, and breathe easy knowing you’ve taken control of your RAV4’s maintenance. Your lungs—and your HVAC system—will thank you.
Frequently Asked Questions
How often should I change the cabin air filter in my Toyota RAV4?
Toyota recommends replacing the cabin air filter every 12,000 to 15,000 miles or once a year. However, if you drive in dusty conditions, heavy traffic, or high-pollen areas, consider changing it every 6,000 to 10,000 miles.
Can I change the cabin air filter myself, or do I need a mechanic?
Yes, you can absolutely do it yourself! Most RAV4 models allow you to replace the filter in under 15 minutes without any tools. It’s one of the easiest DIY maintenance tasks for car owners.
What happens if I don’t change the cabin air filter?
A dirty filter reduces airflow, causes unpleasant odors, increases strain on the HVAC system, and allows pollutants to enter the cabin. Over time, this can lead to mold growth and poor air quality inside your vehicle.
Where is the cabin air filter located in a Toyota RAV4?
The cabin air filter is located behind the glove box on the passenger side. You’ll need to lower the glove box by releasing its dampers to access the filter housing.
Do I need a special tool to remove the cabin air filter?
No special tools are needed for most RAV4 models (2013 and newer). Older models (2006–2012) may require a Phillips screwdriver to remove one or two screws on the filter housing cover.
Can I reuse or clean my cabin air filter?
No, cabin air filters are designed for single use. They cannot be effectively cleaned or reused. Always replace them with a new, high-quality filter to ensure proper performance and air quality.

At CarLegit, we believe information should be clear, factual, and genuinely helpful. That’s why every guide, review, and update on our website is created with care, research, and a strong focus on user experience.