
Changing the gas cap on your Ford F150 is a simple yet essential maintenance task that ensures proper fuel system function and prevents check engine lights. With just a few basic tools and under 10 minutes, you can replace a faulty or worn gas cap and restore your truck’s emissions control performance.
If you own a Ford F150, you know it’s built for power, reliability, and everyday toughness. But even the most rugged trucks need a little TLC now and then—and one of the simplest yet most overlooked maintenance tasks is replacing the gas cap. Yes, that small, often ignored piece of plastic or metal at the end of your fuel filler neck plays a surprisingly big role in your truck’s performance.
You might be thinking, “It’s just a cap—how important can it really be?” The truth is, the gas cap is a critical component of your F150’s evaporative emissions control system (also known as the EVAP system). This system is designed to prevent fuel vapors from escaping into the atmosphere, which helps reduce pollution and keeps your truck running efficiently. When the gas cap is loose, cracked, or missing, it can cause a pressure leak in the fuel system. That leak triggers your check engine light, reduces fuel economy, and may even cause your truck to fail an emissions test.
The good news? Replacing a gas cap on a Ford F150 is one of the easiest DIY fixes you can do. You don’t need to be a mechanic, and you don’t need fancy tools. In most cases, it takes less than 10 minutes and costs less than a tank of premium gas. Whether you’re dealing with a persistent warning light or just want to stay ahead of potential issues, this guide will walk you through everything you need to know—from spotting the signs of a bad cap to installing a new one the right way.
In This Article
- 1 Key Takeaways
- 2 📑 Table of Contents
- 3 Why the Gas Cap Matters on Your Ford F150
- 4 Signs You Need to Replace Your Ford F150 Gas Cap
- 5 Choosing the Right Replacement Gas Cap
- 6 Step-by-Step Guide to Changing the Gas Cap
- 6.1 Tools and Materials Needed
- 6.2 Step 1: Park and Prepare
- 6.3 Step 2: Locate the Fuel Filler Door
- 6.4 Step 3: Remove the Old Gas Cap
- 6.5 Step 4: Inspect the Filler Neck
- 6.6 Step 5: Install the New Gas Cap
- 6.7 Step 6: Reconnect the Tether (If Applicable)
- 6.8 Step 7: Close the Filler Door
- 6.9 Step 8: Test the Installation
- 7 Resetting the Check Engine Light After Replacement
- 8 Preventing Future Gas Cap Issues
- 9 Conclusion
- 10 Frequently Asked Questions
Key Takeaways
- Why It Matters: A faulty gas cap can trigger the check engine light, reduce fuel efficiency, and cause emissions test failures.
- Signs You Need a New Cap: Look for a loose cap, visible cracks, missing tether, or persistent “Check Fuel Cap” warnings.
- Compatible Replacements: Use OEM or Ford-approved aftermarket caps to ensure proper sealing and compatibility.
- Simple DIY Process: No special tools required—just twist off the old cap and install the new one securely.
- Reset the System: After replacement, drive for a few miles or use an OBD2 scanner to clear error codes.
- Prevent Future Issues: Inspect your gas cap every oil change and clean the filler neck regularly.
- Cost-Effective Fix: Replacing a gas cap costs $15–$40 and avoids expensive diagnostics or repairs.
📑 Table of Contents
Why the Gas Cap Matters on Your Ford F150
Let’s start with the basics: what exactly does the gas cap do? At first glance, it might seem like its only job is to keep dirt and debris out of your fuel tank. But modern gas caps, especially on vehicles like the Ford F150, are far more sophisticated. They’re designed to create a tight seal that maintains the correct pressure inside the fuel system. This seal is essential for the proper function of the EVAP system, which captures fuel vapors and routes them back into the engine to be burned, rather than releasing them into the air.
When the gas cap isn’t sealing properly—whether because it’s loose, damaged, or missing—the system detects a pressure drop. Your truck’s onboard computer (the PCM, or powertrain control module) interprets this as a leak and triggers the dreaded check engine light. On many Ford F150 models, you might also see a specific message like “Check Fuel Cap” on the dashboard. This isn’t just a suggestion—it’s your truck’s way of saying, “Hey, something’s not right with the fuel system.”
Ignoring this warning can lead to more than just an illuminated light. Over time, a faulty gas cap can cause:
– Reduced fuel efficiency (you’ll notice more frequent fill-ups)
– Increased emissions (bad for the environment and possibly your state inspection)
– Potential damage to other EVAP components, like the charcoal canister or purge valve
– Failed emissions tests (in states that require them)
And while a bad gas cap won’t leave you stranded on the side of the road, it can lead to unnecessary stress and repair bills if left unchecked. For example, a mechanic might assume the issue is with a more complex part of the EVAP system and recommend expensive diagnostics or replacements—when all you really needed was a $25 gas cap.
Signs You Need to Replace Your Ford F150 Gas Cap
So how do you know if your gas cap is the culprit? The most obvious sign is the check engine light. But not all check engine lights are created equal. Some are serious—like a misfiring engine or a failing catalytic converter. Others, like a loose gas cap, are minor and easy to fix.
Here are the most common signs that your Ford F150’s gas cap needs replacing:
Check Engine Light or “Check Fuel Cap” Message
If your dashboard shows a check engine light and you’ve recently filled up gas, the first thing to check is the gas cap. Many newer F150 models (especially 2015 and later) will display a specific “Check Fuel Cap” message. This is a direct clue that the system has detected a pressure issue in the fuel tank.
Visual guide about How to Change Gas Cap on Ford F150
Image source: m.media-amazon.com
Loose or Hard-to-Tighten Cap
A properly functioning gas cap should screw on smoothly and click when it’s fully tightened. If it feels loose, spins freely, or doesn’t click, the internal seal or threading may be worn out. This is a common issue with older caps that have been over-tightened or exposed to extreme temperatures.
Visible Damage or Cracks
Take a close look at your gas cap. Are there cracks in the plastic housing? Is the rubber seal brittle or missing pieces? Even small cracks can allow vapors to escape and trigger the EVAP system. If you see any damage, it’s time for a replacement.
Missing or Broken Tether
Many Ford F150 gas caps come with a tether that keeps the cap attached to the filler neck. This prevents you from driving off without it. If the tether is broken or missing, you’re more likely to lose the cap—and that’s a surefire way to trigger the check engine light.
Persistent Odor Near the Fuel Tank
If you notice a strong gasoline smell around the rear of your truck, especially after filling up, it could mean fuel vapors are escaping. This is a safety hazard and a sign that the gas cap isn’t sealing properly.
Failed Emissions Test
During an emissions inspection, technicians check the integrity of the EVAP system. If your gas cap is faulty, the test may fail—even if everything else on your truck is in perfect condition.
If you notice any of these signs, don’t wait. Replacing the gas cap is quick, affordable, and can save you from bigger headaches down the road.
Choosing the Right Replacement Gas Cap
Now that you know why the gas cap matters and how to spot a problem, it’s time to pick a replacement. Not all gas caps are created equal, and using the wrong one can cause more problems than it solves.
OEM vs. Aftermarket: What’s the Difference?
OEM (Original Equipment Manufacturer) gas caps are made by Ford or a Ford-approved supplier. They’re designed specifically for your F150 and meet exact specifications for fit, seal, and durability. Aftermarket caps are made by third-party companies and can vary widely in quality.
Visual guide about How to Change Gas Cap on Ford F150
Image source: i.etsystatic.com
While OEM caps are usually more expensive, they’re worth the investment for peace of mind. A cheap aftermarket cap might not seal properly, leading to the same check engine light issues you’re trying to fix. Look for aftermarket brands that are Ford-approved or certified by organizations like the EPA or CARB (California Air Resources Board).
Compatibility by Model Year
Ford F150 gas caps are not universal. The design and threading can vary between model years and engine types. For example:
- 2004–2008 F150: Uses a specific cap with a dual-thread design
- 2009–2014 F150: Features a redesigned cap with improved sealing
- 2015–2020 F150: Includes a cap with a built-in pressure relief valve
- 2021–2024 F150: Uses a cap compatible with both gas and hybrid models
Always check your owner’s manual or consult a Ford parts specialist to ensure you’re buying the correct cap for your truck.
Features to Look For
When shopping for a replacement gas cap, look for these key features:
- Secure Seal: A high-quality rubber gasket that creates an airtight seal
- Click Mechanism: Audible or tactile feedback when the cap is fully tightened
- Tether or Retention Strap: Prevents loss and keeps the cap handy
- Pressure Relief Valve: Allows excess pressure to escape safely (important for modern EVAP systems)
- Corrosion Resistance: Durable materials that won’t rust or degrade over time
Where to Buy
You can purchase a replacement gas cap from several sources:
- Ford Dealership: Highest quality and guaranteed compatibility, but usually the most expensive
- Auto Parts Stores: Advance Auto Parts, AutoZone, O’Reilly Auto Parts, and NAPA carry both OEM and aftermarket options
- Online Retailers: Amazon, RockAuto, and FordParts.com offer a wide selection with customer reviews
Prices typically range from $15 to $40, depending on the brand and features.
Step-by-Step Guide to Changing the Gas Cap
Ready to replace your Ford F150’s gas cap? It’s easier than you think. Here’s a simple, step-by-step guide to get it done right.
Tools and Materials Needed
You won’t need much for this job. Here’s what to have on hand:
Visual guide about How to Change Gas Cap on Ford F150
Image source: m.media-amazon.com
- New gas cap (compatible with your F150 model year)
- Clean rag or paper towel
- Optional: Flashlight (to inspect the filler neck)
That’s it! No wrenches, no jacks, no special skills required.
Step 1: Park and Prepare
Start by parking your F150 on a flat surface and turning off the engine. Engage the parking brake for safety. If you’ve just filled up, wait a few minutes to let any fuel vapors settle.
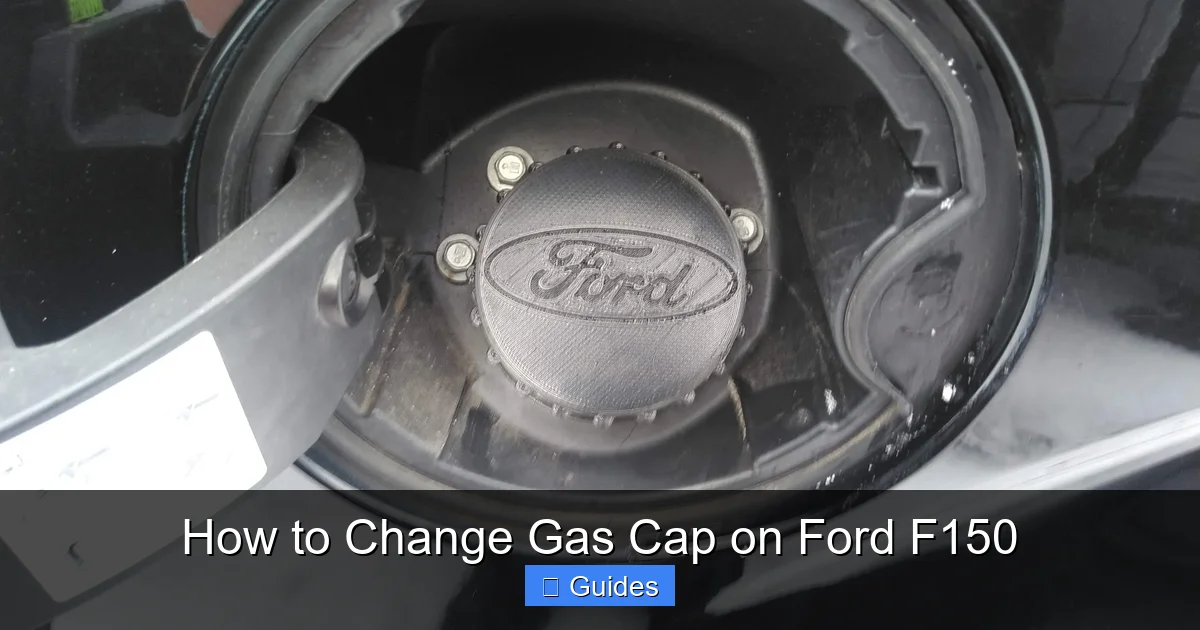
Step 2: Locate the Fuel Filler Door
The fuel filler door is on the driver’s side rear quarter panel. On most F150 models, you can open it by pressing the release button inside the cab (usually near the driver’s door or on the floor) or by using the key fob. Once open, you’ll see the fuel filler neck and the gas cap.
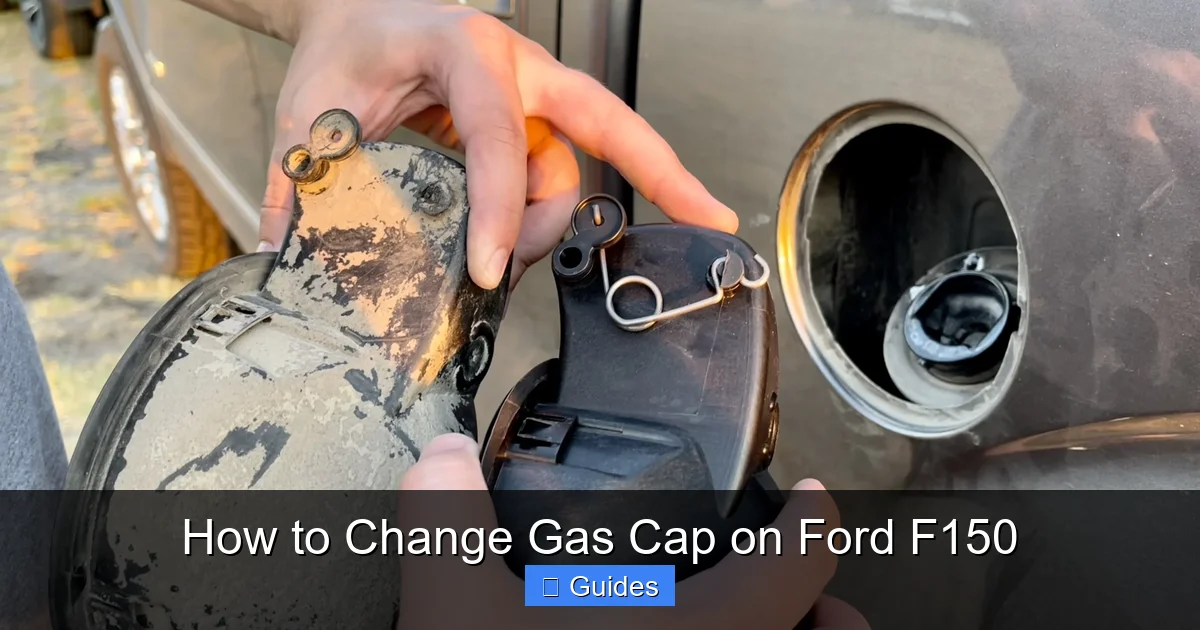
Step 3: Remove the Old Gas Cap
Turn the gas cap counterclockwise to unscrew it. Most Ford F150 caps require about one full turn to release. If it’s stuck, don’t force it—try spraying a little WD-40 around the threads and wait a minute before trying again. Once loose, pull the cap straight out. If it has a tether, disconnect it carefully.
Step 4: Inspect the Filler Neck
Before installing the new cap, take a moment to inspect the filler neck. Look for dirt, rust, or debris that could interfere with the seal. Wipe the area clean with a rag. If you see heavy corrosion or damage, consider having a mechanic check the fuel system.
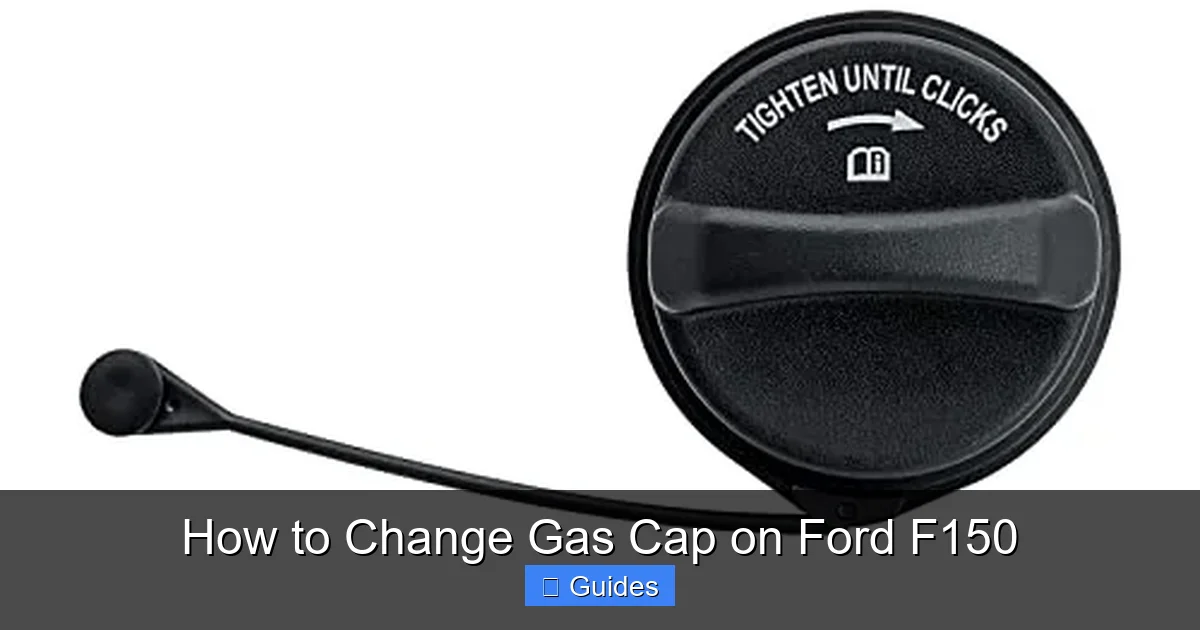
Step 5: Install the New Gas Cap
Take your new gas cap and align it with the threads on the filler neck. Turn it clockwise until it clicks. Most Ford caps will click 3–5 times as they tighten. Don’t over-tighten—this can damage the seal or strip the threads. A firm hand is all you need.
Step 6: Reconnect the Tether (If Applicable)
If your new cap has a tether, attach it to the designated clip on the filler door or neck. This ensures you won’t lose the cap when refueling.
Step 7: Close the Filler Door
Push the fuel filler door closed until it clicks into place. Make sure it’s fully sealed to prevent water or dirt from entering.
Step 8: Test the Installation
Start your truck and check the dashboard. If the check engine light was on, it may take a few drive cycles for the system to reset. Drive normally for 10–15 minutes, then check again. If the light remains off, you’re good to go!
Resetting the Check Engine Light After Replacement
Even after replacing the gas cap, the check engine light might stay on for a while. That’s because your truck’s computer needs time to confirm that the leak has been fixed.
Drive Cycle Method
The simplest way to reset the system is to drive your F150 normally for a few days. Ford’s onboard diagnostics system will run a series of tests to verify the EVAP system is functioning properly. This usually takes 50–100 miles of mixed driving (city and highway). Once the system confirms no leaks, the light should turn off automatically.
Using an OBD2 Scanner
If you want to speed things up, you can use an OBD2 scanner to clear the error code. These devices plug into the diagnostic port (usually under the dashboard near the steering column) and allow you to read and erase trouble codes. Many auto parts stores offer free code reading, or you can buy a basic scanner for $20–$50.
Manual Reset (Not Recommended)
Some people try to reset the system by disconnecting the battery. While this can work, it also resets other settings (like radio presets and clock) and may not fully clear EVAP-related codes. It’s better to use the drive cycle or OBD2 method.
Preventing Future Gas Cap Issues
Now that your gas cap is replaced and working properly, here’s how to keep it that way.
Regular Inspections
Make it a habit to check your gas cap every time you change the oil or rotate the tires. Look for cracks, wear, or a loose fit. A quick visual inspection can catch problems early.
Proper Tightening Technique
Always tighten the cap until it clicks. Don’t over-tighten—this can damage the seal. If you’re unsure, refer to your owner’s manual for specific instructions.
Keep the Filler Neck Clean
Dirt and moisture can interfere with the seal. Wipe the filler neck with a clean cloth after fueling, especially in wet or muddy conditions.
Use Quality Fuel
Low-quality or contaminated fuel can leave residues that affect the gas cap and EVAP system. Stick to reputable gas stations and consider using a fuel system cleaner every few thousand miles.
Replace Before It Fails
Gas caps don’t last forever. Most manufacturers recommend replacing them every 50,000 miles or 5 years, even if they seem fine. Think of it as preventive maintenance—like changing your air filter.
Conclusion
Changing the gas cap on your Ford F150 is one of the simplest, most cost-effective maintenance tasks you can do. It takes less than 10 minutes, requires no special tools, and can prevent a host of problems—from check engine lights to reduced fuel efficiency. By understanding why the gas cap matters, recognizing the signs of failure, and following the right steps to replace it, you’ll keep your F150 running smoothly and efficiently for years to come.
Don’t let a small part cause big headaches. Whether you’re dealing with a persistent warning light or just want to stay ahead of maintenance, replacing your gas cap is a smart move. With the right replacement and a little attention to detail, you’ll ensure your truck’s fuel system stays sealed, safe, and compliant with emissions standards.
So next time you fill up, take a moment to check that cap. A quick twist could save you time, money, and stress down the road.
Frequently Asked Questions
How often should I replace my Ford F150 gas cap?
It’s recommended to replace your gas cap every 50,000 miles or 5 years, even if it appears to be working fine. Over time, the rubber seal can degrade, leading to leaks.
Can I use any gas cap on my Ford F150?
No, you should use a cap that’s compatible with your specific model year. Using the wrong cap can cause sealing issues and trigger the check engine light.
Will a new gas cap fix my check engine light?
In many cases, yes—especially if the code is related to a loose or faulty gas cap (like P0455 or P0457). After replacement, drive for a few miles to allow the system to reset.
Is it safe to drive with a broken gas cap?
While your truck will still run, it’s not ideal. A broken cap can lead to fuel vapor leaks, reduced efficiency, and failed emissions tests. Replace it as soon as possible.
Do I need to reset the computer after changing the gas cap?
Not always. The system may reset itself after a few drive cycles. If the light stays on, use an OBD2 scanner to clear the code.
Can a bad gas cap damage my engine?
No, it won’t damage the engine directly. But it can affect the EVAP system and lead to increased emissions or failed inspections if left unaddressed.

At CarLegit, we believe information should be clear, factual, and genuinely helpful. That’s why every guide, review, and update on our website is created with care, research, and a strong focus on user experience.