
Checking the primary oil on your Harley Davidson is a simple but essential maintenance task that ensures your clutch and transmission stay cool and lubricated. Doing it regularly can prevent overheating, reduce wear, and extend the life of your motorcycle’s drivetrain components.
In This Article
- 1 Key Takeaways
- 2 📑 Table of Contents
- 3 Why Checking Primary Oil Matters on Your Harley Davidson
- 4 Understanding the Harley Davidson Primary Oil System
- 5 When and How Often Should You Check Primary Oil?
- 6 Step-by-Step Guide: How to Check Primary Oil on Harley Davidson
- 7 Choosing the Right Primary Oil for Your Harley
- 8 Common Mistakes to Avoid When Checking Primary Oil
- 9 Signs Your Primary Oil Needs Attention
- 10 Conclusion: Keep Your Harley Running Smoothly
- 11 Frequently Asked Questions
- 11.1 Can I use engine oil in the primary case?
- 11.2 How much primary oil does a Harley Davidson hold?
- 11.3 What happens if primary oil is too low?
- 11.4 Can I check primary oil while the bike is hot?
- 11.5 How do I know if my primary oil is contaminated?
- 11.6 Do I need to change primary oil if I only ride occasionally?
Key Takeaways
- Primary oil lubricates the clutch and transmission components: Unlike engine oil, primary oil specifically protects the clutch plates and transmission gears in Harley Davidson motorcycles.
- Check when the engine is cold: Always inspect primary oil levels before starting the bike or after it has cooled down completely to avoid burns and inaccurate readings.
- Use the correct dipstick and method: Harley Davidson uses a unique dipstick design for the primary compartment—never use the engine oil dipstick.
- Maintain proper oil level: Too little oil causes overheating and clutch slippage; too much can lead to foaming and seal damage.
- Change primary oil every 5,000 to 10,000 miles: Regular changes keep contaminants out and ensure optimal performance, especially on older models or high-mileage bikes.
- Use Harley-specific primary oil or approved equivalents: Not all oils are suitable—stick to 20W-50 or Harley’s Screamin’ Eagle Primary Oil for best results.
- Inspect for leaks and contamination: Look for signs of water, metal shavings, or burnt smells, which may indicate internal issues requiring professional attention.
📑 Table of Contents
- Why Checking Primary Oil Matters on Your Harley Davidson
- Understanding the Harley Davidson Primary Oil System
- When and How Often Should You Check Primary Oil?
- Step-by-Step Guide: How to Check Primary Oil on Harley Davidson
- Choosing the Right Primary Oil for Your Harley
- Common Mistakes to Avoid When Checking Primary Oil
- Signs Your Primary Oil Needs Attention
- Conclusion: Keep Your Harley Running Smoothly
Why Checking Primary Oil Matters on Your Harley Davidson
If you’re a Harley Davidson owner, you already know that these bikes are built for the long haul. But even the most rugged machines need regular care. One of the most overlooked—yet critical—maintenance tasks is checking the primary oil. This isn’t the same as engine oil. The primary oil sits in a separate compartment and plays a vital role in keeping your clutch and transmission running smoothly.
Think of the primary oil as the lifeblood of your bike’s drivetrain. It cools and lubricates the clutch plates, transmission gears, and associated components. Without enough oil, your clutch can overheat, slip, or even seize. Too much oil? That can cause foaming, which reduces lubrication and may damage seals. Either way, skipping this check can lead to expensive repairs down the road.
Harley Davidson motorcycles, especially models like the Softail, Touring, and Dyna series, use a wet clutch system housed inside the primary case. This means the clutch plates are bathed in oil, unlike dry clutches found on some sport bikes. Because of this design, the primary oil gets contaminated faster and needs regular monitoring. Whether you’re a weekend rider or a daily commuter, checking your primary oil should be as routine as checking tire pressure or fuel levels.
Understanding the Harley Davidson Primary Oil System

Visual guide about How to Check Primary Oil on Harley Davidson
Image source: i.ytimg.com
Before you pop open the primary cover, it helps to understand how the system works. The primary case is located on the left side of the engine, just below the transmission. It houses the clutch assembly and connects to the transmission via the main shaft. The oil inside this compartment doesn’t mix with engine oil—it’s a completely separate system.
The primary oil serves three main functions: lubrication, cooling, and contamination control. As the clutch engages and disengages, friction generates heat. The oil absorbs this heat and helps prevent the clutch from overheating. It also reduces wear on the clutch plates and transmission gears by forming a protective film between metal surfaces.
Over time, the oil picks up debris like metal shavings from normal wear, clutch material, and moisture. This contamination reduces its effectiveness. That’s why Harley recommends changing the primary oil every 5,000 to 10,000 miles, depending on riding conditions. If you ride in dusty environments, tow heavy loads, or frequently stop-and-go in traffic, you may need to change it more often.
One common misconception is that primary oil and transmission oil are the same. While they’re both in the same general area, they serve different purposes and are checked separately. The transmission has its own oil level plug, usually on the right side of the transmission case. Always refer to your owner’s manual to confirm the correct locations and procedures for your specific model.
When and How Often Should You Check Primary Oil?
Visual guide about How to Check Primary Oil on Harley Davidson
Image source: blog.amsoil.com
Timing is everything when it comes to checking primary oil. The best time to inspect the level is when the engine is cold—either before your first ride of the day or after the bike has been sitting for several hours. Why? When the engine is hot, oil expands and rises in the case, giving you a false high reading. Checking it cold ensures accuracy.
As for frequency, Harley Davidson recommends checking the primary oil level at every oil change, which is typically every 5,000 miles for most models. However, if you notice any unusual noises, clutch slippage, or difficulty shifting, check it immediately. These could be signs of low oil or contamination.
Riders who frequently ride in harsh conditions—like desert heat, heavy rain, or mountainous terrain—should inspect the oil more often. For example, if you’re on a long road trip through Arizona in July, it’s smart to check the primary oil every 1,000 miles or so. Heat accelerates oil breakdown, and low oil levels can go unnoticed until it’s too late.
Another good rule of thumb: check the primary oil before any long ride. Whether you’re heading out for a weekend getaway or a cross-country tour, a quick inspection can save you from a breakdown miles from the nearest service station. It only takes a few minutes and gives you peace of mind.
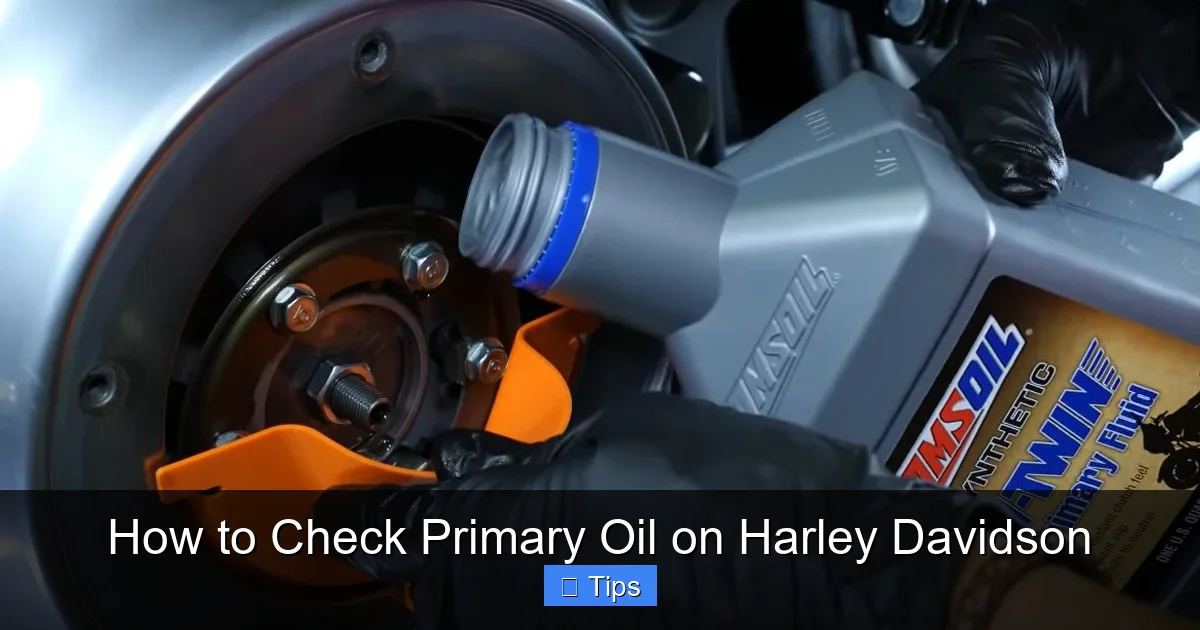
Step-by-Step Guide: How to Check Primary Oil on Harley Davidson

Visual guide about How to Check Primary Oil on Harley Davidson
Image source: ironhorserebels.com
Now that you know why and when to check, let’s walk through the actual process. This step-by-step guide works for most Harley Davidson models, including the Softail, Touring, and Dyna series. Always consult your owner’s manual first, as some newer models may have slight variations.
Step 1: Park on a Level Surface
Start by parking your Harley on a flat, level surface. This ensures the oil settles evenly in the primary case. Avoid checking the oil on a slope or incline, as this can give you an inaccurate reading. If you’re at home, your garage floor is ideal. On the road, look for a level parking lot or driveway.
Step 2: Let the Engine Cool Down
Never check primary oil right after riding. The oil will be hot and expanded, leading to a false high reading. Wait at least 2–3 hours after your last ride, or check it first thing in the morning before starting the bike. This gives the oil time to cool and settle.
Step 3: Locate the Primary Dipstick
The primary dipstick is usually found on the left side of the motorcycle, near the primary cover. It’s often labeled “Primary” or has a distinctive cap color—commonly black or chrome. It’s not the same as the engine oil dipstick, which is typically on the right side near the oil filter.
On some models, like the Road King or Street Glide, the dipstick may be tucked behind a small cover or require removing a rubber cap. If you’re unsure, refer to your owner’s manual or look for a threaded plug with a dipstick attached.
Step 4: Remove and Inspect the Dipstick
Unscrew the dipstick by hand. Be careful—there may be a small amount of oil residue, so have a rag ready. Wipe the dipstick clean with a lint-free cloth. Look for any signs of contamination: metal flakes, sludge, or a burnt smell. Clean oil should be amber to light brown and translucent.
If the oil looks milky or has a frothy appearance, it may be contaminated with water or coolant. This could indicate a seal failure or internal leak. A burnt smell suggests the oil has overheated, possibly due to low levels or excessive clutch slipping.
Step 5: Reinsert and Check the Level
After wiping the dipstick clean, reinsert it fully into the primary case. Do not screw it in—just push it all the way down. Then, pull it out again and check the oil level. The dipstick will have markings indicating “Full,” “Add,” or a range between minimum and maximum.
The oil should be between the two marks. If it’s below the “Add” line, you’ll need to top it off. If it’s above the “Full” line, you may have overfilled it, which can cause foaming and seal damage.
Step 6: Add Oil if Necessary
If the level is low, add the recommended primary oil slowly. Use a funnel to avoid spills. Harley Davidson recommends using 20W-50 motorcycle oil or their proprietary Screamin’ Eagle Primary Oil. Avoid automotive oils, as they may contain additives that harm clutch performance.
Add oil in small increments—no more than 1–2 ounces at a time. After each addition, recheck the level with the dipstick. Overfilling is just as bad as underfilling, so take your time.
Step 7: Reinstall the Dipstick and Clean Up
Once the oil level is correct, screw the dipstick back in securely. Wipe away any spilled oil with a clean rag. Oil residue can attract dirt and grime, so it’s best to keep the area clean.
Choosing the Right Primary Oil for Your Harley
Not all oils are created equal—especially when it comes to Harley Davidson motorcycles. The primary oil must withstand high temperatures, resist shear, and protect clutch plates from slipping. Using the wrong oil can lead to poor performance, clutch chatter, or even failure.
Harley Davidson recommends using 20W-50 viscosity oil for the primary compartment. This thicker oil provides better lubrication under high heat and pressure. It also helps prevent clutch slippage, which is common in wet clutch systems.
For best results, use Harley’s own Screamin’ Eagle Primary Oil. It’s specifically formulated for Harley engines and meets all OEM specifications. It contains friction modifiers that enhance clutch engagement and reduce wear.
If you prefer a third-party brand, look for oils labeled “motorcycle-specific” or “wet clutch compatible.” Brands like Mobil 1 V-Twin, Bel-Ray, and Spectro offer high-quality options. Avoid automotive oils, even if they’re 20W-50. They often contain friction reducers that can cause clutch slippage in Harley’s wet clutch system.
Some riders swear by synthetic oils for better performance and longer life. While synthetics can offer improved heat resistance and flow, make sure they’re approved for use in Harley primary cases. Always check the label or consult your dealer.
Common Mistakes to Avoid When Checking Primary Oil
Even experienced riders can make mistakes when checking primary oil. Here are some common pitfalls to watch out for:
Checking Hot Oil
One of the biggest errors is checking the oil when the engine is still warm. Hot oil expands and gives a false high reading. Always wait until the bike has cooled down completely.
Using the Wrong Dipstick
Never use the engine oil dipstick to check primary oil. They’re located in different areas and measure different systems. Using the wrong one can lead to incorrect readings and potential damage.
Overfilling the Primary Case
Adding too much oil can cause foaming, which reduces lubrication and may blow out seals. Stick to the recommended level and add oil slowly.
Ignoring Contamination
Just checking the level isn’t enough. Always inspect the oil for signs of contamination. Milky oil, metal shavings, or a burnt smell are red flags that require immediate attention.
Using the Wrong Oil
Automotive oils or low-quality substitutes can harm your clutch and transmission. Always use Harley-approved or motorcycle-specific 20W-50 oil.
Skipping Regular Checks
Don’t wait for problems to appear. Make primary oil checks part of your regular maintenance routine. A few minutes now can save you hundreds in repairs later.
Signs Your Primary Oil Needs Attention
Even if you check the oil regularly, it’s important to know the warning signs of trouble. Here are some symptoms that your primary oil may be low, contaminated, or due for a change:
– Clutch Slippage: If the engine revs but the bike doesn’t accelerate, the clutch may be slipping due to low or degraded oil.
– Hard Shifting: Difficulty shifting gears, especially into first or second, can indicate poor lubrication in the transmission.
– Burning Smell: A strong, burnt odor near the primary case suggests overheating and oil breakdown.
– Unusual Noises: Grinding, whining, or clunking sounds from the primary area may point to metal-on-metal contact.
– Oil Leaks: Visible oil around the primary cover or dipstick could mean a damaged seal or overfilling.
– Milky or Foamy Oil: This indicates water contamination or excessive aeration, both of which reduce lubrication.
If you notice any of these signs, check the primary oil immediately. If the problem persists, take your bike to a certified Harley technician for a full inspection.
Conclusion: Keep Your Harley Running Smoothly
Checking the primary oil on your Harley Davidson might seem like a small task, but it’s one of the most important things you can do to protect your investment. This simple maintenance step ensures your clutch and transmission stay cool, lubricated, and free from wear. By following the steps outlined in this guide, you’ll avoid costly repairs and enjoy smoother, more reliable rides.
Remember: always check the oil when the engine is cold, use the correct dipstick, and inspect for contamination. Stick to Harley-approved 20W-50 oil, and change it every 5,000 to 10,000 miles. Pay attention to warning signs like clutch slippage or unusual noises, and don’t ignore them.
Your Harley is more than just a motorcycle—it’s a companion on the open road. Treat it well, and it will take you wherever you want to go. So the next time you’re doing routine maintenance, take a few extra minutes to check that primary oil. Your bike—and your wallet—will thank you.
Frequently Asked Questions
Can I use engine oil in the primary case?
No, you should not use engine oil in the primary case. Engine oil contains additives that can cause clutch slippage in Harley’s wet clutch system. Always use 20W-50 motorcycle-specific oil or Harley’s Screamin’ Eagle Primary Oil.
How much primary oil does a Harley Davidson hold?
Most Harley Davidson models hold between 32 and 40 ounces (about 1 to 1.25 quarts) of primary oil. Check your owner’s manual for the exact capacity of your specific model.
What happens if primary oil is too low?
Low primary oil can cause the clutch to overheat, slip, or wear prematurely. It may also lead to increased transmission noise and potential damage to internal components.
Can I check primary oil while the bike is hot?
No, you should never check primary oil when the engine is hot. Hot oil expands and gives a false high reading. Always wait until the bike has cooled down completely.
How do I know if my primary oil is contaminated?
Look for milky or frothy oil, metal shavings on the dipstick, or a burnt smell. These signs indicate contamination and may require an oil change or further inspection.
Do I need to change primary oil if I only ride occasionally?
Yes, even occasional riders should change primary oil every 5,000 to 10,000 miles or once a year. Oil degrades over time, even if the bike isn’t used frequently.

At CarLegit, we believe information should be clear, factual, and genuinely helpful. That’s why every guide, review, and update on our website is created with care, research, and a strong focus on user experience.