
Is your Ford F150’s rear sliding window stuck, leaking, or misaligned? This guide walks you through diagnosing and fixing common problems—from broken latches to worn seals—so you can restore functionality and keep your truck cabin dry and secure.
If you own a Ford F150, especially models from the 2004–2014 generation, you’re likely familiar with the rear sliding window—a convenient feature that lets you open a portion of the back glass for ventilation without opening the tailgate. It’s great for airing out the cab after a muddy off-road trip or letting your dog stick their head out on a sunny drive. But when that sliding window starts acting up—getting stuck, leaking, or refusing to latch—it can quickly go from a helpful feature to a major headache.
You’re not alone. Thousands of F150 owners have faced similar issues, often at the worst possible time—like during a rainstorm or a long road trip. The good news? Most rear sliding window problems are fixable with some basic tools, a bit of patience, and the right guidance. Whether you’re a seasoned DIYer or tackling your first truck repair, this comprehensive guide will walk you through every step of diagnosing, repairing, and maintaining your Ford F150’s rear sliding window. We’ll cover everything from simple fixes like lubricating tracks to more involved repairs like replacing latches or weatherstripping.
By the end of this article, you’ll know exactly how to restore your sliding window to peak performance, prevent future issues, and save hundreds of dollars by avoiding dealership repairs. Let’s get started.
In This Article
- 1 Key Takeaways
- 2 📑 Table of Contents
- 3 Understanding the Ford F150 Rear Sliding Window System
- 4 Tools and Materials You’ll Need
- 5 Step-by-Step Guide to Diagnosing the Problem
- 6 How to Fix Common Ford F150 Sliding Window Problems
- 7 Preventive Maintenance Tips
- 8 When to Call a Professional
- 9 Conclusion
- 10 Frequently Asked Questions
- 10.1 Why won’t my Ford F150 rear sliding window close all the way?
- 10.2 Can I drive with a broken rear sliding window latch?
- 10.3 How often should I lubricate the sliding window tracks?
- 10.4 Is it hard to replace the weatherstripping on an F150?
- 10.5 Can I fix a leaking rear sliding window without replacing the seal?
- 10.6 Are aftermarket sliding window parts reliable?
Key Takeaways
- Identify the root cause: Common issues include broken latches, worn weatherstripping, misaligned tracks, or damaged rollers—diagnose before replacing parts.
- Use the right tools: A trim removal tool, socket set, screwdrivers, and silicone lubricant are essential for safe and effective repairs.
- Replace seals proactively: Cracked or brittle weatherstripping causes leaks; replacing it prevents water damage and improves insulation.
- Lubricate moving parts: Apply silicone-based lubricant to tracks and rollers to ensure smooth operation and prevent future sticking.
- Check alignment after reassembly: Misaligned windows strain latches and cause gaps; adjust carefully for a tight, secure fit.
- Consider OEM vs. aftermarket parts: OEM parts offer exact fit and durability, while quality aftermarket options can save money without sacrificing performance.
- Test before finalizing: Always test the window’s movement, latch function, and seal integrity after repair to avoid repeat issues.
📑 Table of Contents
Understanding the Ford F150 Rear Sliding Window System
Before diving into repairs, it’s important to understand how the rear sliding window works. Unlike a standard fixed window, the F150’s rear slider operates on a track-and-roller system. A portion of the rear glass (usually the left side) slides horizontally within a sealed frame, guided by nylon or plastic rollers that run along aluminum tracks. The window is secured by one or two latches—typically located on the sliding panel—that lock into place when closed.
This system is designed for durability, but over time, exposure to weather, dirt, and regular use takes its toll. The rollers can wear down, tracks can collect debris, and latches can break or become misaligned. Additionally, the weatherstripping—the rubber seal around the window frame—can dry out, crack, or lose its shape, leading to leaks and wind noise.
Knowing the components involved helps you pinpoint the source of the problem. For example, if the window won’t slide smoothly, the issue is likely with the rollers or tracks. If it won’t stay closed, the latch mechanism may be faulty. And if you notice water inside the cab after rain, the weatherstripping is probably compromised.
Common Symptoms of a Failing Sliding Window
Here are the most frequent signs that your F150’s rear sliding window needs attention:
- Window won’t slide: It feels stuck, jerky, or requires excessive force to move.
- Window won’t latch: The sliding panel won’t lock in place, or the latch feels loose.
- Air or water leaks: You hear wind noise at highway speeds or find water pooling inside the cab.
- Misaligned window: The sliding panel sits higher or lower than the fixed side, creating a gap.
- Loud grinding or squeaking: Unusual noises when operating the window suggest worn rollers or dry tracks.
Recognizing these symptoms early can prevent more serious damage. For instance, a small leak might seem minor, but over time, it can lead to mold, rust, or electrical issues if water reaches the interior wiring.
Tools and Materials You’ll Need
Visual guide about How to Fix Ford F150 Rear Sliding Window
Image source: f150forum.com
Before starting any repair, gather the right tools and materials. Having everything on hand saves time and frustration. Here’s a checklist of what you’ll need for most rear sliding window fixes:
- Trim removal tool (plastic pry tool)
- Socket wrench set (typically 8mm and 10mm sockets)
- Phillips and flathead screwdrivers
- Silicone-based lubricant (never use WD-40—it attracts dirt)
- Replacement weatherstripping (if needed)
- New window latches or rollers (if broken)
- Clean rags and mild soap
- Rubbing alcohol (for cleaning surfaces)
- Measuring tape (for alignment checks)
Optional but helpful:
- Torx bit set (some models use Torx screws)
- Work gloves (to protect your hands)
- Flashlight (for better visibility inside the cab)
Always work in a clean, well-lit area. If you’re removing interior trim, lay down a towel or blanket to protect the seats and floor.
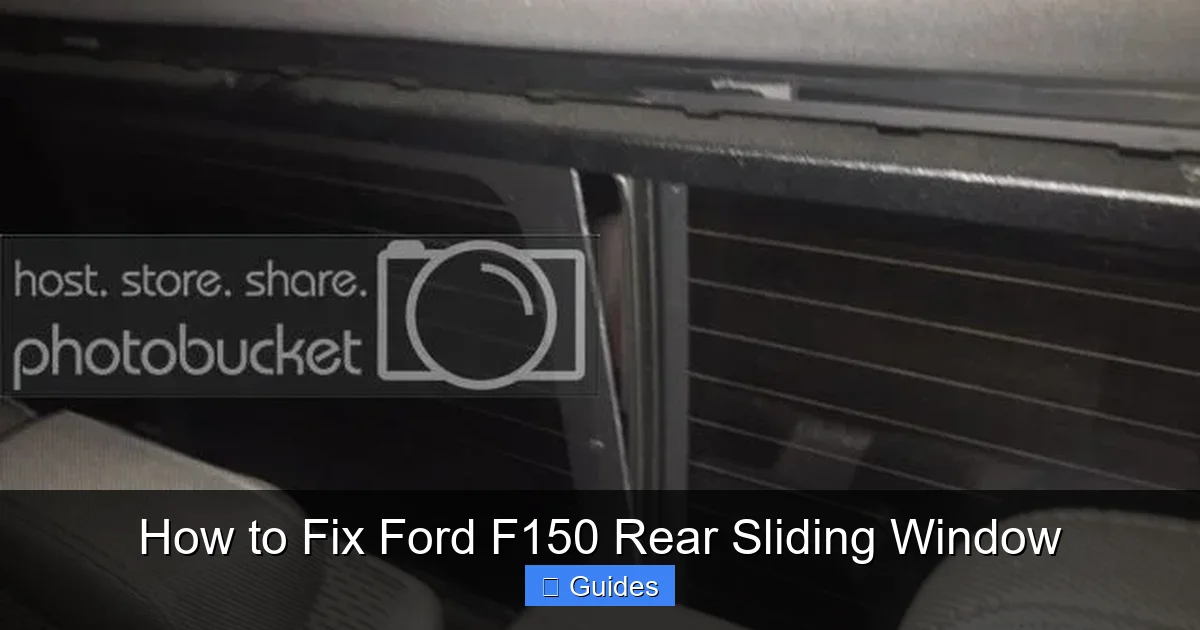
Step-by-Step Guide to Diagnosing the Problem

Visual guide about How to Fix Ford F150 Rear Sliding Window
Image source: i.ytimg.com
The first step in fixing your sliding window is figuring out what’s wrong. Rushing to replace parts without diagnosis can waste time and money. Follow this systematic approach to identify the root cause.
Step 1: Test the Window Operation
Start by trying to open and close the sliding window. Pay attention to how it feels:
- Does it move smoothly, or does it stick in certain spots?
- Does it require excessive force?
- Does it make noise—grinding, squeaking, or rattling?
If the window is completely stuck, try gently rocking it side to side while pulling. Sometimes debris in the track causes binding.
Step 2: Inspect the Latches
Check the latches on the sliding panel. Are they fully engaging when the window is closed? Do they feel loose or broken? Try manually pressing the latch mechanism—if it doesn’t click securely, it may need adjustment or replacement.
On many F150 models, the latch is spring-loaded and can wear out over time. A broken latch not only prevents the window from staying closed but can also allow the panel to shift, causing alignment issues.
Step 3: Examine the Tracks and Rollers
Open the sliding window halfway and inspect the tracks. Look for:
- Built-up dirt, leaves, or debris
- Rust or corrosion (especially in humid climates)
- Visible damage to the rollers (cracks, flat spots, or missing pieces)
Use a flashlight to see into the lower track. If the rollers are damaged, they’ll need replacement. If the track is dirty, cleaning it may solve the problem.
Step 4: Check the Weatherstripping
Run your fingers along the rubber seal around the window frame. Look for:
- Cracks, tears, or missing sections
- Brittleness or discoloration (signs of aging)
- Gaps between the seal and the glass
Even a small crack can allow water to seep in. If the weatherstripping is compromised, replacement is usually the best solution.
Step 5: Look for Alignment Issues
Stand behind the truck and compare the sliding panel to the fixed side. Is one higher, lower, or tilted? Misalignment often results from worn rollers or a bent track. It can also cause the window to bind or leak.
Use a measuring tape to check the gap between the sliding panel and the fixed glass. It should be even on both sides when closed.
How to Fix Common Ford F150 Sliding Window Problems
Visual guide about How to Fix Ford F150 Rear Sliding Window
Image source: i.ytimg.com
Now that you’ve diagnosed the issue, it’s time to fix it. Below are step-by-step solutions for the most common problems.
Fixing a Stuck or Hard-to-Move Window
If your window is difficult to slide, the problem is usually in the tracks or rollers.
Step 1: Clean the Tracks
- Open the sliding window as far as possible.
- Use a dry rag to remove loose dirt and debris.
- Spray a small amount of silicone lubricant into the track.
- Use a soft brush (like an old toothbrush) to scrub away grime.
- Wipe clean with a damp rag, then dry thoroughly.
Step 2: Lubricate the Rollers and Tracks
- Apply a thin layer of silicone-based lubricant to the rollers and tracks.
- Work the window back and forth several times to distribute the lubricant.
- Wipe away any excess to prevent dirt buildup.
Step 3: Inspect and Replace Rollers (if needed)
If cleaning and lubricating don’t help, the rollers may be worn.
- Remove the interior trim panel (see next section for details).
- Locate the roller assembly—usually held by two bolts.
- Unbolt the old roller and install a new one (available at auto parts stores or online).
- Reassemble and test the window.
Replacing Broken or Worn Latches
A faulty latch is one of the most common causes of a window that won’t stay closed.
Step 1: Remove the Interior Trim Panel
- Use a trim removal tool to gently pry off the plastic panel behind the rear seats.
- Be careful—clips can break if forced.
- Disconnect any electrical connectors (for speakers or lights).
Step 2: Access the Latch Mechanism
- The latch is usually mounted on the sliding panel and connects to a striker on the frame.
- Remove the screws holding the latch in place.
- Disconnect the latch from the window frame.
Step 3: Install the New Latch
- Position the new latch and secure it with screws.
- Ensure it aligns properly with the striker.
- Test the latch by closing the window—it should click securely.
Tip: If the striker is bent or worn, replace it too. A misaligned striker can prevent proper latching.
Replacing Damaged Weatherstripping
Leaky windows are often caused by worn weatherstripping.
Step 1: Remove the Old Seal
- Carefully peel off the old weatherstripping from the window frame.
- Use a plastic scraper if needed—avoid metal tools that can scratch the paint.
- Clean the area with rubbing alcohol to remove adhesive residue.
Step 2: Install the New Weatherstripping
- Start at one corner and press the new seal into place.
- Work your way around the frame, ensuring a tight fit.
- Use a rubber mallet or your hand to seat the seal fully.
Step 3: Test for Leaks
- Close the window and spray water on the outside with a hose.
- Check inside for any signs of leakage.
- If water gets in, reseat the seal or check for gaps.
Pro Tip: Choose high-quality, OEM-style weatherstripping. Cheap alternatives may not last as long or seal properly.
Correcting Window Misalignment
If the sliding panel is uneven, it may need adjustment.
Step 1: Loosen the Roller Bolts
- Access the roller assembly from inside the cab.
- Loosen (but don’t remove) the bolts holding the rollers.
Step 2: Adjust the Position
- Gently shift the sliding panel up, down, or sideways to align it with the fixed glass.
- Use a measuring tape to ensure even gaps on both sides.
Step 3: Tighten and Test
- Once aligned, tighten the roller bolts securely.
- Test the window’s movement and latch function.
- Make minor adjustments if needed.
Preventive Maintenance Tips
Fixing the problem is one thing—keeping it from happening again is another. Regular maintenance can extend the life of your sliding window and prevent future issues.
Clean and Lubricate Every 6 Months
Even if the window works fine, clean the tracks and apply silicone lubricant twice a year. This prevents dirt buildup and keeps rollers moving smoothly.
Inspect Weatherstripping Annually
Check the rubber seals for cracks or wear. Replace them at the first sign of damage to avoid leaks.
Avoid Forcing the Window
If the window feels stuck, don’t yank it. Forcing it can damage rollers, tracks, or latches. Instead, investigate the cause and address it gently.
Park in the Shade When Possible
UV exposure accelerates the aging of rubber and plastic components. Parking in a garage or under cover helps preserve weatherstripping and rollers.
Use a Window Cover in Winter
In cold climates, ice can freeze the window shut. Use a cover or apply a thin layer of silicone spray to prevent freezing.
When to Call a Professional
While most sliding window issues can be fixed at home, some problems require professional help. Consider taking your truck to a mechanic or dealership if:
- The window is cracked or shattered (glass replacement is complex and safety-critical).
- The track is bent or severely damaged (may require frame repair).
- You’re uncomfortable removing interior trim or electrical components.
- The problem persists after multiple repair attempts.
Dealerships have specialized tools and access to OEM parts, which can be helpful for complex issues. However, for routine repairs, DIY is often faster and more cost-effective.
Conclusion
The Ford F150’s rear sliding window is a practical feature, but like any mechanical component, it requires care and occasional repair. Whether your window is stuck, leaking, or misaligned, the solutions are usually straightforward with the right approach. By diagnosing the problem, using the correct tools, and following step-by-step instructions, you can restore your sliding window to full functionality—without spending a fortune at the shop.
Remember: regular maintenance is key. A little cleaning and lubrication go a long way in preventing future issues. And when in doubt, don’t hesitate to consult a professional. With the tips and techniques in this guide, you’re well-equipped to keep your F150’s rear sliding window working smoothly for years to come.
Frequently Asked Questions
Why won’t my Ford F150 rear sliding window close all the way?
This is often due to a misaligned latch or worn rollers. Check that the latch engages properly and that the window is level with the fixed panel. Adjust the rollers if needed.
Can I drive with a broken rear sliding window latch?
It’s not recommended. A loose window can rattle, leak, or even come open at high speeds, creating a safety hazard. Repair or replace the latch as soon as possible.
How often should I lubricate the sliding window tracks?
Every 6 months is ideal, or whenever you notice the window becoming harder to move. Use only silicone-based lubricant—avoid oil-based products that attract dirt.
Is it hard to replace the weatherstripping on an F150?
No, it’s a moderate DIY job. The key is removing the old seal carefully and installing the new one evenly. Take your time to ensure a tight fit.
Can I fix a leaking rear sliding window without replacing the seal?
Temporary fixes like silicone sealant may work short-term, but for a lasting solution, replacing the weatherstripping is best. Leaks often worsen over time.
Are aftermarket sliding window parts reliable?
Quality aftermarket parts can work well and save money, but stick to reputable brands. OEM parts offer the best fit and durability, especially for latches and rollers.

At CarLegit, we believe information should be clear, factual, and genuinely helpful. That’s why every guide, review, and update on our website is created with care, research, and a strong focus on user experience.