
Flushing your RV water heater is essential for removing sediment buildup, improving efficiency, and extending its lifespan. This guide walks you through the entire process—from preparation to reassembly—with clear, easy-to-follow steps and expert tips to keep your system running smoothly.
In This Article
- 1 Key Takeaways
- 2 📑 Table of Contents
- 3 Why Flushing Your RV Water Heater Matters
- 4 When Should You Flush Your RV Water Heater?
- 5 Tools and Supplies You’ll Need
- 6 Step-by-Step Guide to Flushing Your RV Water Heater
- 7 Maintaining Your RV Water Heater After Flushing
- 8 Troubleshooting Common Issues
- 9 Conclusion
- 10 Frequently Asked Questions
- 10.1 How often should I flush my RV water heater?
- 10.2 Can I flush my RV water heater with the power on?
- 10.3 What kind of vinegar should I use for cleaning?
- 10.4 Do I need to replace the anode rod every time I flush?
- 10.5 Can I flush my water heater without removing the anode rod?
- 10.6 Why does my RV water smell like rotten eggs after flushing?
Key Takeaways
- Regular flushing prevents sediment buildup: Over time, minerals like calcium and magnesium accumulate in the tank, reducing heating efficiency and potentially damaging the unit.
- Turn off power and water supply first: Always shut off electricity (or gas) and disconnect the water supply before starting to ensure safety.
- Use the drain valve or anode rod port: Most RV water heaters can be flushed through the drain valve, but some models require removing the anode rod for a thorough clean.
- Flush with vinegar for deep cleaning: For heavy sediment, a vinegar soak helps dissolve mineral deposits more effectively than water alone.
- Inspect the anode rod during maintenance: Check for corrosion—replace it if more than ½ inch of core wire is exposed to protect the tank from rust.
- Re-pressurize slowly after refilling: Open the hot water faucet inside the RV to release air pockets and avoid pressure surges.
- Perform maintenance seasonally: Flushing every 3–6 months ensures optimal performance, especially if you use hard water or full-time RV.
📑 Table of Contents
Why Flushing Your RV Water Heater Matters
If you’ve ever noticed your RV’s hot water running out faster than usual, or if the water heater makes strange gurgling or popping noises, chances are sediment has built up inside the tank. This isn’t just a minor inconvenience—it can seriously affect your water heater’s performance, efficiency, and lifespan. Flushing your RV water heater regularly is one of the simplest yet most impactful maintenance tasks you can do as an RV owner.
Sediment, primarily made of minerals like calcium and magnesium from hard water, settles at the bottom of the tank over time. As it accumulates, it acts as an insulating layer between the heating element (or burner) and the water. This means your heater has to work harder and longer to heat the same amount of water, increasing energy use and wear on the system. In extreme cases, the sediment can overheat, causing damage to the tank lining or even leading to leaks or complete failure. Regular flushing removes this buildup, restoring efficiency and preventing costly repairs down the road.
When Should You Flush Your RV Water Heater?
There’s no one-size-fits-all answer, but most RV experts recommend flushing your water heater at least every 3 to 6 months. If you’re a full-time RVer or frequently camp in areas with hard water, you may need to do it more often—perhaps every 2 to 3 months. Seasonal RVers should always flush before storing their RV for the winter and again when preparing it for spring use.
Visual guide about How to Flush Rv Water Heater
Image source: truckcampermagazine.com
Signs It’s Time to Flush
- Rotten egg smell: This is often caused by bacteria reacting with the anode rod and sediment, producing hydrogen sulfide gas.
- Reduced hot water supply: If you’re running out of hot water faster than usual, sediment may be taking up space in the tank.
- Noisy operation: Popping, cracking, or rumbling sounds during heating are classic signs of sediment buildup.
- Cloudy or discolored water: While not always related to sediment, it can indicate corrosion or mineral accumulation.
- After long storage: Water left sitting in the tank for months can promote sediment and bacterial growth.
Seasonal Maintenance Tips
If you store your RV during the off-season, flushing before winterizing is crucial. Stagnant water with sediment can freeze and expand, potentially cracking the tank. Similarly, when de-winterizing in spring, flush the system to clear out any debris or mineral deposits that may have formed over the winter. For full-timers, consider marking your calendar every three months to make flushing a routine part of your maintenance schedule.
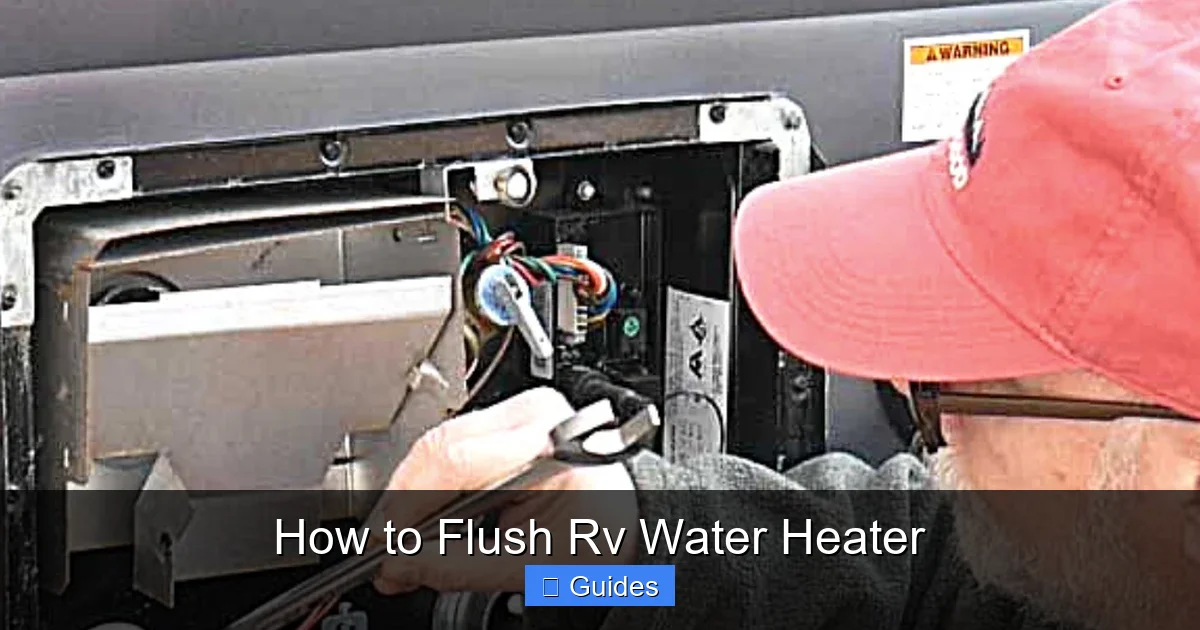
Tools and Supplies You’ll Need
Before you begin, gather all the necessary tools and supplies. Having everything ready will make the process smoother and safer. Most of these items are inexpensive and can be found at any hardware or RV supply store.

Visual guide about How to Flush Rv Water Heater
Image source: i.pinimg.com
Essential Tools
- Adjustable wrench or socket set: For removing the drain plug or anode rod.
- Garden hose: To flush out the tank and rinse sediment.
- Bucket or drain pan: To catch water when opening the drain valve.
- Screwdriver (flathead or Phillips): For accessing the access panel.
- Safety gloves and goggles: To protect your hands and eyes from hot water and debris.
Optional but Helpful Supplies
- White distilled vinegar: For deep cleaning mineral deposits.
- New anode rod: If yours is worn out, replace it during the flush.
- Teflon tape: To ensure a tight seal when reattaching fittings.
- Funnel: For pouring vinegar into the tank if using the anode rod port.
- Water heater flush kit: Some kits include a hose attachment and cleaning solution for easier flushing.
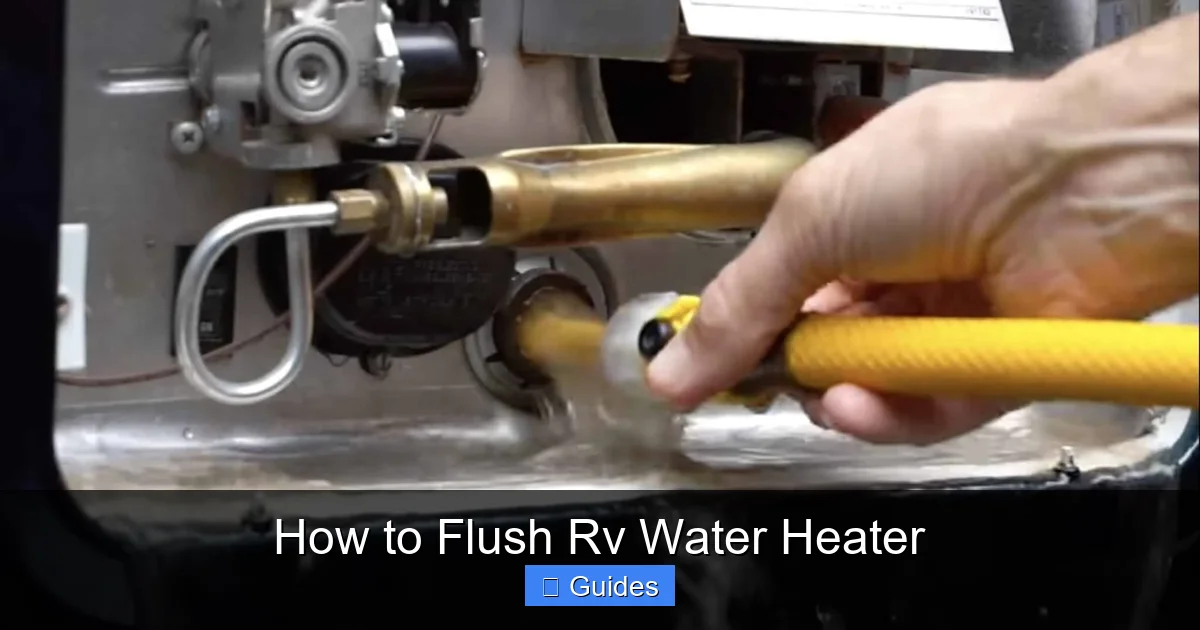
Step-by-Step Guide to Flushing Your RV Water Heater
Now that you’re prepared, let’s walk through the flushing process step by step. Whether you have a gas, electric, or dual-powered water heater, the basic steps are the same. Always prioritize safety—turn off power and water before starting.
Visual guide about How to Flush Rv Water Heater
Image source: i.pinimg.com
Step 1: Turn Off Power and Water Supply
Safety first! Start by turning off the power to your water heater. If it’s electric, switch off the breaker in your RV’s electrical panel. For gas models, turn the gas control valve to the “off” position. Next, shut off the water supply. This is usually a valve near the water pump or city water connection. If you’re connected to city water, disconnect the hose.
Allow the water in the tank to cool for at least 2–3 hours. Hot water can cause burns, and pressurized steam can be dangerous when opening the drain valve. Never attempt to flush a hot water heater.
Step 2: Open a Hot Water Faucet
Inside your RV, open a hot water faucet (kitchen or bathroom sink). This relieves pressure in the system and allows air to enter the tank as water drains out. Leave the faucet open throughout the flushing process.
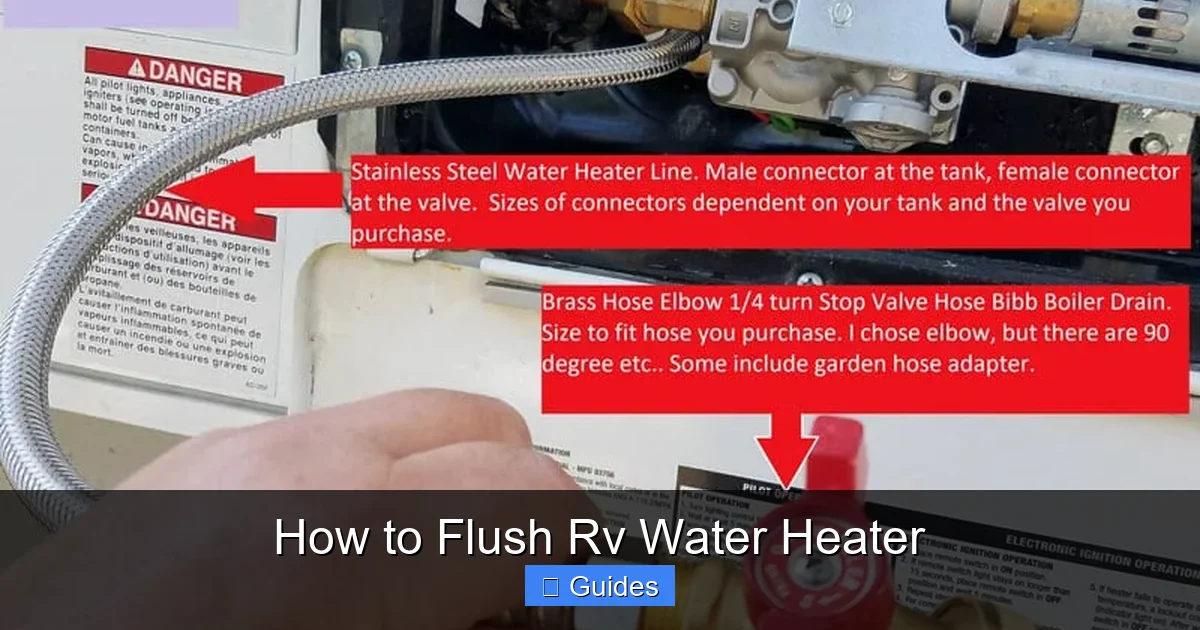
Step 3: Locate the Drain Valve or Anode Rod
Most RV water heaters have a drain valve on the outside of the unit, usually behind an access panel. It looks like a small spigot or plug. Some models, especially newer ones, require you to remove the anode rod (also called a sacrificial rod) to flush the tank thoroughly. The anode rod is typically located near the top of the water heater and is accessed from the outside.
If your model uses a drain valve, proceed to Step 4. If it requires removing the anode rod, use your wrench to carefully unscrew it. Be prepared for some water to spill out—place a bucket underneath. Inspect the rod: if it’s heavily corroded (more than ½ inch of the steel core is visible), replace it with a new one.
Step 4: Attach the Garden Hose
Connect one end of a garden hose to the drain valve or anode rod opening. Run the other end to a safe drainage area—like a gravel spot or sewer drain. Make sure the hose is secure and won’t come loose during flushing.
If you removed the anode rod, you can use a funnel to pour water (or vinegar) directly into the tank through the opening. This method allows for more thorough agitation of sediment.
Step 5: Flush the Tank
Open the drain valve or leave the anode rod port open. Let the water flow out completely. You’ll likely see cloudy water, sediment, or even small rocks coming out—this is normal. Let it drain until the water runs clear.
For a deeper clean, especially if you have hard water, consider using vinegar. Close the drain valve, pour 1–2 gallons of white distilled vinegar into the tank (via the anode rod port), and let it sit for 1–2 hours. The acid helps dissolve stubborn mineral deposits. After soaking, reopen the drain and flush until the vinegar smell is gone.
Step 6: Rinse and Refill
Once the tank is flushed, close the drain valve or reinstall the anode rod (with Teflon tape on the threads for a tight seal). Reconnect the water supply and turn it back on. Open the hot water faucet inside the RV again to allow air to escape as the tank fills.
Let the tank fill completely—you’ll hear air sputtering from the faucet, then a steady stream of water. Once water flows smoothly, close the faucet. Turn the power or gas back on. For electric heaters, wait about 30 minutes for the water to heat up. For gas models, follow the manufacturer’s lighting instructions.
Maintaining Your RV Water Heater After Flushing
Flushing is just one part of water heater care. To keep your system in top shape, follow these ongoing maintenance tips.
Inspect the Anode Rod Regularly
The anode rod protects your tank from corrosion by sacrificing itself to rust. Check it every time you flush—ideally every 6 months. If it’s worn down, replace it. You can also switch to an aluminum or zinc-aluminum rod if you notice a sulfur smell, as magnesium rods can react with bacteria to produce odors.
Use a Water Softener or Filter
If you frequently camp in areas with hard water, consider installing a water softener or inline filter. These reduce mineral content before it enters your tank, slowing sediment buildup and extending the time between flushes.
Winterize Properly
In cold climates, always winterize your water heater by draining it completely and using RV antifreeze. Never leave water in the tank during freezing temperatures—it can expand and crack the tank.
Monitor Performance
Pay attention to how your water heater performs. If you notice changes in water temperature, pressure, or smell, it may be time for another flush or professional inspection.
Troubleshooting Common Issues
Even with regular maintenance, problems can arise. Here’s how to handle some common issues.
Water Won’t Drain Completely
If water remains in the tank after flushing, the drain valve may be clogged. Try using a small brush or compressed air to clear debris. If that doesn’t work, you may need to remove the valve and clean it manually.
Leaking After Reassembly
Leaks often occur due to improper sealing. Check that the drain valve or anode rod is tightened securely and that Teflon tape was used on threaded connections. If the leak persists, the valve or rod may be damaged and need replacement.
No Hot Water After Flushing
Ensure the power or gas is turned back on. For electric heaters, check the breaker. For gas models, relight the pilot light if necessary. Also, verify that the thermostat is set correctly and that the heating element isn’t faulty.
Conclusion
Flushing your RV water heater might seem like a chore, but it’s a small effort that pays big dividends. By removing sediment, you improve heating efficiency, extend the life of your unit, and enjoy better hot water performance on the road. With the right tools and a little know-how, it’s a task any RV owner can handle.
Make flushing a regular part of your maintenance routine—your water heater (and your travel comfort) will thank you. Whether you’re a weekend warrior or a full-time nomad, a clean water heater means fewer surprises and more relaxing adventures. So grab your wrench, hose, and vinegar, and give your RV the care it deserves.
Frequently Asked Questions
How often should I flush my RV water heater?
Most experts recommend flushing every 3 to 6 months. Full-time RVers or those using hard water should flush more frequently, every 2 to 3 months, to prevent sediment buildup.
Can I flush my RV water heater with the power on?
No, always turn off the power (electricity or gas) and allow the water to cool before flushing. Working on a hot or energized system can cause burns, electrical shock, or damage to the unit.
What kind of vinegar should I use for cleaning?
Use white distilled vinegar—it’s inexpensive, effective at dissolving mineral deposits, and safe for your tank. Avoid apple cider or cleaning vinegar, which may contain additives.
Do I need to replace the anode rod every time I flush?
Not necessarily. Inspect the rod during each flush. Replace it only if it’s corroded—typically when more than ½ inch of the steel core is exposed. Otherwise, clean it and reinstall.
Can I flush my water heater without removing the anode rod?
Yes, if your model has a dedicated drain valve. However, removing the anode rod allows for a more thorough flush and gives you a chance to inspect or replace it.
Why does my RV water smell like rotten eggs after flushing?
This smell is usually caused by bacteria reacting with the magnesium anode rod. Switching to an aluminum or zinc-aluminum rod can help reduce or eliminate the odor.

At CarLegit, we believe information should be clear, factual, and genuinely helpful. That’s why every guide, review, and update on our website is created with care, research, and a strong focus on user experience.