
Swirl marks are common but fixable. With the right tools, techniques, and patience, you can restore your car’s shine and protect it from future damage.
In This Article
- 1 Key Takeaways
- 2 📑 Table of Contents
- 3 What Are Swirl Marks and Why Do They Appear?
- 4 Tools and Products You’ll Need
- 5 Step-by-Step Guide to Removing Swirl Marks
- 6 Protecting Your Paint After Correction
- 7 Preventing Swirl Marks in the Future
- 8 Common Mistakes to Avoid
- 9 Conclusion
- 10 Frequently Asked Questions
Key Takeaways
- Swirl marks are fine scratches caused by improper washing and drying. They scatter light, making paint look dull and hazy.
- Use a dual-action polisher for safe, effective correction. It reduces the risk of burning paint compared to rotary buffers.
- Choose the right polish and pad combination. Light swirls need fine polish and foam pads; deeper marks require heavier compounds.
- Always work in small sections and use proper lighting. Natural or LED light helps you see progress and avoid over-polishing.
- Wash and decontaminate the surface before polishing. Remove dirt, tar, and iron particles to prevent adding new scratches.
- Apply a sealant or wax after polishing. This protects the corrected surface and enhances gloss.
- Prevent future swirls with proper washing techniques. Use the two-bucket method, microfiber towels, and avoid automatic car washes.
📑 Table of Contents
What Are Swirl Marks and Why Do They Appear?
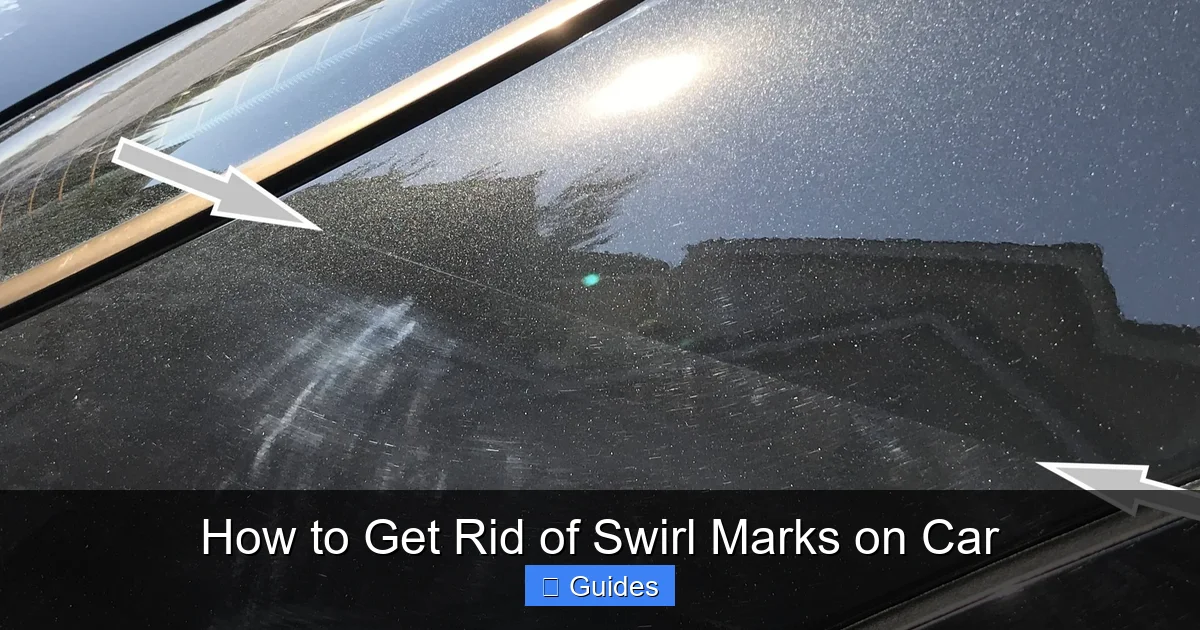
Swirl marks—also known as spider webbing or holograms—are fine, circular scratches that appear on your car’s paint. They’re not deep gouges, but rather surface-level imperfections that scatter light, making your paint look dull, hazy, or cloudy under direct light. If you’ve ever noticed a swirling pattern on your black or dark-colored car after washing, you’ve seen swirl marks in action.
These marks are usually caused by improper washing and drying techniques. Using a dirty sponge, washing mitt, or towel can drag tiny particles across the paint, creating micro-scratches. Even automatic car washes with harsh brushes can be culprits. Over time, these small abrasions build up, forming the telltale swirl pattern. Other causes include using low-quality waxes, aggressive drying methods, or even wiping the car with a dry towel after a rain shower.
Swirl marks are more noticeable on dark colors like black, navy, or charcoal because the contrast between the scratched and unscratched areas is more pronounced. Light-colored cars can have them too, but they’re often harder to spot. The good news? Swirl marks are surface-level and don’t penetrate the clear coat, which means they can be safely removed with the right approach.
How to Identify Swirl Marks
Before you start fixing swirl marks, you need to confirm they’re actually there. The best way to spot them is under bright, direct light—natural sunlight or a high-intensity LED lamp works best. Park your car in a well-lit area and inspect the paint at different angles. Look for fine, swirling lines that seem to move as you shift your viewpoint.
Another trick is to use a flashlight at a low angle across the surface. This creates shadows that highlight imperfections. You can also run your fingers lightly over the paint. If it feels smooth but looks hazy, it’s likely swirl marks—not deep scratches or oxidation.
Common Causes of Swirl Marks
Understanding what causes swirl marks helps you avoid them in the future. Here are the most common culprits:
- Improper washing tools: Using a sponge that’s been dropped on the ground or a mitt with embedded dirt can scratch the paint.
- One-bucket washing: Reusing dirty water spreads contaminants across the surface.
- Automatic car washes: Brushes in tunnel washes are often harsh and can leave swirls, especially if they’re not cleaned regularly.
- Drying with low-quality towels: Thin or abrasive towels can drag dirt and create fine scratches.
- Wiping with a dry cloth: Never wipe a wet car with a dry towel—this is a fast track to swirls.
- Using dirty applicators: Reusing wax or polish applicators without cleaning them introduces grit.
Tools and Products You’ll Need
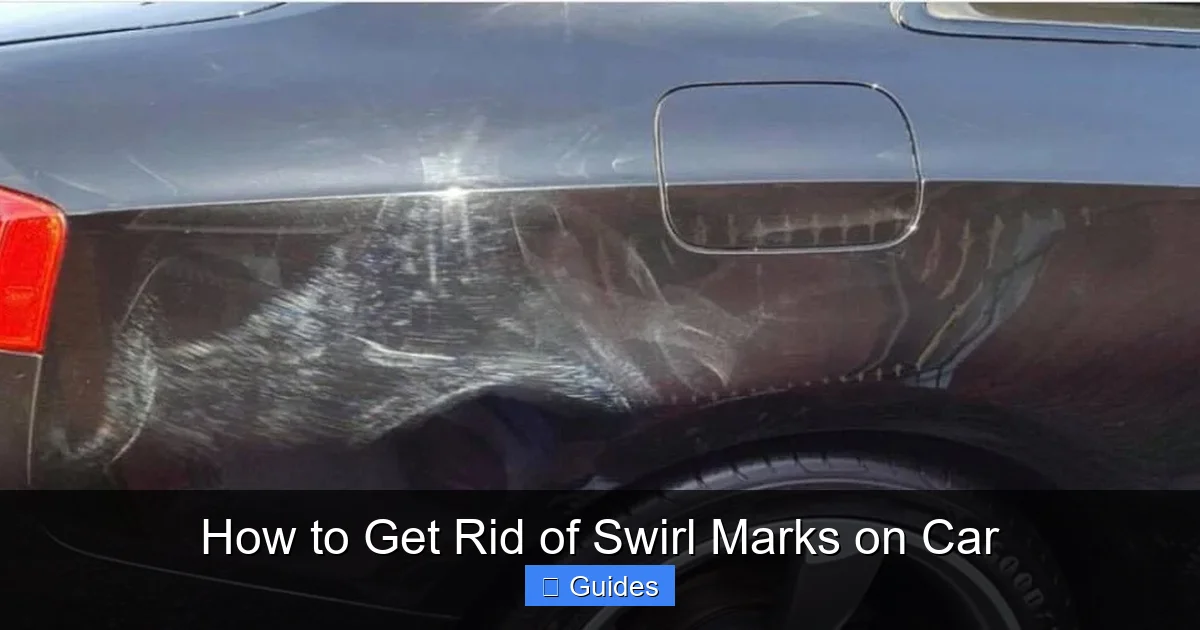
Visual guide about How to Get Rid of Swirl Marks on Car
Image source: procarreviews.com
Before you begin, gather the right tools and products. Using the wrong equipment can make swirl marks worse or damage your paint. Here’s a complete list of what you’ll need for a successful correction:
Essential Tools
- Dual-action (DA) polisher: This is the safest and most effective tool for beginners and pros alike. It oscillates and rotates, reducing the risk of burning the paint. Popular brands include Griot’s Garage, Meguiar’s, and Torq.
- Foam polishing pads: Use a range of pads—cutting, polishing, and finishing. A 5.5-inch or 6.5-inch pad works well for most cars.
- Microfiber towels: High-quality, plush towels for wiping off polish and applying wax. Avoid cheap, thin towels.
- Car wash soap: A pH-neutral, high-lubricity soap designed for automotive use.
- Two buckets with grit guards: One for soapy water, one for rinsing your mitt.
- Wash mitt or microfiber wash pad: Soft, clean, and free of debris.
- Clay bar kit: Removes embedded contaminants like tar, tree sap, and industrial fallout.
- Isopropyl alcohol (70%): For surface prep before polishing.
- Spray bottle with quick detailer: Helps lubricate the surface during claying and polishing.
Polishes and Compounds
Choose your polish based on the severity of the swirls:
- Fine polish: For light swirls and light oxidation. Examples: Meguiar’s Ultimate Polish, Chemical Guys VSS Scratch & Swirl Remover.
- Medium compound: For moderate swirls and deeper imperfections. Examples: Sonax Perfect Finish, Griot’s Garage Perfecting Cream.
- Heavy compound: For severe swirls or heavy oxidation—use with caution. Examples: 3M Perfect-It Rubbing Compound, Meguiar’s M100.
Always start with the least aggressive option. If fine polish doesn’t work, move up to medium, then heavy. Over-polishing can thin the clear coat.
Optional but Helpful Tools
- Paint thickness gauge: Measures clear coat thickness to avoid over-correction.
- LED work light: Helps you see swirls and monitor progress.
- Applicator pads: For applying wax or sealant.
- Detailing spray: For quick touch-ups between washes.
Step-by-Step Guide to Removing Swirl Marks
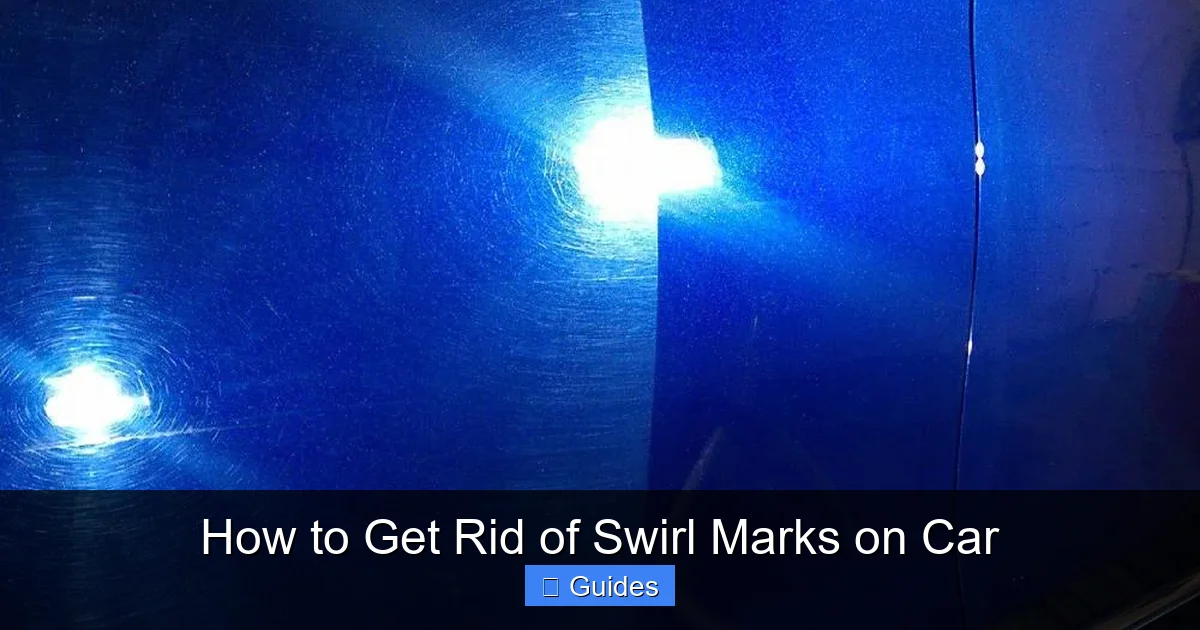
Visual guide about How to Get Rid of Swirl Marks on Car
Image source: procleandetail.com
Now that you have your tools, it’s time to get to work. Follow this step-by-step process to safely and effectively remove swirl marks.
Step 1: Wash the Car Thoroughly
Start with a clean surface. Any dirt left on the paint can scratch it during polishing. Use the two-bucket method: one bucket with soapy water, one with clean rinse water. Dip your wash mitt into the soapy water, wash one panel at a time, then rinse the mitt in the rinse bucket before re-dipping. This prevents dirt from being reintroduced.
Use a high-quality car wash soap—never dish soap, which strips wax and dries out paint. Rinse the car thoroughly and dry it with a clean microfiber towel using a blotting motion, not wiping.
Step 2: Decontaminate the Surface
Even after washing, your paint may still have embedded contaminants. Use a clay bar to remove these. Spray a small section with a clay lubricant or quick detailer, then gently glide the clay bar over the surface. You’ll feel it grab onto contaminants. Wipe the area clean with a microfiber towel.
Clay barring ensures a smooth surface for polishing and prevents new scratches. Do this panel by panel, folding the clay frequently to expose a clean side.
Step 3: Test a Small Area
Before polishing the entire car, test your polish and pad on a small, inconspicuous area—like the lower rear quarter panel. Apply a small amount of polish to the pad, spread it on the paint at low speed, then increase to medium speed (around 4–5 on a DA polisher). Work in 2×2 foot sections using overlapping passes.
Check your progress under bright light. If the swirls are gone, proceed. If not, try a more aggressive polish or pad.
Step 4: Polish the Entire Car
Work in sections—hood, roof, doors, fenders, etc. Apply a pea-sized amount of polish to the pad. Spread it on the paint at speed 2–3, then increase to 4–5 for correction. Use slow, overlapping passes—about 50% overlap—and keep the pad flat. Don’t press too hard; let the machine do the work.
After each pass, wipe the area with a clean microfiber towel to check progress. If swirls remain, do a second pass. Avoid over-polishing one spot—move steadily across the panel.
Step 5: Finish with a Fine Polish (Optional)
If you used a compound, follow up with a fine polish to restore gloss and clarity. This step removes any haze left by the compound and brings out the shine. Use a clean foam finishing pad and work at medium speed.
Step 6: Wipe Down and Inspect
Once the entire car is polished, wipe it down with a clean microfiber towel. Inspect under bright light. If swirls are gone and the paint looks glossy, you’re ready for protection.
Protecting Your Paint After Correction
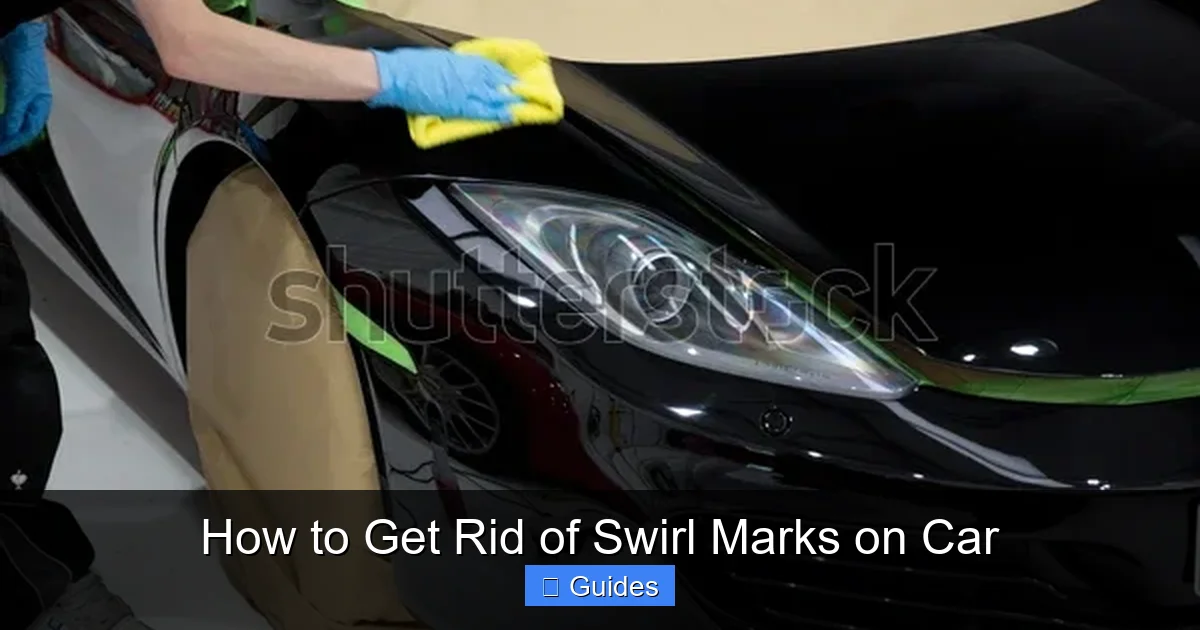
Visual guide about How to Get Rid of Swirl Marks on Car
Image source: shutterstock.com
Polishing removes a tiny layer of clear coat, so it’s crucial to protect the newly exposed surface. Without protection, your paint is vulnerable to UV rays, oxidation, and new swirl marks.
Apply a Sealant or Wax
Use a high-quality synthetic sealant or carnauba wax. Sealants last longer (3–6 months) and offer better UV protection. Waxes provide a deeper, warmer shine but need reapplication every 4–8 weeks.
Apply the product with a clean applicator pad using thin, even layers. Let it haze, then buff off with a microfiber towel. Work in small sections to avoid drying too quickly.
Use a Quick Detailer Between Washes
Between full washes, use a quick detailer spray to remove light dust and fingerprints. Spray on and wipe off with a clean microfiber towel. This helps maintain shine and prevents the need for frequent washing, which can cause swirls.
Consider a Ceramic Coating
For long-term protection, consider a professional or DIY ceramic coating. These coatings bond to the paint and create a hard, hydrophobic layer that resists swirls, stains, and UV damage. They can last 1–5 years depending on the product and maintenance.
Preventing Swirl Marks in the Future
The best way to deal with swirl marks is to stop them from forming. Here’s how to keep your paint swirl-free:
Use the Two-Bucket Wash Method
Always use two buckets—one with soapy water, one with rinse water. This keeps your wash mitt clean and reduces the risk of scratching.
Choose the Right Wash Tools
Use a high-quality microfiber wash mitt or wash pad. Replace it every 6–12 months or if it feels gritty. Avoid sponges, which trap dirt.
Dry Properly
Use a plush, clean microfiber drying towel. Pat or blot the surface—don’t wipe. Consider a blower or air dryer for hard-to-reach areas.
Avoid Automatic Car Washes
If possible, skip tunnel washes with brushes. Opt for touchless washes or hand wash at home. If you must use an automatic wash, choose a reputable one with well-maintained equipment.
Wash in the Shade
Washing in direct sunlight can cause soap to dry too quickly, leaving spots and increasing the risk of swirls. Wash in the early morning or late afternoon.
Regular Maintenance
Wash your car every 2–4 weeks, depending on climate and usage. Use a quick detailer weekly to maintain shine and remove light contaminants.
Common Mistakes to Avoid
Even with the best intentions, mistakes can happen. Here are common pitfalls and how to avoid them:
Using the Wrong Polish or Pad
Starting with a heavy compound on light swirls can over-correct and damage the paint. Always begin with the least aggressive option.
Over-Polishing
Polishing too long in one spot can burn through the clear coat. Keep the polisher moving and work in small sections.
Skipping Surface Prep
Polishing over dirt or contaminants will grind them into the paint, creating new swirls. Always wash and clay first.
Using Dirty Towels or Pads
Reusing dirty towels or pads introduces grit. Use clean microfiber towels and replace pads when they get dirty.
Working in Direct Sunlight
Heat causes polish to dry too fast, making it hard to work with and increasing the risk of streaks. Work in a shaded or indoor area.
Not Testing First
Always test your polish and pad on a small area. This prevents surprises and helps you choose the right combination.
Conclusion
Swirl marks are frustrating, but they’re not permanent. With the right tools, techniques, and a bit of patience, you can restore your car’s paint to a mirror-like finish. Start by washing and decontaminating the surface, then use a dual-action polisher with the appropriate polish and pad. Work in small sections, check your progress, and finish with a protective wax or sealant.
More importantly, adopt habits that prevent swirl marks from returning. Use the two-bucket method, high-quality towels, and avoid harsh automatic washes. Regular maintenance and careful washing will keep your car looking showroom-ready for years to come.
Remember, polishing is a skill that improves with practice. Don’t expect perfection on your first try—focus on progress, not perfection. And most of all, enjoy the process. There’s something deeply satisfying about seeing your car shine like new after a careful detail.
Frequently Asked Questions
Can swirl marks be removed by hand?
Yes, but it’s much harder and less effective. Hand polishing requires a lot of elbow grease and may not remove deeper swirls. A machine polisher is recommended for best results.
How often should I polish my car?
Polish only when needed—typically once or twice a year. Over-polishing can thin the clear coat, so avoid doing it too frequently.
Will waxing remove swirl marks?
No, waxing only adds shine and protection. It won’t correct swirl marks. You need to polish first, then apply wax.
Can I use a rotary buffer to remove swirls?
Yes, but it’s riskier. Rotary buffers can burn paint if used incorrectly. A dual-action polisher is safer for most users.
Are swirl marks covered by car warranties?
No, swirl marks are considered cosmetic damage from improper care and are not covered by manufacturer warranties.
Do ceramic coatings prevent swirl marks?
Ceramic coatings don’t prevent swirl marks entirely, but they make the surface harder and more resistant to fine scratches. Proper washing is still essential.

At CarLegit, we believe information should be clear, factual, and genuinely helpful. That’s why every guide, review, and update on our website is created with care, research, and a strong focus on user experience.