
Proper lubrication is essential for keeping your Lippert slide out operating smoothly and preventing costly repairs. This guide walks you through the entire process—from identifying the right lubricant to applying it correctly—so you can maintain your RV’s slide-out system with confidence.
In This Article
- 1 Key Takeaways
- 2 📑 Table of Contents
- 3 Why Lubricating Your Lippert Slide Out Matters
- 4 Understanding Your Lippert Slide-Out System
- 5 Choosing the Right Lubricant for Your Slide Out
- 6 Tools and Supplies You’ll Need
- 7 Step-by-Step Guide to Lubricating Your Lippert Slide Out
- 7.1 Step 1: Prepare Your RV
- 7.2 Step 2: Inspect the Slide-Out Components
- 7.3 Step 3: Clean the Tracks and Rollers
- 7.4 Step 4: Clean the Seals and Extension Arms
- 7.5 Step 5: Apply the Lubricant
- 7.6 Step 6: Wipe Off Excess Lubricant
- 7.7 Step 7: Test the Slide-Out Operation
- 7.8 Step 8: Final Inspection and Cleanup
- 8 Common Mistakes to Avoid
- 9 Maintenance Schedule and Best Practices
- 10 Troubleshooting Common Slide-Out Issues
- 11 Conclusion
- 12 Frequently Asked Questions
- 12.1 What type of lubricant should I use on a Lippert slide out?
- 12.2 How often should I lubricate my slide out?
- 12.3 Can I use WD-40 to lubricate my slide out?
- 12.4 Do I need to lubricate the rubber seals?
- 12.5 What if my slide out is still stiff after lubrication?
- 12.6 Can I lubricate my slide out while it’s retracted?
Key Takeaways
- Use the right lubricant: Always use a dry-film or PTFE-based lubricant designed for RV slide-outs—never grease or oil, which attract dirt and cause buildup.
- Clean before lubricating: Wipe down all slide-out components thoroughly to remove dirt, debris, and old lubricant residue before applying new lube.
- Lubricate key contact points: Focus on the roller tracks, bearings, seals, and extension arms—these are the areas that endure the most friction.
- Inspect for wear and damage: While lubricating, check for signs of wear, cracks, or misalignment that could affect performance.
- Perform regular maintenance: Lubricate your Lippert slide out every 6 months or after 20–30 cycles to ensure long-term reliability.
- Avoid over-lubrication: Too much lube can attract grime and cause buildup, leading to stiffness or malfunctions.
- Test operation after service: Always extend and retract the slide fully after lubricating to ensure smooth movement and proper alignment.
📑 Table of Contents
- Why Lubricating Your Lippert Slide Out Matters
- Understanding Your Lippert Slide-Out System
- Choosing the Right Lubricant for Your Slide Out
- Tools and Supplies You’ll Need
- Step-by-Step Guide to Lubricating Your Lippert Slide Out
- Common Mistakes to Avoid
- Maintenance Schedule and Best Practices
- Troubleshooting Common Slide-Out Issues
- Conclusion
Why Lubricating Your Lippert Slide Out Matters
If you own an RV with a Lippert slide-out system, you already know how much it enhances your living space. Whether it’s a bedroom, living room, or kitchen slide, these mechanisms expand your comfort zone on the road. But like any mechanical system, they need regular care to keep working properly. One of the most important—and often overlooked—maintenance tasks is lubrication.
Over time, dust, moisture, and constant movement wear down the moving parts of your slide-out. Without proper lubrication, you might notice the slide becoming stiff, jerky, or even failing to extend or retract fully. Worse, neglecting lubrication can lead to premature wear, costly repairs, or complete system failure. That’s why learning how to lubricate a Lippert slide out isn’t just a good idea—it’s essential for protecting your investment and ensuring a smooth camping experience.
Lippert slide-outs are built to last, but they’re not maintenance-free. The good news? Lubricating them is a simple DIY task that takes less than an hour and requires only a few basic tools. With the right approach, you can keep your slide-out running like new for years to come.
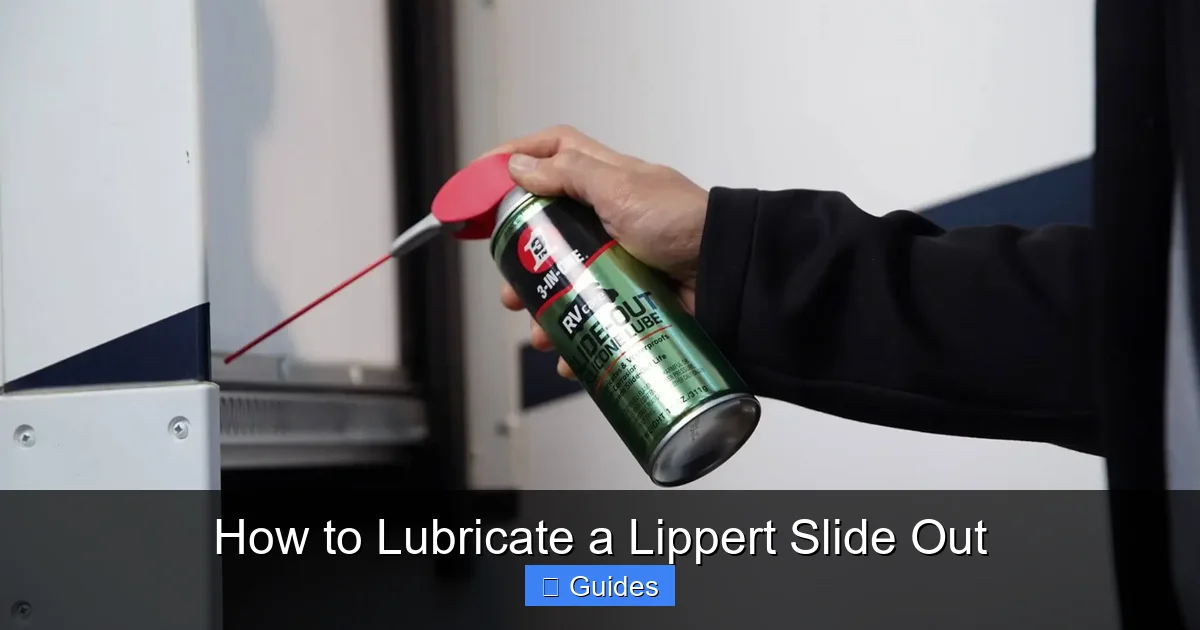
Understanding Your Lippert Slide-Out System
Visual guide about How to Lubricate a Lippert Slide Out
Image source: i.ytimg.com
Before diving into lubrication, it helps to understand how your Lippert slide-out works. Most Lippert systems use an electric motor-driven mechanism that extends and retracts the slide via a series of rollers, tracks, and extension arms. The slide itself rides on a set of rollers that move along metal tracks mounted inside the RV wall. Seals around the edges keep weather and debris out when the slide is closed.
There are two main types of Lippert slide-outs: rack-and-pinion and cable-driven. Rack-and-pinion systems use a toothed gear (pinion) that engages with a rack (a linear gear) to move the slide. Cable-driven systems use a motor to pull a cable that extends or retracts the slide. Both types rely heavily on smooth-moving rollers and well-lubricated contact points.
The key components that need lubrication include:
– Roller tracks (where the slide rolls in and out)
– Rollers and bearings
– Extension arms or linkage arms
– Seal surfaces (to prevent sticking and wear)
– Motor gears (if accessible)
Understanding these parts helps you target the right areas during lubrication. It also helps you spot potential issues early—like worn rollers or misaligned tracks—before they become major problems.
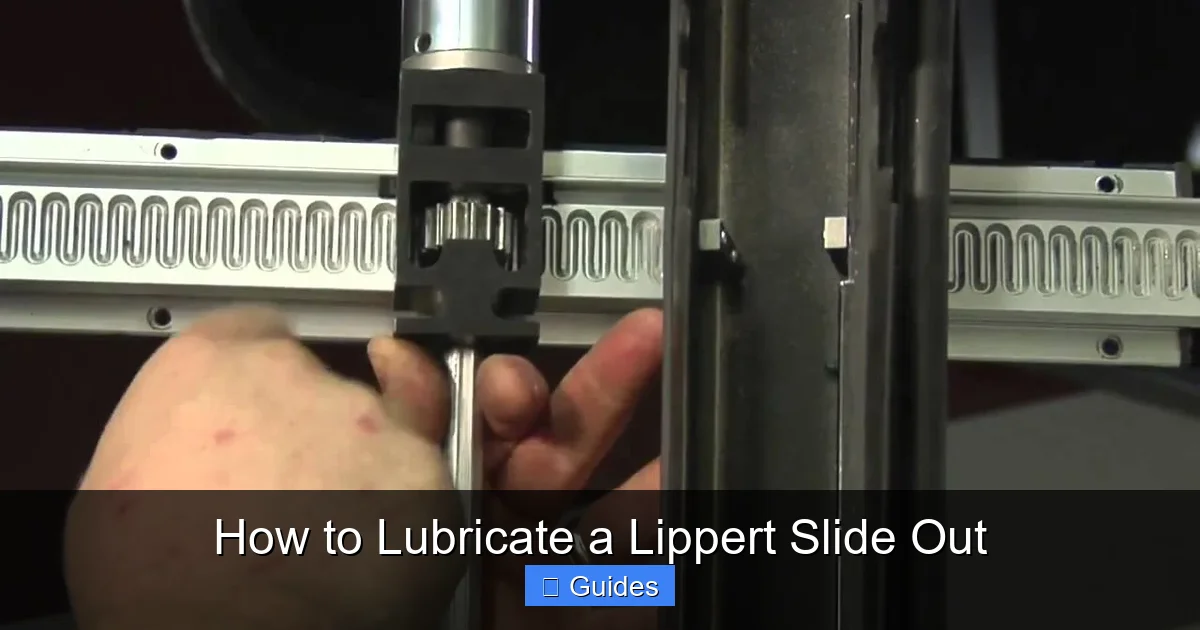
Choosing the Right Lubricant for Your Slide Out

Visual guide about How to Lubricate a Lippert Slide Out
Image source: gocarlife.com
Not all lubricants are created equal—especially when it comes to RV slide-outs. Using the wrong type can do more harm than good. For example, petroleum-based greases or oils may seem like a good idea, but they attract dirt, dust, and moisture. Over time, this creates a gritty paste that increases friction and wears down components faster.
So, what should you use?
The best lubricant for a Lippert slide out is a dry-film or PTFE-based (polytetrafluoroethylene) lubricant. These products are designed to reduce friction without attracting debris. They come in aerosol sprays or squeeze bottles and are often labeled as “RV slide-out lubricant,” “dry lube,” or “PTFE lube.” Popular brands include:
– WD-40 Specialist Dry Lube with PTFE
– 3-IN-ONE RV Slide-Out Lubricant
– Star Brite Slide-Out Lube
– CRC Dry Film Lubricant
These lubricants form a thin, protective layer that reduces metal-to-metal contact and resists water wash-off. They’re also safe for rubber seals and plastic components, which is crucial since many slide-out parts include weatherstripping and gaskets.
Avoid using:
– WD-40 Original (it’s a solvent, not a long-term lubricant)
– Grease or heavy oils (they collect dirt)
– Silicone sprays (can degrade rubber over time)
When shopping, look for a product specifically labeled for RV or slide-out use. If you’re unsure, check the manufacturer’s recommendations—Lippert often suggests PTFE-based dry lubes in their maintenance guides.
Tools and Supplies You’ll Need
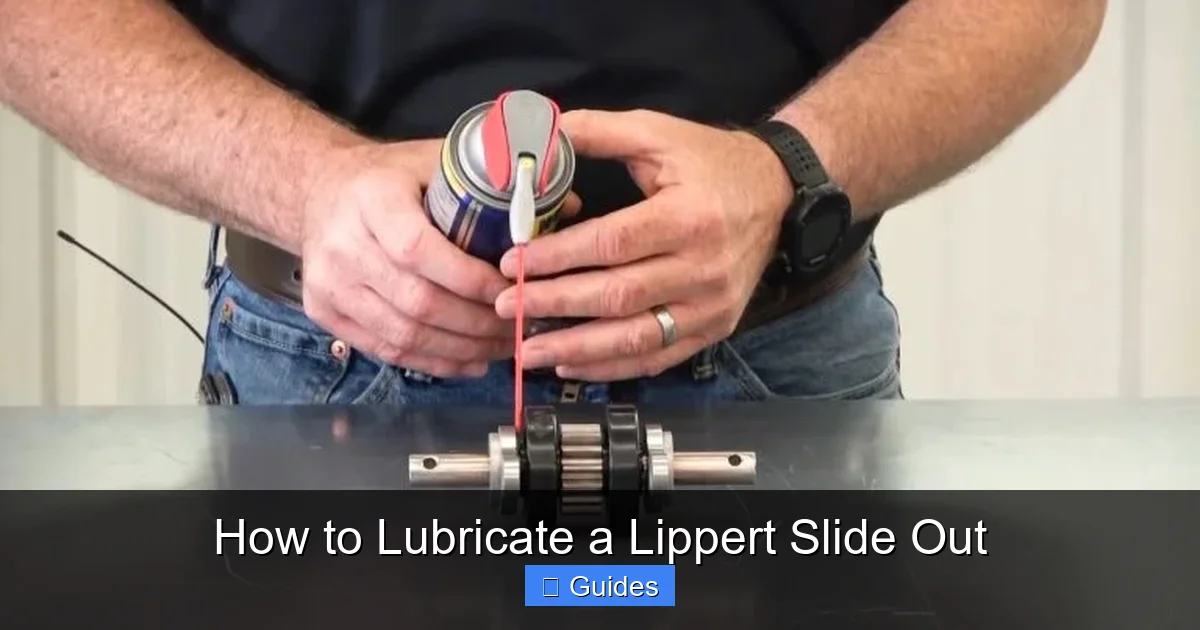
Visual guide about How to Lubricate a Lippert Slide Out
Image source: shootingstar-rvresort.com
Lubricating your Lippert slide out is a straightforward process, but having the right tools makes it easier and more effective. Here’s what you’ll need:
- PTFE-based dry lubricant spray or squeeze bottle – The star of the show. Choose a product with a long nozzle or extension tube for hard-to-reach areas.
- Clean rags or microfiber cloths – For wiping down surfaces and removing old lube or debris.
- Soft-bristle brush or old toothbrush – Great for scrubbing tight spaces and cleaning rollers.
- Compressed air (optional) – Helps blow out dust and debris from tracks and seals.
- Flashlight or work light – Essential for seeing into dark corners and under the slide.
- Gloves (optional but recommended) – Keeps your hands clean and protects from sharp edges.
- Safety glasses – Protect your eyes when spraying lubricant or using compressed air.
You don’t need expensive tools or special equipment. Most of these items are probably already in your garage or RV toolkit. The key is to have everything ready before you start so you don’t have to pause mid-task.
Step-by-Step Guide to Lubricating Your Lippert Slide Out
Now that you’re prepared, let’s walk through the lubrication process step by step. This method works for most Lippert slide-out systems, whether rack-and-pinion or cable-driven.
Step 1: Prepare Your RV
Start by parking your RV on a level surface and ensuring it’s stable. Turn off the power to the slide-out system to prevent accidental activation. If your RV has a battery disconnect switch, use it. Safety first!
Next, fully extend the slide-out. This gives you full access to the tracks, rollers, and seals. If your slide has a manual override, use it to extend it if the motor isn’t working.
Step 2: Inspect the Slide-Out Components
Before applying any lubricant, take a close look at the entire system. Check for:
– Cracks or damage in the tracks
– Worn or chipped rollers
– Loose bolts or fasteners
– Torn or brittle seals
– Signs of rust or corrosion
If you spot any serious damage, note it for repair. Minor wear is normal, but major issues should be addressed before lubrication.
Step 3: Clean the Tracks and Rollers
Dirt and grime are the enemies of smooth operation. Use a clean rag to wipe down the roller tracks, removing dust, mud, or old lubricant. For stubborn buildup, use a soft-bristle brush or toothbrush to scrub gently.
If you have compressed air, blow out the tracks to remove loose debris. Pay special attention to the corners and ends of the tracks, where dirt tends to accumulate.
Don’t forget the rollers themselves. Wipe them down and check for smooth rotation. If a roller feels stiff or doesn’t spin freely, it may need replacement.
Step 4: Clean the Seals and Extension Arms
The rubber seals around the slide prevent water and air leaks. Over time, they can collect dirt and become sticky. Wipe them down with a damp cloth (avoid harsh cleaners) and dry thoroughly.
For extension arms or linkage arms, wipe away any grease, dirt, or rust. These parts move in and out with the slide and benefit from lubrication to prevent binding.
Step 5: Apply the Lubricant
Now it’s time to lubricate. Shake your PTFE-based lubricant well before use. Apply a thin, even coat to the following areas:
– **Roller tracks:** Spray or apply lube along the entire length of the tracks, especially where the rollers make contact. Don’t overdo it—a light coat is enough.
– **Rollers and bearings:** Apply a small amount to the roller axles and bearing surfaces. Spin the rollers gently to work the lube in.
– **Extension arms or linkage joints:** Lubricate pivot points and moving joints. These areas endure a lot of stress and benefit from smooth movement.
– **Seal surfaces:** Lightly coat the rubber seals where they contact the slide frame. This prevents sticking and reduces wear.
Use the extension tube on your spray can to reach tight spots. Avoid spraying directly into the motor or electrical components.
Step 6: Wipe Off Excess Lubricant
After applying the lube, use a clean rag to wipe away any excess. Too much lubricant can attract dirt and create a sticky film. You want a thin, even layer—not a dripping mess.
This step is especially important around seals and joints, where buildup can interfere with proper sealing.
Step 7: Test the Slide-Out Operation
Once everything is clean and lubricated, it’s time to test. Turn the power back on and slowly extend and retract the slide several times. Listen for unusual noises—grinding, squeaking, or jerking—which could indicate a problem.
If the slide moves smoothly and quietly, you’re good to go. If it’s still stiff, double-check for missed spots or excess debris.
Step 8: Final Inspection and Cleanup
After testing, do a final visual check. Make sure all bolts are tight, seals are intact, and no lubricant has dripped onto the floor or exterior. Clean up your tools and store your lubricant in a cool, dry place.
Common Mistakes to Avoid
Even experienced RVers make mistakes when lubricating their slide-outs. Here are some common pitfalls to watch out for:
- Using the wrong lubricant: As mentioned earlier, avoid oils and greases. They attract dirt and cause more harm than good.
- Over-lubricating: More isn’t better. Excess lube collects dust and can gum up the system.
- Skipping the cleaning step: Applying new lube over old grime just traps dirt and reduces effectiveness.
- Ignoring the seals: Dry or sticky seals can cause the slide to bind. Always include them in your lubrication routine.
- Not testing after service: Always run the slide through a full cycle to ensure everything is working properly.
- Lubricating only when there’s a problem: Preventive maintenance is key. Don’t wait for stiffness or noise to appear.
Avoiding these mistakes will save you time, money, and frustration down the road.
Maintenance Schedule and Best Practices
How often should you lubricate your Lippert slide out? The general rule is every 6 months or after 20–30 full extension/retraction cycles—whichever comes first. If you use your RV frequently or travel in dusty or wet conditions, you may need to lubricate more often.
Here’s a simple maintenance schedule to follow:
– **Monthly:** Visually inspect the slide for dirt, damage, or leaks.
– **Every 3 months:** Clean the tracks and seals with a damp cloth.
– **Every 6 months:** Full lubrication as described in this guide.
– **Annually:** Check bolts, rollers, and motor operation. Consider a professional inspection if you’re unsure.
Other best practices include:
– Keep the slide clean and free of debris.
– Never force a stuck slide—investigate the cause first.
– Store your RV with the slide retracted to protect seals.
– Use a slide-out cover or awning to shield it from rain and UV damage.
By staying proactive, you’ll extend the life of your slide-out and avoid unexpected breakdowns on the road.
Troubleshooting Common Slide-Out Issues
Even with regular maintenance, slide-outs can develop problems. Here’s how to handle some common issues:
Slide is Stiff or Hard to Move
This is often due to lack of lubrication or dirt buildup. Clean and lubricate the tracks and rollers. If the problem persists, check for misalignment or worn parts.
Slide Makes Noise When Extending
Squeaking or grinding usually points to dry components. Re-lubricate the rollers and tracks. If noise continues, inspect the motor and gears.
Slide Doesn’t Fully Extend or Retract
Check for obstructions in the tracks or damaged seals. Also, verify that the motor is functioning and the system is level.
Water Leaks Around the Slide
Worn or dirty seals are the usual culprits. Clean and lubricate the seals, and replace them if cracked or brittle.
Slide Drifts or Sags When Extended
This could indicate worn rollers or a failing support system. Have a professional inspect the slide for structural issues.
When in doubt, consult your Lippert owner’s manual or contact a certified RV technician.
Conclusion
Learning how to lubricate a Lippert slide out is one of the simplest and most effective ways to maintain your RV. With the right tools, the correct lubricant, and a little time, you can keep your slide-out operating smoothly for years. Regular lubrication prevents wear, reduces noise, and helps avoid costly repairs.
Remember: clean first, lubricate second, and always test afterward. Stick to a maintenance schedule, avoid common mistakes, and pay attention to your slide’s performance. Your RV will thank you with reliable, hassle-free operation on every adventure.
Whether you’re a weekend warrior or a full-time RVer, taking care of your slide-out is part of the journey. So grab your lube, roll up your sleeves, and give your Lippert slide the care it deserves.
Frequently Asked Questions
What type of lubricant should I use on a Lippert slide out?
Use a dry-film or PTFE-based lubricant designed for RV slide-outs. Avoid grease, oil, or silicone sprays, as they can attract dirt or damage seals.
How often should I lubricate my slide out?
Lubricate your Lippert slide out every 6 months or after 20–30 full cycles. Increase frequency if you travel in dusty or wet conditions.
Can I use WD-40 to lubricate my slide out?
No, avoid WD-40 Original. It’s a solvent, not a long-term lubricant. Use WD-40 Specialist Dry Lube with PTFE instead.
Do I need to lubricate the rubber seals?
Yes, lightly lubricate the seals to prevent sticking and reduce wear. Use a PTFE-based lube safe for rubber.
What if my slide out is still stiff after lubrication?
Check for dirt buildup, worn rollers, or misalignment. If the issue persists, inspect the motor and consider professional help.
Can I lubricate my slide out while it’s retracted?
No, always fully extend the slide before lubricating. This gives you access to all tracks, rollers, and seals.

At CarLegit, we believe information should be clear, factual, and genuinely helpful. That’s why every guide, review, and update on our website is created with care, research, and a strong focus on user experience.