
Mounting solar panels on an RV roof lets you enjoy off-grid adventures with clean, renewable energy. This guide walks you through every step—from planning and tools to installation and maintenance—so you can power your travels confidently and safely.
[FEATURED_IMAGE_PLACEHODEL]
In This Article
- 1 Key Takeaways
- 2 📑 Table of Contents
- 3 Why Mount Solar Panels on Your RV Roof?
- 4 Step 1: Assess Your Power Needs and Roof Space
- 5 Step 2: Choose the Right Solar Panels and Mounting System
- 6 Step 3: Gather Tools and Prepare for Installation
- 7 Step 4: Install the Mounting Hardware
- 8 Step 5: Wire the Solar Panels and Connect to Your System
- 9 Step 6: Maintain and Monitor Your Solar Setup
- 10 Conclusion
- 11 Frequently Asked Questions
Key Takeaways
- Plan your solar setup first: Calculate your power needs, choose the right panels, and map out roof space before buying anything.
- Use quality mounting hardware: Z-brackets, tilt mounts, or rail systems ensure secure, weatherproof installation that lasts.
- Seal all roof penetrations: Proper sealing with RV-specific sealant prevents leaks and protects your roof.
- Follow wiring best practices: Use correct gauge wires, fuses, and MC4 connectors to ensure safe, efficient power flow.
- Test and maintain regularly: Check connections, clean panels, and inspect seals to keep your system running smoothly.
- Safety is non-negotiable: Always use fall protection, work with a partner, and follow electrical safety guidelines.
- Consider professional help if unsure: If you’re not confident in your skills, hire an RV solar specialist to avoid costly mistakes.
📑 Table of Contents
- Why Mount Solar Panels on Your RV Roof?
- Step 1: Assess Your Power Needs and Roof Space
- Step 2: Choose the Right Solar Panels and Mounting System
- Step 3: Gather Tools and Prepare for Installation
- Step 4: Install the Mounting Hardware
- Step 5: Wire the Solar Panels and Connect to Your System
- Step 6: Maintain and Monitor Your Solar Setup
- Conclusion
Why Mount Solar Panels on Your RV Roof?
Imagine waking up in a quiet forest clearing, brewing coffee with your electric kettle, and scrolling through photos on your tablet—all without plugging into a campground outlet. That’s the freedom solar power brings to RV life. Mounting solar panels on your RV roof transforms your vehicle from a gas-guzzling traveler into a self-sufficient, eco-friendly home on wheels.
Solar energy isn’t just about going green—it’s about independence. Whether you’re boondocking in the desert, parked at a remote beach, or simply avoiding crowded RV parks, solar lets you stay powered up. No more worrying about generator noise, fuel costs, or finding an available electrical hookup. With the right setup, your RV can generate enough electricity to run lights, a refrigerator, a laptop, and even a small air conditioner.
But here’s the catch: installing solar panels on an RV roof isn’t as simple as slapping them on and calling it a day. It requires planning, the right tools, and careful execution. From choosing the best mounting method to ensuring a watertight seal, every step matters. This guide will walk you through the entire process, so you can install your solar panels safely, efficiently, and with confidence.
Step 1: Assess Your Power Needs and Roof Space
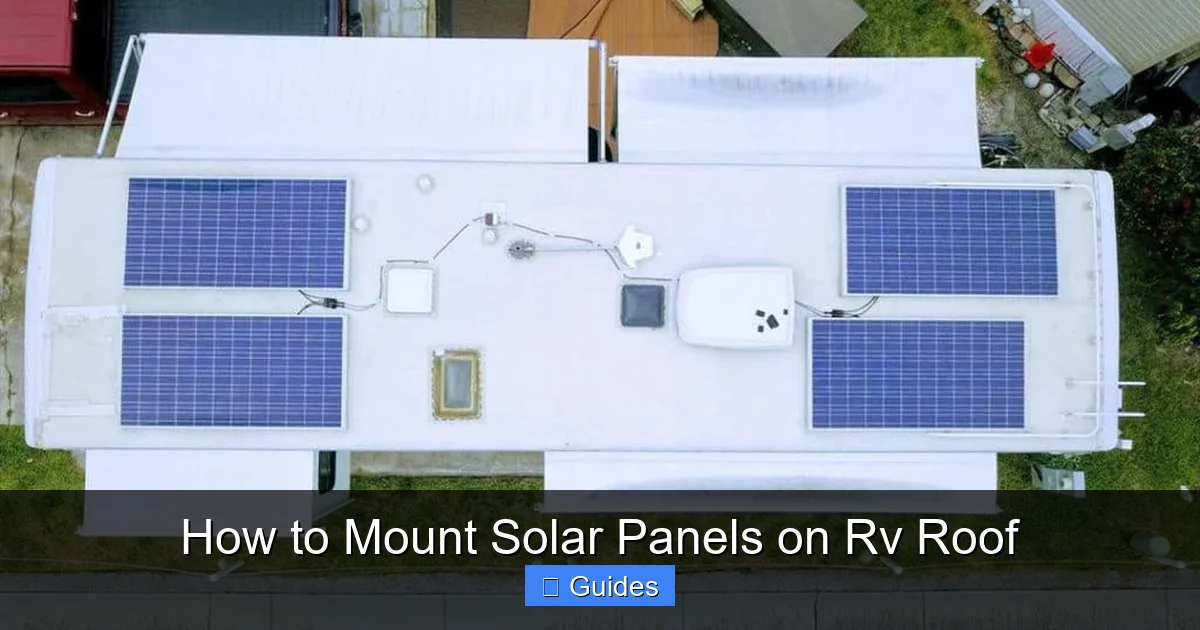
Before you buy a single solar panel, take a hard look at your energy habits. How much power do you actually use? Start by listing all the devices you plan to run: lights, fridge, water pump, phone chargers, TV, microwave, etc. Check the wattage rating on each device (usually found on a label or in the manual), and estimate how many hours per day you’ll use them.

Visual guide about How to Mount Solar Panels on Rv Roof
Image source: adventurousway.com
Calculate Your Daily Energy Consumption
For example, a 12V LED light might use 5 watts and run for 4 hours a day—that’s 20 watt-hours (Wh). A laptop charger at 60 watts used for 3 hours equals 180 Wh. Add up all your devices to get your total daily consumption in watt-hours. Multiply that by 1.2 to account for inefficiencies in the system (like inverter loss), and you’ll have a realistic estimate of how much solar power you need.
Determine How Many Panels You Need
Solar panels are rated in watts—common sizes for RVs are 100W, 200W, and 400W. A 100W panel typically produces about 300–400Wh per day in full sun, depending on your location and season. If you need 1,200Wh per day, you’d want at least three 100W panels (or one 400W panel). Keep in mind that cloudy days and shading reduce output, so it’s smart to oversize your system slightly.
Measure Your RV Roof
Not all RV roofs are created equal. Some are flat, some are curved, and some have vents, air conditioners, or satellite dishes that limit usable space. Measure the available area where you can safely mount panels—avoiding edges, hatches, and high-wind zones. Most rigid panels are about 40” x 20”, so plan accordingly. Flexible panels can conform to curved roofs but are generally less efficient.
Consider Weight and Aerodynamics
Solar panels add weight to your roof—typically 3–5 pounds per square foot. Most RVs can handle this, but check your manufacturer’s weight limits. Also, consider how panels affect wind resistance. Flat-mounted panels create less drag than tilted ones, which can improve fuel efficiency and reduce noise while driving.
Step 2: Choose the Right Solar Panels and Mounting System
Once you know how much power you need and where you can install it, it’s time to pick your gear. Not all solar panels are equal, and the mounting method you choose will impact performance, durability, and ease of installation.
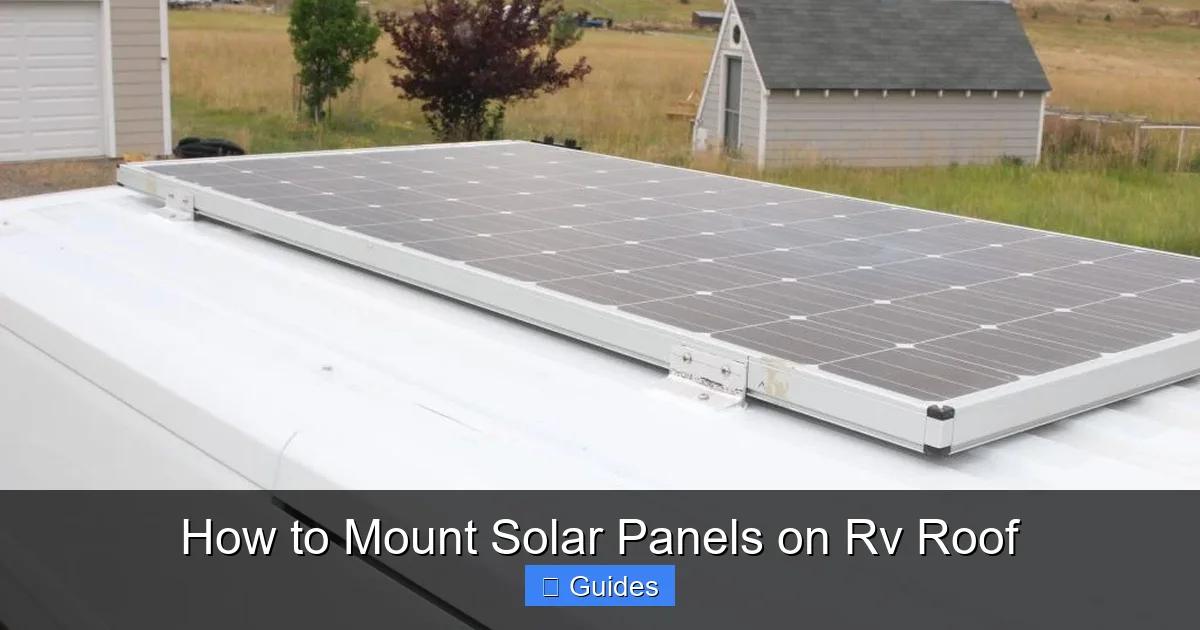
Visual guide about How to Mount Solar Panels on Rv Roof
Image source: buildagreenrv.com
Types of Solar Panels for RVs
There are three main types of solar panels: monocrystalline, polycrystalline, and thin-film (flexible). Monocrystalline panels are the most efficient and space-saving—ideal for RVs with limited roof space. They perform well in low light and last 25+ years. Polycrystalline panels are slightly less efficient but more affordable. Thin-film panels are lightweight and flexible, great for curved roofs, but they degrade faster and require more surface area for the same output.
Mounting Options: Z-Brackets, Tilt Mounts, and Rails
Your mounting system must be strong, secure, and weatherproof. Here are the most common options:
- Z-Brackets: Simple L-shaped metal brackets that bolt directly to the roof and panel frame. They’re affordable and easy to install but keep panels flat, which may reduce efficiency in winter or at high latitudes.
- Tilt Mounts: Allow you to angle panels toward the sun for better energy capture. Great for seasonal adjustments, but they add height and wind resistance. Some models are foldable for travel.
- Rail Systems: Use aluminum rails mounted to the roof, with panels clamped in place. They offer a clean, professional look and allow for easy panel removal or reconfiguration. More expensive but very durable.
Flexible vs. Rigid Panels
Flexible panels can be glued directly to the roof with adhesive, eliminating the need for drilling. This is great for fiberglass or curved roofs. However, they require airflow underneath to prevent overheating, which reduces efficiency. Rigid panels with proper mounting allow airflow and are generally more efficient and longer-lasting.
Don’t Forget the Charge Controller and Batteries
Solar panels don’t power your RV directly—they charge your house batteries through a charge controller. Choose a MPPT (Maximum Power Point Tracking) controller over a PWM (Pulse Width Modulation) type. MPPT controllers are more efficient, especially in cold or cloudy conditions, and can boost output by up to 30%. Make sure your battery bank (usually 12V lithium or AGM) has enough capacity to store the energy you generate.
Step 3: Gather Tools and Prepare for Installation
Before you climb onto your roof, make sure you have the right tools and safety gear. A well-prepared installer is a safe installer.
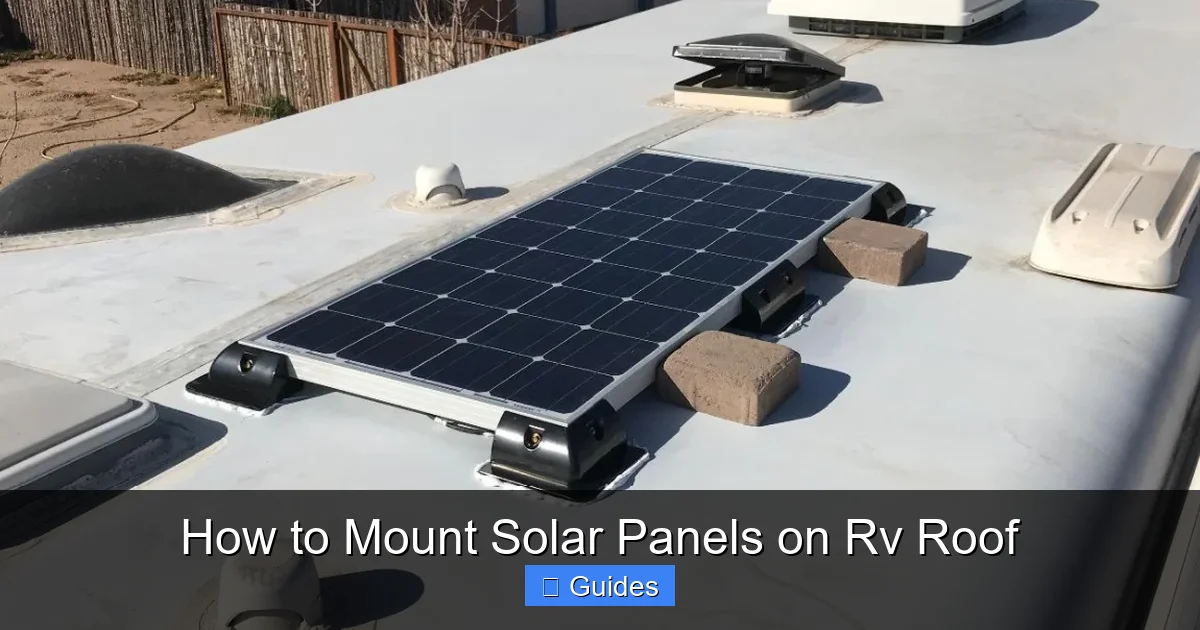
Visual guide about How to Mount Solar Panels on Rv Roof
Image source: mobile-solarpower.com
Essential Tools and Materials
Here’s what you’ll need:
- Drill with drill bits (including a step bit for roof penetrations)
- Socket wrench or screwdriver set
- Measuring tape and marker
- Level
- Silicone sealant (use RV-specific, UV-resistant sealant like Dicor or Eternabond)
- Butyl tape (for extra waterproofing under brackets)
- MC4 connectors and solar cable (10 or 12 AWG recommended)
- Crimping tool and wire strippers
- Fuses and fuse holder
- Safety harness and ladder stabilizer (seriously—don’t skip this!)
Safety First: Roof Work Tips
Working on an RV roof can be dangerous. Always use a sturdy ladder with a stabilizer, and wear non-slip shoes. If your RV is parked on uneven ground, use leveling blocks. Never work alone—have someone spot you. Consider using a safety harness attached to a secure anchor point. And never install panels in windy, rainy, or icy conditions.
Plan Your Layout
Sketch a layout of your roof, marking where each panel will go. Leave at least 2–3 inches between panels for airflow and expansion. Avoid placing panels directly over seams or weak spots. If using Z-brackets, space them evenly—typically 12–16 inches apart along the panel frame.
Test Fit Before Drilling
Place your panels and brackets on the roof without drilling to ensure everything fits. Check for interference with vents, antennas, or AC units. Adjust as needed. This step saves you from making unnecessary holes or buying the wrong hardware.
Step 4: Install the Mounting Hardware
Now comes the critical part: securing your panels to the roof. This step must be done carefully to prevent leaks and ensure long-term stability.
Drill Pilot Holts and Seal Penetrations
Once your layout is finalized, drill pilot holes for the mounting brackets. Use a drill bit slightly smaller than your lag screws to prevent cracking. Before inserting screws, apply a generous bead of silicone sealant around each hole. Then, place a strip of butyl tape under the bracket base for extra waterproofing. Tighten screws evenly—don’t over-tighten, as this can crack the roof or warp the bracket.
Use the Right Fasteners
Use stainless steel lag screws or bolts with rubber washers. Avoid galvanized steel, which can rust. For fiberglass roofs, consider using self-tapping screws with sealing washers. If your RV has a rubber roof (EPDM), use Eternabond tape under brackets and avoid puncturing the membrane if possible.
Install Rail Systems (If Using)
If you’re using a rail system, mount the rails first. Use the manufacturer’s instructions to space and secure them. Rails typically require fewer roof penetrations than individual brackets, which reduces leak risk. Once rails are in place, clamp the panels into position.
Double-Check Alignment and Level
Use a level to ensure panels are straight and evenly spaced. Misaligned panels not only look bad but can create wind noise and stress on the mounting hardware. Adjust as needed before final tightening.
Step 5: Wire the Solar Panels and Connect to Your System
With the panels mounted, it’s time to connect them to your RV’s electrical system. This step requires basic electrical knowledge—if you’re not comfortable working with wires, consult a professional.
Wire in Series or Parallel?
Solar panels can be wired in series (positive to negative) to increase voltage, or in parallel (positive to positive, negative to negative) to increase current. For most RVs with 12V systems, wiring in parallel is simpler and safer. However, if you have a high-voltage MPPT controller, series wiring can reduce wire size and losses. Check your charge controller’s specs to determine the best configuration.
Use Proper Gauge Wire and Connectors
Solar cables should be rated for outdoor use and UV exposure. Use 10 or 12 AWG wire for most RV setups. MC4 connectors are standard for solar panels—they’re weatherproof and easy to disconnect. Always crimp connectors properly and use a multimeter to check for continuity before connecting to the charge controller.
Install Fuses and Disconnects
Safety is crucial. Install an inline fuse (usually 15–20A) on the positive wire between the panels and charge controller. This protects against short circuits and fire. Some systems also include a disconnect switch for maintenance.
Connect to the Charge Controller and Batteries
Run the solar cables down through a roof vent or dedicated entry point (seal it with silicone). Connect the positive and negative wires to the charge controller’s solar input terminals. Then connect the controller to your house battery bank. Follow the manufacturer’s wiring diagram carefully. Once connected, the controller should display voltage and charging status.
Test the System
On a sunny day, check that the charge controller shows solar input and that your batteries are charging. Use a multimeter to verify voltage at the panels and controller. If everything looks good, you’re ready to enjoy solar power!
Step 6: Maintain and Monitor Your Solar Setup
Installing solar panels is just the beginning. Regular maintenance ensures your system performs well for years.
Clean Panels Regularly
Dust, bird droppings, and pollen reduce efficiency. Clean panels with water and a soft sponge every few weeks. Avoid abrasive cleaners or high-pressure washers, which can scratch the surface.
Inspect Mounting Hardware and Seals
Every few months, check that brackets are tight and seals are intact. Reapply silicone if you notice cracks or gaps. Look for signs of water intrusion inside the RV—musty smells or stains could indicate a leak.
Monitor Performance
Use a solar monitor or app (many charge controllers have Bluetooth) to track daily production. If output drops suddenly, check for shading, dirt, or wiring issues.
Winter and Storage Tips
In winter, snow can block sunlight. Use a soft brush to clear panels after storms. If storing your RV for long periods, disconnect the panels or cover them to prevent damage from UV exposure.
Conclusion
Mounting solar panels on your RV roof is one of the best upgrades you can make for off-grid travel. It gives you freedom, saves money on campground fees, and reduces your environmental impact. While the process requires careful planning and attention to detail, the rewards are well worth the effort.
Start by assessing your power needs and roof space, choose the right panels and mounting system, and follow safe installation practices. Seal all penetrations, wire correctly, and maintain your system regularly. With a little patience and the right approach, you’ll be generating clean energy wherever the road takes you.
Remember, solar power isn’t just for full-time RVers—weekend warriors and seasonal travelers can benefit too. Whether you’re chasing sunsets in the Southwest or exploring quiet lakes in the North, solar lets you stay connected without being tethered to the grid. So grab your tools, plan your setup, and get ready to power your adventures the smart, sustainable way.
Frequently Asked Questions
Can I install solar panels on a curved RV roof?
Yes, but rigid panels may not sit flush. Flexible solar panels are better for curved roofs, or you can use specialized mounting brackets that allow slight adjustments. Always ensure proper sealing to prevent leaks.
Do I need to drill holes in my RV roof?
Most mounting systems require drilling, but you can minimize risk by using quality sealant and butyl tape. Flexible panels can sometimes be glued, but this method may void warranties and reduce efficiency due to lack of airflow.
How many solar panels do I need for my RV?
It depends on your daily power usage. A typical RV might need 200W to 600W of solar panels. Calculate your total watt-hours per day and divide by 300–400 (average daily output per 100W panel) to estimate your needs.
Can I run my RV air conditioner with solar?
It’s possible but challenging. Most RV air conditioners require 1,500–3,000 watts to start, which demands a large solar array, high-capacity batteries, and a powerful inverter. Many RVers use solar to reduce AC runtime or pair it with a generator.
How long do RV solar panels last?
Quality solar panels can last 25–30 years or more. Regular cleaning and maintenance help maximize lifespan. Charge controllers and inverters may need replacement every 10–15 years.
Is it safe to install solar panels myself?
Yes, if you follow safety guidelines and have basic mechanical and electrical skills. Use fall protection, work with a partner, and consult a professional if you’re unsure about wiring or roof integrity.

At CarLegit, we believe information should be clear, factual, and genuinely helpful. That’s why every guide, review, and update on our website is created with care, research, and a strong focus on user experience.