
Sanitizing your RV fresh water tank is essential for safe, clean drinking water and preventing harmful bacteria buildup. This guide walks you through the entire process—from preparation to final rinse—using simple household bleach and clear instructions.
In This Article
- 1 Key Takeaways
- 2 📑 Table of Contents
- 3 Why Sanitizing Your RV Fresh Water Tank Matters
- 4 When Should You Sanitize Your RV Fresh Water Tank?
- 5 What You’ll Need to Sanitize Your RV Fresh Water Tank
- 6 Step-by-Step Guide to Sanitizing Your RV Fresh Water Tank
- 7 Tips for Maintaining a Clean Fresh Water System
- 8 Common Mistakes to Avoid When Sanitizing
- 9 Conclusion
- 10 Frequently Asked Questions
- 10.1 How often should I sanitize my RV fresh water tank?
- 10.2 Can I use vinegar instead of bleach to sanitize?
- 10.3 Will sanitizing damage my RV’s plumbing?
- 10.4 Can I drink the water right after sanitizing?
- 10.5 Do I need to sanitize if I only use bottled water?
- 10.6 What if I smell bleach after rinsing?
Key Takeaways
- Sanitize at least twice a year: Regular sanitizing prevents mold, bacteria, and odors in your RV’s water system.
- Use unscented household bleach: Only use regular, unscented bleach (5-6% sodium hypochlorite) to avoid chemical contamination.
- Follow the 1:4 ratio rule: Mix 1 cup of bleach per 40 gallons of tank capacity for safe, effective sanitizing.
- Run bleach solution through all fixtures: Flush faucets, shower, and toilet to sanitize the entire plumbing system.
- Rinse thoroughly before refilling: Drain and refill the tank 2-3 times to remove all bleach residue.
- Test water before drinking: Use a chlorine test strip or smell check to ensure no bleach remains.
- Maintain clean habits: Always use clean hoses and avoid letting water sit stagnant for long periods.
📑 Table of Contents
- Why Sanitizing Your RV Fresh Water Tank Matters
- When Should You Sanitize Your RV Fresh Water Tank?
- What You’ll Need to Sanitize Your RV Fresh Water Tank
- Step-by-Step Guide to Sanitizing Your RV Fresh Water Tank
- Tips for Maintaining a Clean Fresh Water System
- Common Mistakes to Avoid When Sanitizing
- Conclusion
Why Sanitizing Your RV Fresh Water Tank Matters
When you’re out on the open road, your RV’s fresh water tank is your lifeline. It supplies drinking water, cooking water, and water for showers and washing dishes. But if that tank isn’t properly maintained, it can become a breeding ground for bacteria, mold, and unpleasant odors. That’s why learning how to sanitize RV fresh water tank is one of the most important maintenance tasks for any RV owner.
Think of your fresh water tank like a large water bottle you reuse every day. Over time, even with clean refills, residue builds up on the walls, hoses can introduce contaminants, and stagnant water encourages microbial growth. Without regular sanitizing, you might notice a funky smell when you turn on the faucet, or worse—experience stomach issues from contaminated water. Sanitizing isn’t just about cleanliness; it’s about health and safety.
Many RV owners skip this step, assuming that filling up at clean campgrounds or using filtered water is enough. But filters don’t sanitize—they only remove particles and some chemicals. The tank itself, along with the plumbing lines, can still harbor harmful organisms like E. coli, Legionella, or mold spores. Even if your water looks clear, it might not be safe. That’s why a thorough sanitizing routine is non-negotiable for anyone who wants to enjoy safe, great-tasting water on the go.
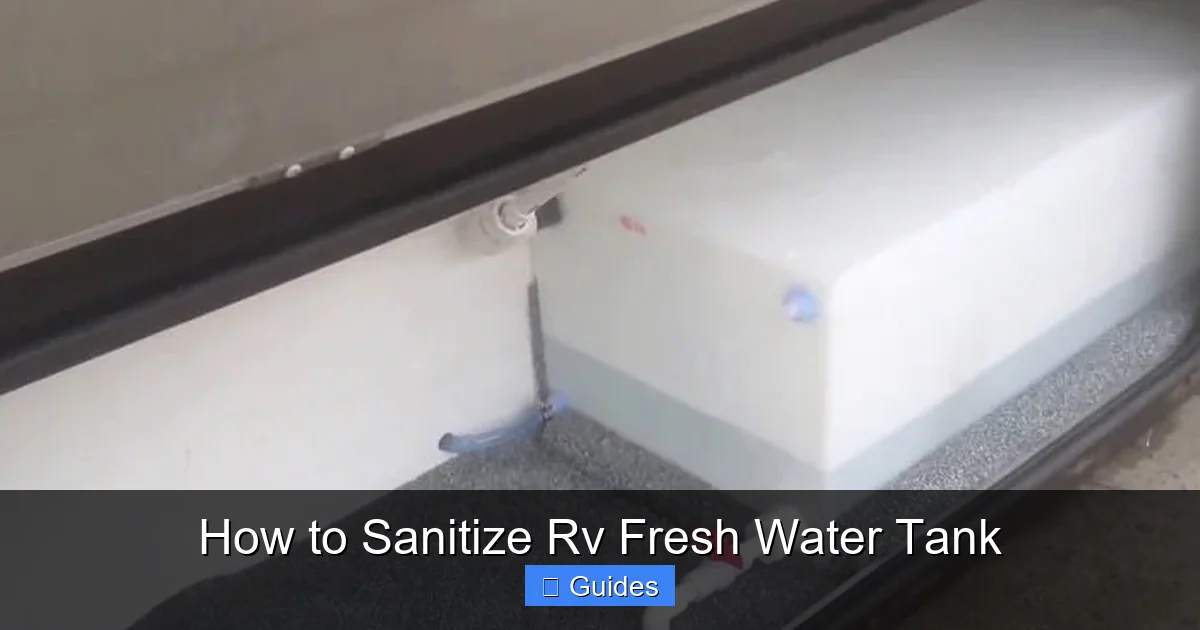
When Should You Sanitize Your RV Fresh Water Tank?
Visual guide about How to Sanitize Rv Fresh Water Tank
Image source: gudgear.com
Timing is everything when it comes to sanitizing your RV’s fresh water system. While it might seem like a chore, doing it at the right intervals can save you from bigger problems down the road.
Most experts recommend sanitizing your fresh water tank at least twice a year—once before the start of the camping season and once at the end. If you use your RV frequently, especially in warm climates where bacteria grow faster, you might want to sanitize every three to four months. Warm water and stagnant conditions create the perfect environment for biofilm—a slimy layer of bacteria that clings to tank walls and pipes.
You should also sanitize your tank after any period of non-use longer than two weeks. Letting water sit still for too long allows microorganisms to multiply. Even if you drained the tank before storing your RV, residual moisture can still lead to mold or mildew growth. Sanitizing ensures that when you’re ready to hit the road again, your water system is fresh and safe.
Another key time to sanitize is after filling up from an unknown or questionable water source. While most campgrounds and RV parks have clean water, not all public fill stations are regularly tested. If you’re ever in doubt about the quality of the water you’ve added, it’s better to be safe and run a sanitizing cycle. Also, if you notice any unusual smells, tastes, or discoloration in your water, don’t wait—sanitize immediately.
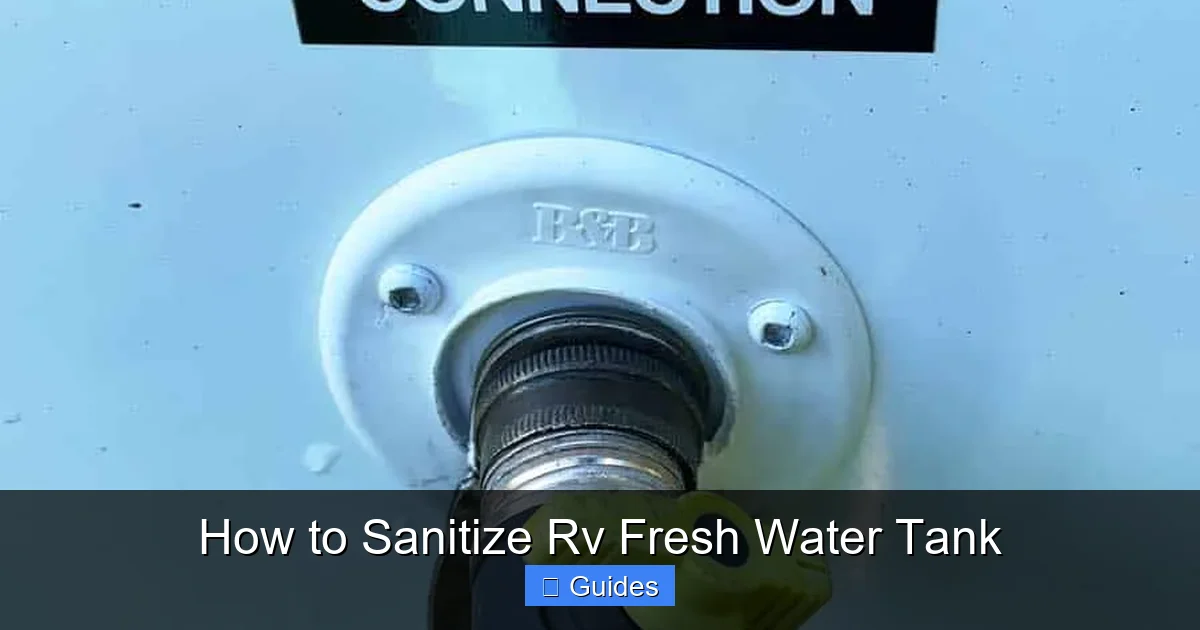
What You’ll Need to Sanitize Your RV Fresh Water Tank

Visual guide about How to Sanitize Rv Fresh Water Tank
Image source: s3.amazonaws.com
Before you begin, gather all the necessary supplies. Having everything ready will make the process smoother and faster. You don’t want to be halfway through and realize you’re missing a key item.
Here’s a checklist of what you’ll need:
– Unscented household bleach (5-6% sodium hypochlorite) – never use scented, color-safe, or bleach with additives
– Clean water hose (preferably one dedicated only to drinking water)
– Funnel (optional, but helpful for pouring bleach into the tank)
– Measuring cup or container
– Bucket or container for mixing (if needed)
– Rubber gloves and safety goggles (for protection)
– Chlorine test strips (optional, but recommended for accuracy)
– Towels or rags (for spills)
– A way to access your tank’s fill port (usually on the exterior of the RV)
It’s important to use only regular, unscented bleach. Scented or “fresh” bleach contains fragrances and other chemicals that can leave harmful residues in your water system. The same goes for bleach labeled “color-safe” or “for delicate fabrics”—these often have lower concentrations of sodium hypochlorite and may not sanitize effectively.
Your water hose should be clean and free of mold or debris. Many RV owners keep a dedicated drinking water hose separate from their garden hose to avoid cross-contamination. If your hose has been sitting outside or used for non-potable purposes, give it a good rinse or replace it before use.
Safety gear like gloves and goggles are a good idea, especially when handling bleach. While the amounts used are small, bleach can irritate skin and eyes. Keep children and pets away during the process, and work in a well-ventilated area.
Step-by-Step Guide to Sanitizing Your RV Fresh Water Tank
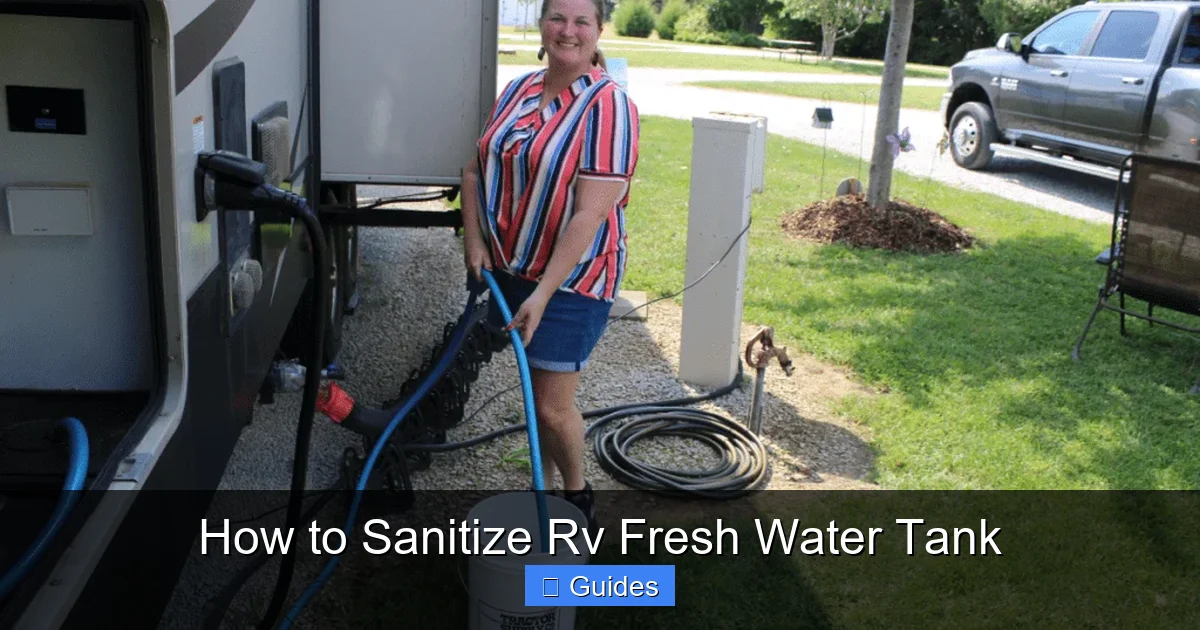
Visual guide about How to Sanitize Rv Fresh Water Tank
Image source: travelswithted.com
Now that you’re prepared, let’s walk through the sanitizing process step by step. This method is safe, effective, and approved by RV manufacturers and health organizations.
Step 1: Drain the Tank Completely
Start by emptying your fresh water tank. Turn on all faucets—kitchen sink, bathroom sink, shower, and toilet—to release any remaining water. Open the low-point drain valves (usually located under the RV) to let gravity do the work. If your RV has a water pump, turn it on to help push out the last bits of water.
Make sure the tank is as empty as possible. Any leftover water will dilute the bleach solution, reducing its effectiveness. Once drained, close all valves and faucets.
Step 2: Calculate the Right Amount of Bleach
The standard ratio is 1 cup of unscented bleach per 40 gallons of tank capacity. To find out how much you need, check your RV’s manual or look for a label near the fill port that lists the tank size. If you’re unsure, estimate based on your RV’s class:
– Class B (camper vans): 20–30 gallons → use ½ to ¾ cup bleach
– Class C (small motorhomes): 30–50 gallons → use ¾ to 1¼ cups
– Class A (large motorhomes): 50–100+ gallons → use 1¼ to 2½+ cups
For example, if your tank holds 60 gallons, you’ll need 1½ cups of bleach. Always round up slightly to ensure full coverage.
Step 3: Mix the Bleach Solution
Pour the measured bleach into your empty fresh water tank. You can use a funnel to avoid spills. Then, fill the tank about one-quarter full with clean water. This helps distribute the bleach evenly and prevents it from settling at the bottom.
Do not mix bleach with other cleaning products—especially ammonia or vinegar. These combinations can create toxic gases. Stick to bleach and water only.
Step 4: Circulate the Solution Through the System
Turn on the water pump and open every faucet in the RV—hot and cold sides. Let the water run until you smell bleach coming out of each fixture. This ensures the sanitizing solution reaches all parts of the plumbing system, including hidden pipes and valves.
Don’t forget the shower, outdoor shower (if equipped), and toilet. Flush the toilet several times to sanitize the bowl and flush valve. If your RV has a water heater, turn it on (after the tank is full) to circulate the solution through it as well. However, avoid running the solution through the water heater for too long—most manufacturers recommend no more than 15–20 minutes to prevent damage.
Step 5: Let It Sit
Once the entire system is filled with the bleach solution, turn off all faucets and let it sit for at least 4 hours. Overnight is even better. This dwell time allows the bleach to kill bacteria, viruses, and mold effectively.
During this time, avoid using any water in the RV. Keep the tank closed and all valves shut.
Step 6: Drain and Rinse Thoroughly
After the waiting period, drain the tank completely again. Open all faucets and low-point drains to remove the bleach solution. Then, refill the tank with clean, fresh water. Run the pump and open all fixtures to flush out any remaining bleach.
Repeat this fill-and-drain process at least two more times. The goal is to remove all traces of bleach. You can speed up the process by using a water hose to flush the system directly through the fill port, bypassing the tank if your RV allows it.
Step 7: Test the Water
Before using the water for drinking or cooking, test it. You can use chlorine test strips (available at pool supply stores) to check for residual bleach. Alternatively, smell the water—if you can still detect a strong chlorine odor, continue rinsing.
Once the water smells and tastes normal, your system is safe to use. Refill the tank and enjoy clean, fresh water on your next adventure.
Tips for Maintaining a Clean Fresh Water System
Sanitizing your tank is just one part of keeping your RV’s water system in top shape. Regular maintenance and smart habits go a long way in preventing contamination.
Use a Dedicated Drinking Water Hose
Invest in a high-quality, drinking water-safe hose labeled “NSF certified” or “safe for potable water.” These hoses are designed not to leach chemicals or harbor bacteria. Store it in a clean, dry place when not in use, and never use it for anything else—like washing your car or filling a kiddie pool.
Install a Water Filter
While filters don’t sanitize, they can improve taste and remove sediment, chlorine, and some contaminants. Consider installing an inline filter at the fill port or a faucet-mounted filter for drinking water. Replace filters according to the manufacturer’s instructions.
Avoid Letting Water Sit
If you’re not using your RV for more than a week, drain the fresh water tank and leave it empty. Stagnant water is a breeding ground for bacteria. When you return, refill and sanitize if needed.
Clean the Fill Port and Cap
Dirt and debris can enter the tank through the fill port. Regularly wipe the opening and cap with a clean cloth. Consider using a fill port cover or cap with a built-in filter to keep contaminants out.
Monitor Water Quality
Pay attention to how your water looks, smells, and tastes. If something seems off, don’t ignore it. Run a quick sanitizing cycle or have your water tested if problems persist.
Winterize Properly
In cold climates, always winterize your water system to prevent freezing and cracking. This includes draining the tank, blowing out lines with air, and adding antifreeze to traps and drains. Sanitize before winterizing and again when you de-winterize in the spring.
Common Mistakes to Avoid When Sanitizing
Even experienced RV owners can make errors during the sanitizing process. Avoid these common pitfalls to ensure a safe and effective clean.
Using the Wrong Type of Bleach
As mentioned earlier, only use unscented, regular household bleach. Scented or “gentle” bleach won’t sanitize properly and can leave harmful residues. Check the label to confirm it contains 5-6% sodium hypochlorite.
Skipping the Rinse
Some people think one rinse is enough, but bleach can linger in pipes and tanks. Always rinse at least two to three times. If you can still smell chlorine, keep rinsing.
Overusing Bleach
More isn’t better. Using too much bleach can damage rubber seals, gaskets, and plastic components in your plumbing system. Stick to the recommended ratio.
Sanitizing Without Draining First
Adding bleach to a full or partially full tank dilutes the solution and reduces its effectiveness. Always drain the tank completely before starting.
Ignoring the Water Heater
Many people forget to include the water heater in the sanitizing process. If your RV has one, make sure the bleach solution flows through it—but don’t let it sit too long.
Not Sanitizing After Repairs or Modifications
If you’ve recently repaired a leak, replaced a hose, or added a new fixture, sanitize the system afterward. New parts can introduce contaminants.
Conclusion
Sanitizing your RV fresh water tank might not be the most exciting part of RV ownership, but it’s one of the most important. Clean water is essential for health, comfort, and peace of mind on the road. By following this guide, you can ensure your water system stays free of bacteria, odors, and contaminants.
Remember, sanitizing isn’t a one-time task—it’s an ongoing responsibility. Make it part of your regular maintenance routine, and you’ll enjoy safe, great-tasting water no matter where your adventures take you. With the right tools, a little time, and attention to detail, you can keep your RV’s water system in peak condition for years to come.
So the next time you’re packing up for a trip, don’t forget to add “sanitize fresh water tank” to your pre-travel checklist. Your health—and your taste buds—will thank you.
Frequently Asked Questions
How often should I sanitize my RV fresh water tank?
You should sanitize your RV fresh water tank at least twice a year—once before the camping season and once after. If you use your RV frequently or store it with water inside, consider sanitizing every three to four months.
Can I use vinegar instead of bleach to sanitize?
Vinegar can help clean and deodorize, but it’s not strong enough to kill all bacteria and viruses. Bleach is the only recommended sanitizer for RV water systems because it’s effective and safe when used correctly.
Will sanitizing damage my RV’s plumbing?
No, as long as you use the correct amount of bleach and rinse thoroughly. Overuse or leaving bleach in the system too long can damage rubber parts, so always follow the recommended ratios and rinse well.
Can I drink the water right after sanitizing?
No. You must rinse the tank and plumbing system at least two to three times to remove all bleach residue. Test the water with a chlorine strip or by smell before using it for drinking or cooking.
Do I need to sanitize if I only use bottled water?
Yes. Even if you drink bottled water, you still use the tank for showers, washing dishes, and flushing the toilet. Bacteria can grow in stagnant water and affect your health through skin contact or inhalation of aerosols.
What if I smell bleach after rinsing?
If you still smell chlorine, continue rinsing the system. Run fresh water through all faucets and drains until the odor is gone. You can also use a water filter to help remove any lingering taste or smell.

At CarLegit, we believe information should be clear, factual, and genuinely helpful. That’s why every guide, review, and update on our website is created with care, research, and a strong focus on user experience.