
Testing your RV converter is essential for safe and reliable power while camping. This guide walks you through simple steps to check if your converter is working properly, troubleshoot common issues, and keep your RV’s electrical system running smoothly.
In This Article
- 1 Key Takeaways
- 2 📑 Table of Contents
- 3 Why Testing Your RV Converter Matters
- 4 What Is an RV Converter and How Does It Work?
- 5 Signs Your RV Converter Might Be Failing
- 6 Tools You’ll Need to Test an RV Converter
- 7 Step-by-Step Guide to Testing Your RV Converter
- 8 What to Do If Your RV Converter Fails the Test
- 9 Preventative Maintenance Tips
- 10 Conclusion
- 11 Frequently Asked Questions
Key Takeaways
- Understand the role of an RV converter: It converts 120V AC power from shore power into 12V DC power to charge batteries and run low-voltage systems.
- Know the signs of a failing converter: Dim lights, dead batteries, or no power to 12V appliances often point to converter problems.
- Use a multimeter for accurate testing: A digital multimeter is the best tool to check voltage output and confirm proper function.
- Test with shore power connected: Always test the converter when plugged into a reliable 120V power source for accurate results.
- Inspect fuses and connections first: Blown fuses or loose wires are common causes of converter failure and easy to fix.
- Replace if necessary: If the converter isn’t outputting 13.6–14.4V DC, it may need replacement to protect your RV’s electrical system.
- Practice safety first: Always turn off power and wear protective gear when working with electrical components.
📑 Table of Contents
- Why Testing Your RV Converter Matters
- What Is an RV Converter and How Does It Work?
- Signs Your RV Converter Might Be Failing
- Tools You’ll Need to Test an RV Converter
- Step-by-Step Guide to Testing Your RV Converter
- What to Do If Your RV Converter Fails the Test
- Preventative Maintenance Tips
- Conclusion
Why Testing Your RV Converter Matters
Imagine you’re parked at a beautiful campsite, the sun is setting, and you’re ready to relax with some music, lights, and maybe a movie on your tablet. You flip the switch—nothing happens. The lights are dim, the water pump won’t run, and your phone won’t charge. Sound familiar? If you’ve ever experienced this, there’s a good chance your RV converter might be the culprit.
The RV converter is one of the most important—and often overlooked—components in your recreational vehicle. It quietly works behind the scenes to convert 120-volt alternating current (AC) from shore power into 12-volt direct current (DC) that powers your lights, refrigerator, water pump, and other essential systems. Without a working converter, your RV’s 12V system can’t function properly, even if you’re plugged into a power pedestal. That’s why learning how to test an RV converter is a must-have skill for every RV owner.
Regular testing helps you catch problems early, avoid frustrating breakdowns, and extend the life of your RV’s electrical system. Whether you’re a weekend camper or a full-time RVer, knowing how to test an RV converter gives you peace of mind and saves you time and money on repairs. In this guide, we’ll walk you through everything you need to know—from understanding how the converter works to using a multimeter like a pro.
What Is an RV Converter and How Does It Work?
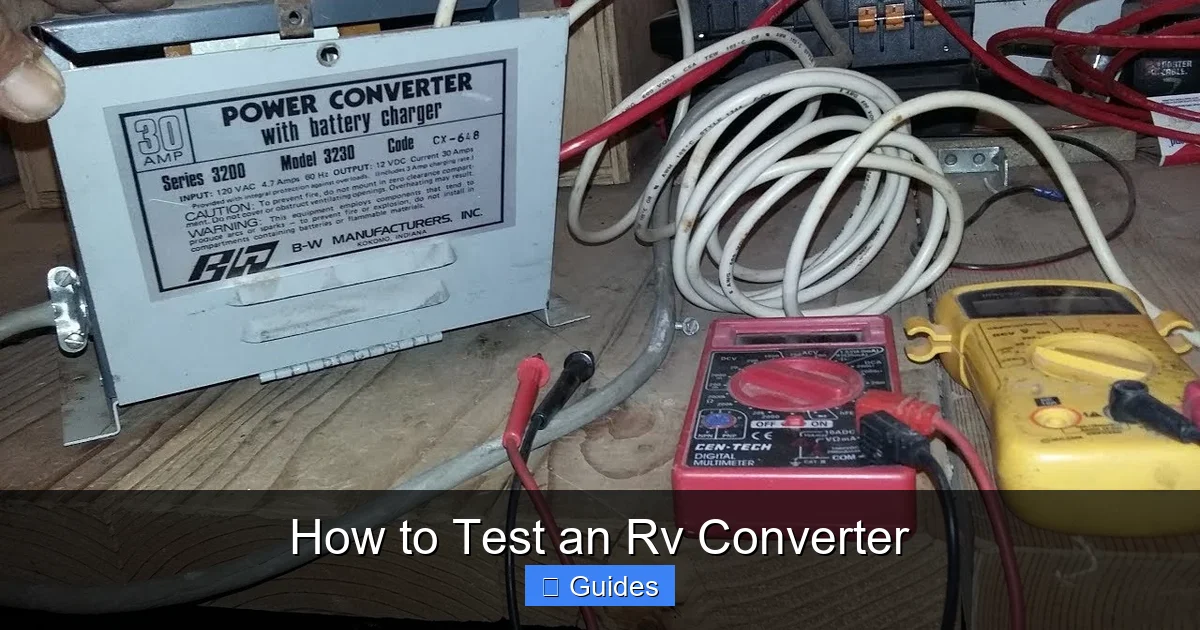
Before diving into testing, it’s important to understand what an RV converter actually does. Think of it as the heart of your RV’s electrical system. When you plug your RV into shore power at a campground, the converter takes that 120V AC electricity and transforms it into 12V DC power. This lower voltage is what your RV’s lights, fans, water pump, and other appliances need to run.

Visual guide about How to Test an Rv Converter
Image source: rvtalk.net
In addition to converting power, many modern converters also act as battery chargers. They keep your RV’s house battery topped off while you’re connected to shore power. This means you can use your 12V systems even when the engine isn’t running. Some advanced models even include features like temperature compensation and multi-stage charging to protect your battery and extend its lifespan.
Types of RV Converters
Not all converters are created equal. Over the years, RV manufacturers have used different types, each with its own pros and cons:
- Standard (Linear) Converters: These are the older, simpler models. They’re reliable but less efficient and can generate a lot of heat. They typically charge batteries at a constant rate, which isn’t ideal for long-term battery health.
- Converter/Charger Combinations: These are more advanced and often include a built-in transfer switch. They can switch between shore power and battery power automatically and offer better charging profiles.
- Smart Converters (Multi-Stage Chargers): The latest and greatest, these units use microprocessors to monitor battery voltage and adjust charging rates accordingly. They often include bulk, absorption, and float stages to maximize battery life.
Knowing which type you have can help you better understand how it should perform and what to expect during testing. Most RVs made in the last 10–15 years use a converter/charger combo or a smart converter, but older models may still have a basic linear unit.
Where Is the RV Converter Located?
Finding your converter is the first step in testing it. In most RVs, the converter is located near the power distribution center, often behind a panel in a storage compartment, under a cabinet, or near the battery compartment. Look for a metal box with cooling fins, wires connected to it, and possibly a small fan. Some converters are mounted vertically, while others are horizontal.
If you’re having trouble locating it, check your RV owner’s manual or look for a label that says “Converter,” “Power Center,” or “Electrical Panel.” In some cases, the converter is built into the same unit as the circuit breakers and fuses, making it a bit harder to isolate. Don’t worry—once you find it, testing is straightforward.
Signs Your RV Converter Might Be Failing
You don’t always need a multimeter to suspect a problem. There are several common symptoms that can tip you off to a failing converter. Paying attention to these signs can help you catch issues before they leave you in the dark.
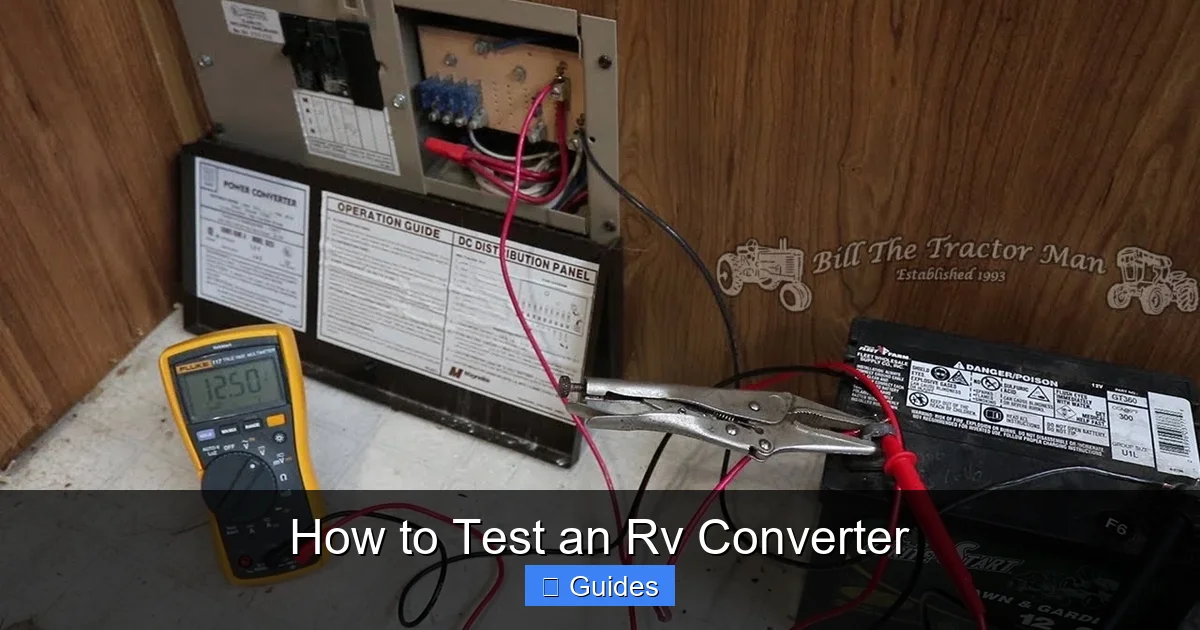
Visual guide about How to Test an Rv Converter
Image source: i.ytimg.com
One of the most obvious signs is dim or flickering lights when you’re plugged into shore power. If your interior lights are noticeably dimmer than usual, or they flicker when you turn on appliances, the converter may not be supplying enough 12V power. Another red flag is a dead or weak house battery even after being connected to shore power for several hours. A healthy converter should keep your battery charged, so if it’s still low, something’s wrong.
You might also notice that 12V appliances aren’t working—like the water pump, furnace, or refrigerator in electric mode. If these devices only work when the engine is running (using the alternator), but not when plugged in, the converter is likely not functioning. Additionally, if you hear a buzzing or humming noise coming from the converter area, or if it feels excessively hot to the touch, it could be overheating or failing internally.
Common Causes of Converter Failure
Several factors can cause a converter to fail. One of the most common is age and wear. Like any electronic device, converters have a limited lifespan—typically 10 to 15 years. Over time, internal components like capacitors and transformers can degrade, leading to reduced performance or complete failure.
Overheating is another major culprit. Converters generate heat during operation, and if they’re not properly ventilated, they can overheat. This is especially true in hot climates or if the converter is covered or blocked. Dust and debris can also clog cooling fins and fans, reducing airflow.
Power surges or voltage fluctuations at campgrounds can damage sensitive electronics, including converters. If you’ve recently experienced a power outage or plugged into a questionable pedestal, that could be the cause. Finally, blown fuses or loose wiring can mimic converter failure. Always check the basics before assuming the converter is bad.
Tools You’ll Need to Test an RV Converter
Testing your RV converter doesn’t require a garage full of tools. In fact, you only need a few basic items to get started. The most important tool is a digital multimeter (DMM). This handheld device measures voltage, current, and resistance, and it’s essential for diagnosing electrical issues. You can find a reliable multimeter for under $30 at most hardware or auto parts stores.
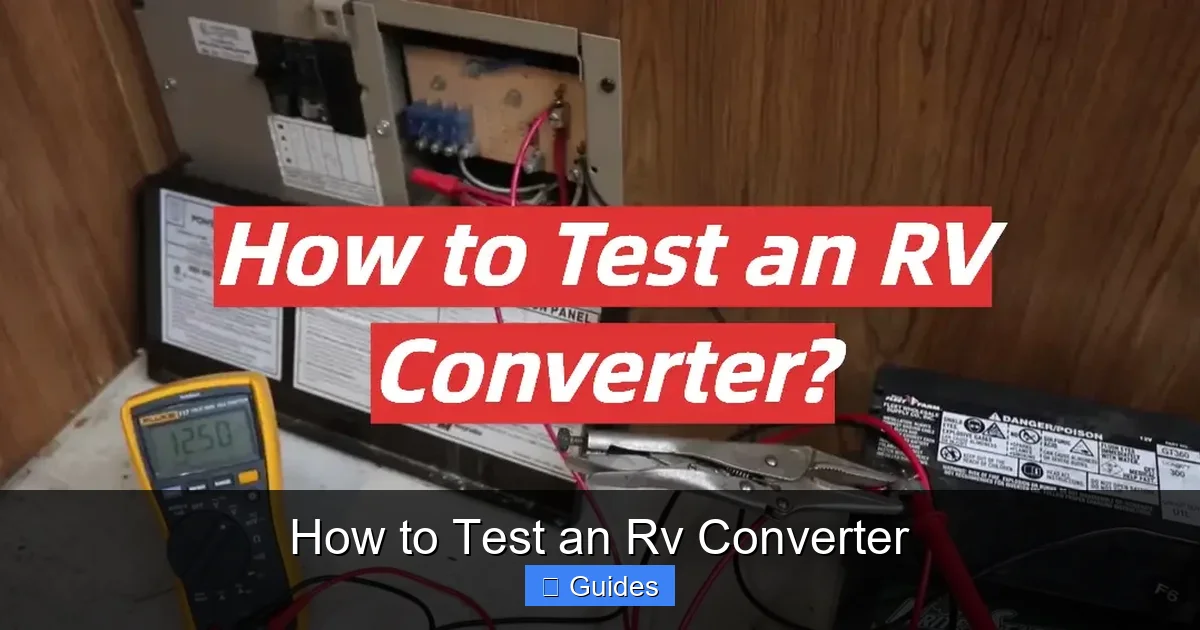
Visual guide about How to Test an Rv Converter
Image source: rvprofy.com
You’ll also need a screwdriver (usually Phillips or flathead) to open access panels and remove covers. Some converters have terminal covers that need to be unscrewed to reach the wiring. It’s also a good idea to have a flashlight on hand, especially if your converter is in a dark or hard-to-reach area.
For safety, wear rubber-soled shoes and avoid working in wet conditions. While the 12V side of the system is low voltage and generally safe, the 120V AC input can be dangerous if mishandled. If you’re not comfortable working with electricity, consider hiring a professional. But for most DIYers, these tools are all you need to test your RV converter with confidence.
Setting Up Your Multimeter
Before you start testing, make sure your multimeter is set up correctly. Turn the dial to the DC voltage setting, usually labeled “V” with a straight line or “VDC.” Most multimeters have multiple voltage ranges (like 20V, 200V, etc.). For testing an RV converter, set it to the 20V DC range—this gives you the best resolution for reading 12V systems.
Insert the black probe into the “COM” port and the red probe into the “VΩ” or “V” port. Make sure the probes are secure and the tips are clean. If your multimeter has auto-ranging, you can skip the range selection and let it detect the voltage automatically. Once it’s ready, you’re all set to begin testing.
Step-by-Step Guide to Testing Your RV Converter
Now that you know what to look for and have your tools ready, it’s time to test your RV converter. Follow these steps carefully to ensure accurate results and stay safe.
Step 1: Ensure Shore Power Is Connected
First, make sure your RV is plugged into a reliable 120V power source. This could be a campground pedestal, a generator, or a household outlet with the correct adapter. Check that the power cord is fully inserted and the pedestal breaker is on. You can verify power is reaching your RV by checking if the AC outlets inside are working—try plugging in a lamp or phone charger.
If you don’t have access to shore power, you won’t be able to test the converter’s output. The converter only works when it’s receiving 120V AC input, so this step is crucial. Never attempt to test the converter while running solely on battery power.
Step 2: Locate the Converter and Access Terminals
Find your converter using the tips from earlier. Once located, remove any covers or panels to access the wiring terminals. Most converters have clearly labeled terminals: “AC In,” “DC Out,” “Battery,” and sometimes “Ground.” You’ll be testing the DC output side, so focus on the terminals that connect to the battery and 12V system.
Be careful not to touch any bare wires or terminals with your hands. Use insulated tools and keep one hand in your pocket while working to reduce the risk of shock. If you see any signs of damage—like burnt wires, melted insulation, or corrosion—stop and assess before proceeding.
Step 3: Test the DC Output Voltage
With your multimeter set to DC voltage, touch the black probe to the negative terminal (usually black wire) and the red probe to the positive terminal (usually red wire) on the converter’s DC output side. You should see a voltage reading on the display.
A healthy converter should output between 13.6 and 14.4 volts DC when connected to shore power. This range indicates it’s properly charging the battery and supplying power to 12V systems. If the reading is below 13.6V, the converter may be undercharging. If it’s above 14.4V, it could be overcharging, which can damage batteries.
If the multimeter shows 0V or a very low reading (like 12V or less), the converter is likely not working. This could mean it’s dead, there’s a blown fuse, or there’s a wiring issue.
Step 4: Check the Battery Voltage
Next, test the voltage directly at the battery terminals. This will tell you if the converter is successfully charging the battery. With the RV still plugged in, touch the multimeter probes to the battery posts (red to positive, black to negative).
A fully charged 12V battery should read around 12.6–12.8V when not under load. If the converter is working, the voltage should rise to 13.6–14.4V while charging. If the battery voltage remains low or doesn’t increase after several hours, the converter isn’t charging it properly.
This test also helps rule out battery issues. If the battery is old or damaged, it may not hold a charge even if the converter is working. In that case, you’ll need to replace the battery, not the converter.
Step 5: Inspect Fuses and Connections
If your converter isn’t outputting power, check the fuses. Most converters have one or more fuses on the DC output side. Locate the fuse panel—often near the converter or in the main electrical panel—and inspect the fuses visually. A blown fuse will have a broken filament or a discolored glass window.
Use the multimeter to test fuse continuity if you’re unsure. Set the meter to the continuity or ohms setting, touch the probes to each end of the fuse, and listen for a beep or check the reading. A good fuse will show near-zero resistance; a blown fuse will show infinite resistance (OL).
Also, check all wire connections for tightness and corrosion. Loose or corroded connections can prevent power from flowing, even if the converter is working. Clean any corrosion with a wire brush and tighten all terminals securely.
Step 6: Test the AC Input (Optional)
If you suspect the converter isn’t receiving power, you can test the AC input side. With the multimeter set to AC voltage (usually labeled “V~” or “VAC”), touch the probes to the “AC In” terminals on the converter. You should see a reading close to 120V AC.
If there’s no voltage, the problem might be with the shore power connection, the power cord, or the breaker panel. If there is voltage, but the DC output is still low, the converter itself is likely faulty.
What to Do If Your RV Converter Fails the Test
If your testing reveals that the converter isn’t working properly, don’t panic. There are several steps you can take to fix or replace it.
Replace Blown Fuses
If you find a blown fuse, replace it with one of the same amperage rating. Never use a higher-rated fuse—it could cause a fire. After replacing the fuse, test the converter again. If the new fuse blows immediately, there’s likely a short circuit or internal fault in the converter.
Tighten or Repair Wiring
Loose or damaged wires can cause intermittent power issues. Inspect all connections and repair or replace any frayed or corroded wires. Use wire nuts or crimp connectors to secure connections, and wrap them with electrical tape for extra protection.
Replace the Converter
If the converter is faulty and can’t be repaired, it’s time to replace it. You can purchase a new converter from an RV dealer, online retailer, or auto parts store. Make sure to get one that matches your RV’s specifications—check the voltage, amperage, and physical size.
Installation is usually straightforward: disconnect the old unit, mount the new one, and reconnect the wires. If you’re not comfortable doing this yourself, hire a certified RV technician. A properly installed converter will restore full power to your 12V systems and keep your battery charged.
Preventative Maintenance Tips
Once your converter is working, keep it that way with regular maintenance. Here are a few tips to extend its life:
- Keep it clean: Dust and debris can block airflow and cause overheating. Use a can of compressed air to clean the cooling fins and fan every few months.
- Ensure proper ventilation: Don’t store items on or near the converter. Allow at least 6 inches of clearance around it for airflow.
- Use a surge protector: Plug your RV into a surge protector at the campground to guard against voltage spikes.
- Test regularly: Make it a habit to test your converter at the start of each camping season or after long trips.
- Monitor battery health: A failing battery can strain the converter. Test your battery annually and replace it every 3–5 years.
Conclusion
Learning how to test an RV converter is a valuable skill that every RV owner should have. It’s not complicated, and with just a multimeter and a few basic tools, you can diagnose problems, avoid breakdowns, and keep your RV’s electrical system running smoothly. Whether you’re troubleshooting dim lights or a dead battery, knowing how to test an RV converter gives you confidence and control on the road.
Remember, the converter is the backbone of your 12V power system. Regular testing and maintenance can save you time, money, and frustration. So the next time you’re setting up camp, take a few minutes to check your converter—it might just save your trip.
Frequently Asked Questions
How often should I test my RV converter?
It’s a good idea to test your RV converter at the start of each camping season and after any long trips. Regular testing helps catch issues early and ensures your electrical system is ready to go.
Can I test the converter without shore power?
No, the converter only works when it’s receiving 120V AC power from shore power. You must be plugged in to test its output. Testing on battery power alone won’t give accurate results.
What voltage should a working RV converter output?
A properly functioning RV converter should output between 13.6 and 14.4 volts DC when connected to shore power. This range ensures the battery is charged and 12V systems receive adequate power.
Can a bad battery cause converter problems?
Yes, a failing or dead battery can strain the converter and cause it to overwork or fail. Always test the battery separately and replace it if it’s old or not holding a charge.
Is it safe to test the converter myself?
Yes, as long as you follow safety precautions. Turn off power when possible, use insulated tools, and avoid touching bare wires. If you’re unsure, consult a professional.
How much does it cost to replace an RV converter?
Replacement converters typically cost between $100 and $300, depending on the model and features. Installation may cost extra if done by a technician, but many RVers can install them themselves.

At CarLegit, we believe information should be clear, factual, and genuinely helpful. That’s why every guide, review, and update on our website is created with care, research, and a strong focus on user experience.