
Stuck with a clogged RV toilet? Don’t panic. This guide walks you through practical, safe methods to unstop a RV toilet—from using a plunger to chemical treatments—plus expert tips to prevent future blockages and keep your system running smoothly on the road.
In This Article
- 1 Key Takeaways
- 2 📑 Table of Contents
- 3 Why RV Toilets Get Clogged (And Why It’s Different)
- 4 Tools and Supplies You’ll Need
- 5 Step-by-Step Guide to Unstop a RV Toilet
- 5.1 Step 1: Stop Using the Toilet Immediately
- 5.2 Step 2: Put on Gloves and Prepare the Area
- 5.3 Step 3: Remove Standing Water (If Any)
- 5.4 Step 4: Use the RV Flange Plunger
- 5.5 Step 5: Try a Plumber’s Snake for Stubborn Clogs
- 5.6 Step 6: Use Enzyme Treatment for Organic Buildup
- 5.7 Step 7: Rinse and Clean
- 6 Advanced Solutions for Persistent Clogs
- 7 How to Prevent Future RV Toilet Clogs
- 8 Conclusion
- 9 Frequently Asked Questions
- 9.1 Can I use a regular plunger on my RV toilet?
- 9.2 Is it safe to use Drano or other chemical drain cleaners in an RV toilet?
- 9.3 How often should I treat my black tank?
- 9.4 What should I do if my RV toilet keeps clogging?
- 9.5 Can I flush baby wipes in an RV toilet?
- 9.6 How do I know if my black tank is clogged?
Key Takeaways
- Use a RV-specific plunger: A flange plunger works best for RV toilets due to their unique seal design.
- Never use household drain cleaners: Harsh chemicals can damage rubber seals and holding tanks.
- Flush with lukewarm water: Hot water can warp components; cold water reduces cleaning efficiency.
- Maintain proper black tank levels: Keep at least 1/3 full when dumping to help solids break down.
- Use RV-safe toilet paper: It dissolves quickly and prevents clogs in the system.
- Regularly treat your tank: Use enzyme-based treatments weekly to break down waste and paper.
- Know when to call a pro: Persistent clogs may indicate a deeper issue in the plumbing or vent system.
📑 Table of Contents
Why RV Toilets Get Clogged (And Why It’s Different)
Let’s be honest—dealing with a clogged RV toilet is one of the least glamorous parts of life on the road. But it doesn’t have to be a disaster. Unlike your home toilet, an RV toilet operates under very different conditions. It’s part of a closed waste management system that includes a black water holding tank, a flush valve, and a network of pipes designed to handle waste with minimal water. Because of this, even small mistakes—like using the wrong kind of toilet paper or flushing too much at once—can lead to a stubborn clog.
RV toilets typically use a foot pedal or hand lever to open a rubber flapper valve, allowing water and waste to drop into the black tank. The design is simple but sensitive. If the flapper doesn’t seal properly, if the tank isn’t vented correctly, or if waste builds up too quickly, you’ll notice slow draining, gurgling sounds, or—worst of all—a complete blockage. Understanding how your RV toilet works is the first step in fixing and preventing clogs. Most problems stem from user habits, poor maintenance, or environmental factors like cold weather thickening waste.
Common Causes of RV Toilet Clogs
Before jumping into solutions, it helps to know what’s causing the problem. Here are the most frequent culprits:
- Too much toilet paper: Even RV-safe paper can clump if used excessively in one flush.
- Non-RV-safe products: Baby wipes, paper towels, or regular household toilet paper don’t dissolve quickly and can create blockages.
- Insufficient water in the tank: Flushing with too little water doesn’t move waste effectively, leading to buildup.
- Improper tank dumping: Not rinsing the black tank after dumping leaves residue that hardens and causes clogs.
- Freezing temperatures: Cold weather can cause waste to freeze and expand, blocking the drain line.
- Old or damaged flapper valve: A worn-out seal can leak or fail to open fully, restricting flow.
Recognizing these signs early can save you time, money, and a whole lot of frustration. For example, if your toilet flushes slowly or makes a gurgling noise, it’s likely a partial clog forming. Address it immediately before it becomes a full blockage.
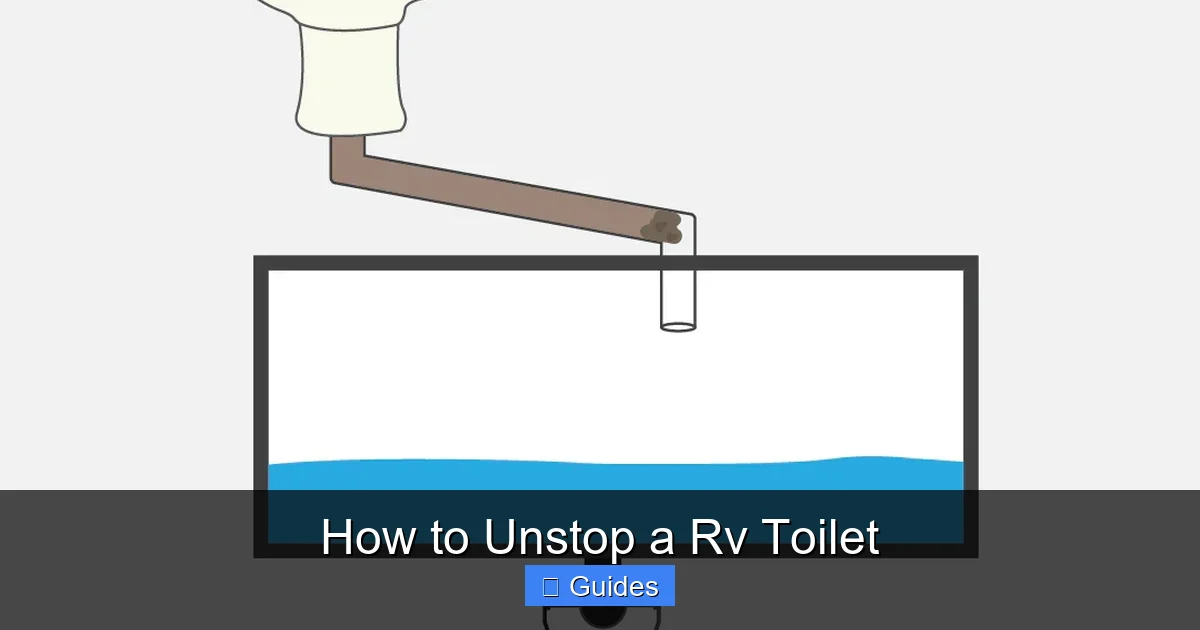
Tools and Supplies You’ll Need
Before attempting to unstop your RV toilet, gather the right tools. Using the wrong equipment can make the problem worse or damage your system. Here’s what you should have on hand:
Visual guide about How to Unstop a Rv Toilet
Image source: wikihow.com
Essential Tools
- RV flange plunger: This is not your average bathroom plunger. It has a soft rubber flange that creates a tight seal over the RV toilet drain, which is smaller and more recessed than a standard toilet. A regular cup plunger won’t work effectively.
- Rubber gloves: Always protect your hands—this is a messy job, and hygiene is crucial.
- Bucket and sponge: For cleaning up spills and wiping down surfaces.
- Enzyme-based tank treatment: Products like Happy Campers or Unique RV Digest-It break down waste naturally without harming your system.
- Plastic scraper or old toothbrush: Useful for removing dried residue around the drain.
- Water hose with spray nozzle: For rinsing the toilet and tank after clearing the clog.
Optional but Helpful Items
- Wet/dry vacuum: Can help suction out standing water and loose debris.
- Plumber’s snake (flexible auger): For deeper clogs that a plunger can’t reach.
- Flashlight: To inspect the drain opening and flapper valve.
- RV sewer hose and gloves: In case you need to disconnect and inspect the drain line.
Having these tools ready means you can act fast when a clog occurs. Many RVers keep a small “plumbing kit” in their storage compartment for emergencies. It’s also smart to carry extra RV toilet paper and tank treatment—especially on long trips.
Step-by-Step Guide to Unstop a RV Toilet
Now that you know the causes and have your tools ready, let’s get to the main event: clearing the clog. Follow these steps carefully to safely and effectively unstop your RV toilet.
Visual guide about How to Unstop a Rv Toilet
Image source: wikihow.com
Step 1: Stop Using the Toilet Immediately
As soon as you notice a clog—whether it’s slow draining, water backing up, or no flush at all—stop using the toilet. Every additional flush can push more waste into the system, worsening the blockage and potentially overflowing into your RV. Close the toilet lid and avoid using any water in the bathroom if possible.
Step 2: Put on Gloves and Prepare the Area
Pull on a pair of heavy-duty rubber gloves. Lay down old towels or a plastic tarp around the toilet to catch any spills. Open a window or turn on the vent fan to improve ventilation. This isn’t just about cleanliness—it’s about safety and comfort.
Step 3: Remove Standing Water (If Any)
If there’s water in the bowl, use a small cup or sponge to remove as much as possible. This reduces the risk of splashing during plunging and gives you better access to the drain. Pour the water into a bucket—don’t dump it on the ground unless you’re at a dump station.
Step 4: Use the RV Flange Plunger
This is the most effective method for minor to moderate clogs. Here’s how to do it right:
- Insert the plunger into the toilet bowl, making sure the soft rubber flange fits snugly over the drain opening.
- Press down gently to create a seal, then pull up sharply to create suction.
- Repeat this motion 10–15 times in quick succession. You should hear a “pop” or feel resistance release when the clog clears.
- Flush the toilet to test. If water drains normally, you’re done. If not, repeat the process.
Tip: Add a few inches of lukewarm water to the bowl before plunging if it’s dry. This helps create better suction.
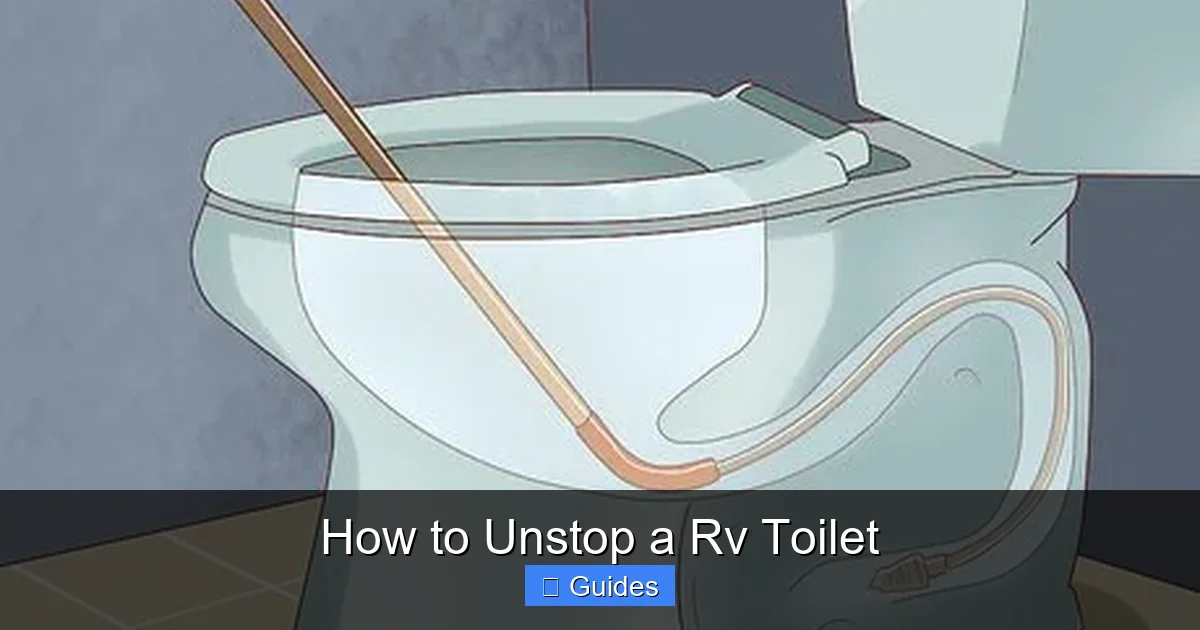
Step 5: Try a Plumber’s Snake for Stubborn Clogs
If plunging doesn’t work, the clog may be deeper in the drain line. Use a flexible plumber’s snake (also called an auger). Insert it slowly into the drain and turn the handle clockwise as you push. When you feel resistance, gently work the snake back and forth to break up the blockage. Pull it out carefully, wiping off debris with a rag. Flush again to test.
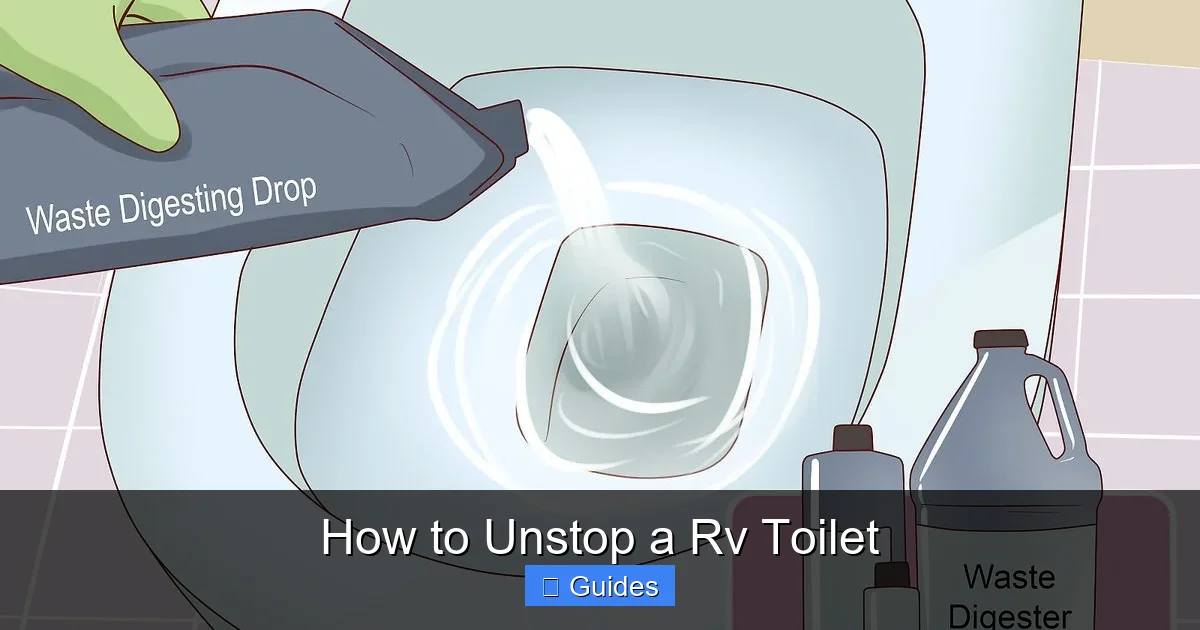
Step 6: Use Enzyme Treatment for Organic Buildup
Sometimes, the clog isn’t a solid mass but a buildup of paper and waste that’s hardened over time. In this case, add an enzyme-based tank treatment directly into the toilet bowl. Follow the product instructions—usually 1–2 cups, followed by a few gallons of water. Let it sit for several hours or overnight. The enzymes will break down the organic material, allowing it to flush through.
Step 7: Rinse and Clean
Once the clog is cleared, flush the toilet several times to ensure everything is moving properly. Use a sponge and mild cleaner to wipe down the bowl and seat. Pour a cup of RV-safe disinfectant into the bowl and let it sit for 10 minutes before flushing to sanitize.
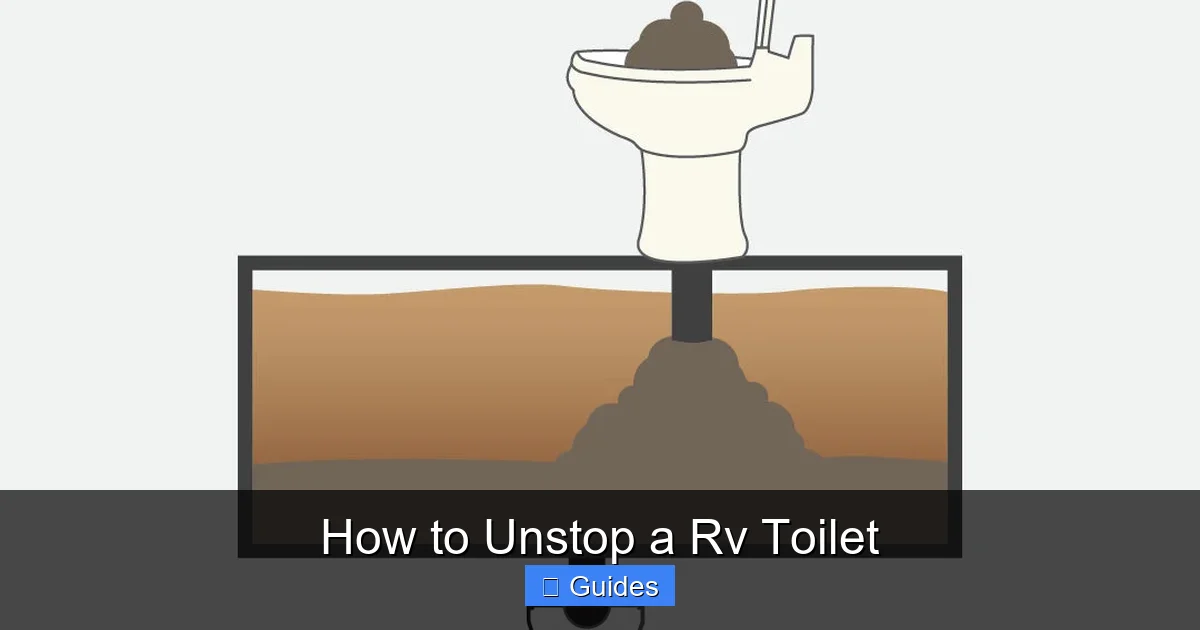
Advanced Solutions for Persistent Clogs
What if the clog keeps coming back—or won’t budge no matter what you try? That’s when you need to dig deeper. Persistent clogs often point to issues beyond the toilet itself.
Visual guide about How to Unstop a Rv Toilet
Image source: gocarlife.com
Check the Flapper Valve
The rubber flapper valve sits between the toilet and the black tank. If it’s cracked, warped, or not sealing properly, waste can leak back into the bowl or block the flow. To inspect it:
- Turn off the water supply to the toilet (usually a valve behind or beneath the unit).
- Flush to empty the bowl.
- Lift the toilet seat and look into the drain opening. You should see the flapper valve.
- If it’s damaged, replace it with an RV-specific part. Most hardware stores or RV supply shops carry them.
A faulty flapper is a common but often overlooked cause of recurring clogs. Replacing it is inexpensive and takes less than 15 minutes.
Inspect the Drain Line and Vent Stack
Your RV’s waste system relies on proper ventilation to allow air in as waste flows out. If the vent stack (usually on the roof) is blocked by leaves, bird nests, or debris, it can create a vacuum that slows or stops drainage. Use a flashlight to check the vent opening. If it’s clogged, clear it with a brush or hose.
Also, inspect the drain line between the toilet and the black tank. If your RV has been parked for a while, waste may have dried and hardened in the pipe. In extreme cases, you may need to disconnect the line (wear gloves!) and flush it with a hose. This is messy but sometimes necessary.
Consider a Wet/Dry Vacuum
For clogs with standing water, a wet/dry vacuum can help remove liquid and loose debris before plunging. Set the vacuum to liquid mode, place the hose over the drain, and turn it on. Be careful not to suck up large solids, which can damage the vacuum. This method works best when combined with enzyme treatment.
When to Call a Professional
If you’ve tried everything and the toilet still won’t flush, it’s time to call an RV technician. There could be a collapsed pipe, a blocked sewer hose, or a problem with the black tank itself. Don’t force it—pushing too hard with a snake or plunger can crack the toilet or damage the tank. A professional has the tools and expertise to diagnose and fix complex issues safely.
How to Prevent Future RV Toilet Clogs
The best way to deal with a clogged RV toilet is to avoid it altogether. Prevention is easier, cleaner, and far less stressful. Here are proven strategies to keep your system running smoothly.
Use Only RV-Safe Toilet Paper
This can’t be stressed enough. Regular toilet paper is designed to stay strong in water, which is great for home plumbing but terrible for RV systems. RV-safe paper, like Scott Rapid-Dissolve or Charmin RV, breaks down quickly in the tank. Test it at home: place a sheet in a jar of water, shake it, and see how fast it disintegrates. If it stays intact after 10 minutes, don’t use it in your RV.
Flush with Enough Water
Always hold the flush pedal or lever down long enough to add at least 2–3 gallons of water per use. This helps move waste through the system and prevents buildup. Avoid “dry flushing” or using minimal water, which is a common mistake among new RVers.
Maintain Proper Black Tank Levels
When dumping your black tank, make sure it’s at least one-third full. This allows waste to slosh around and break down naturally. After dumping, always rinse the tank with clean water using a tank rinse system or a sewer hose attachment. Some RVers even add a cup of dish soap to the tank before dumping to help loosen residue.
Use Enzyme Treatments Weekly
Even if you’re not experiencing clogs, add an enzyme-based treatment to your black tank once a week. These products contain bacteria that digest waste, paper, and grease, preventing buildup and reducing odors. Avoid chemical treatments with formaldehyde—they kill beneficial bacteria and can damage seals.
Winterize Properly
In cold climates, freezing is a major cause of clogs. Use RV antifreeze in the toilet bowl and drain lines when storing your RV. Keep the interior heated if possible, and insulate exposed pipes. Never leave waste in the tank during freezing temperatures.
Educate Everyone on Board
Make sure all passengers—especially kids—know what can and cannot go down the toilet. Post a small sign: “RV Toilet = Only #1, #2, and RV Paper.” A little education goes a long way in preventing accidents.
Conclusion
Unstopping a RV toilet might not be fun, but it’s a manageable task with the right knowledge and tools. From using a flange plunger to maintaining your black tank, each step plays a role in keeping your system clean and functional. Remember, most clogs are preventable with good habits—like using the right toilet paper, flushing properly, and treating your tank regularly.
Don’t let a clog ruin your adventure. Stay prepared, act quickly, and don’t hesitate to seek help if needed. With these tips, you’ll spend less time worrying about your toilet and more time enjoying the open road. After all, that’s what RV life is all about.
Frequently Asked Questions
Can I use a regular plunger on my RV toilet?
No, a regular cup plunger won’t create a proper seal on an RV toilet drain. Use a flange plunger designed for RV toilets, which has a soft rubber extension that fits snugly over the smaller, recessed drain opening.
Is it safe to use Drano or other chemical drain cleaners in an RV toilet?
No, harsh chemicals like Drano can damage the rubber flapper valve and harm the black water tank. Stick to enzyme-based treatments, which are safe, effective, and eco-friendly.
How often should I treat my black tank?
Use an enzyme-based treatment weekly, especially during heavy use. This helps break down waste, prevent clogs, and reduce odors naturally.
What should I do if my RV toilet keeps clogging?
Frequent clogs may indicate a damaged flapper valve, blocked vent stack, or improper tank maintenance. Inspect these components and consider consulting an RV technician if the problem persists.
Can I flush baby wipes in an RV toilet?
No, baby wipes—even those labeled “flushable”—do not dissolve quickly and can cause serious clogs. Dispose of them in a trash can instead.
How do I know if my black tank is clogged?
Signs include slow draining, gurgling sounds, waste backing up into the bowl, or difficulty flushing. If the toilet won’t flush at all, the tank or drain line may be blocked.

At CarLegit, we believe information should be clear, factual, and genuinely helpful. That’s why every guide, review, and update on our website is created with care, research, and a strong focus on user experience.